How to send bulk WhatsApp campaign from Interakt?
After having connected a WhatsApp API number to your Interakt account, you can start sending bulk WhatsApp campaigns to your customers.
These campaigns can be for various purposes, like:
• announcing a new discount offer
• introducing a new product / service
• announcing new prices for your products
• reminding customers to place orders
• inviting customers to a webinar / event
• sending greetings on occasion of a festival, etc.
With a normal WhatsApp number i.e. a number on the WhatsApp personal / business apps, it is not possible to send out such bulk campaigns. You might find some apps / services on the internet, which let you send out bulk campaigns via a normal WhatsApp number – however, using these apps/services will most definitely result in your WhatsApp number getting banned.
However, with a WhatsApp API number connected to Interakt, sending such campaigns is a riskless and seamless process. Since you are using an approved WhatsApp API number, there is a very low chance of the number getting banned.
Prerequisites for sending a bulk campaign
Before sending out a bulk WhatsApp campaign from Interakt, you will need to ensure the following:
• You should have connected a WhatsApp API number to your Interakt account and activated a subscription.
• You should have added contacts in your Interakt account.
• You should have created a template for the message that you want to send in the campaign.
Steps for sending campaign
Initial steps:
– Click on ‘Notifications’ in the left navigation panel. Alternatively,directly go to https://app.interakt.ai/notification.
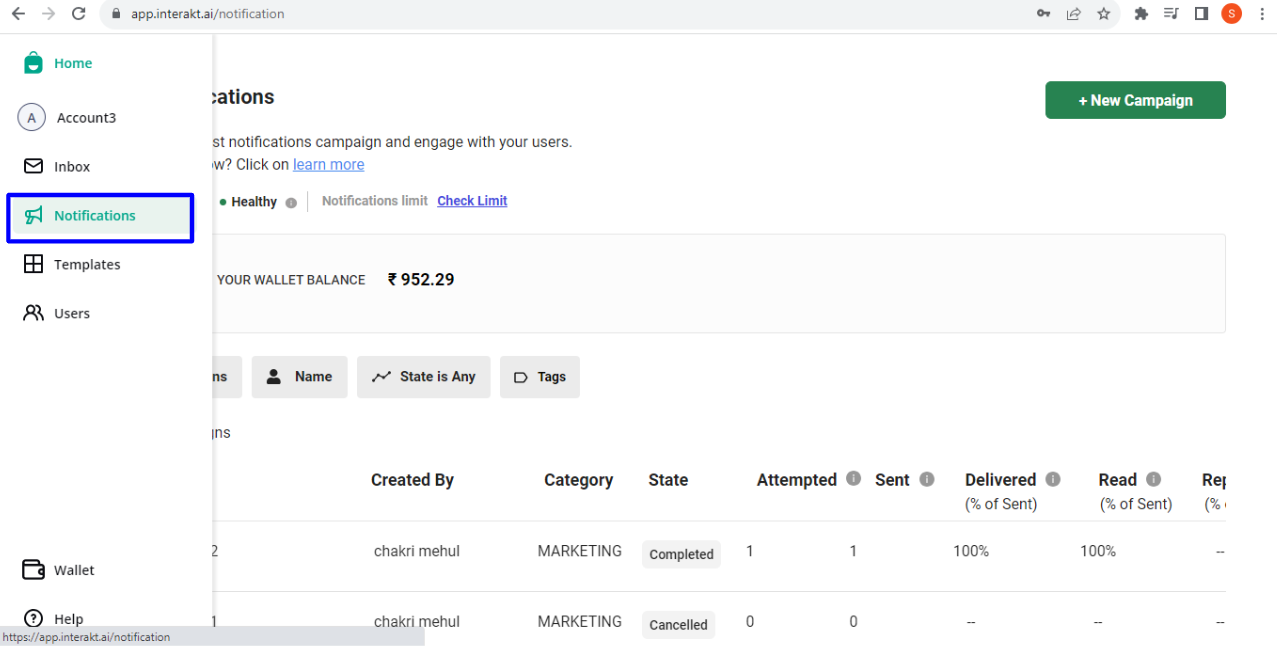
– Next, click on the ‘New Campaign’ button at the top-right corner.

– Next, click on ‘Start from Scratch’.
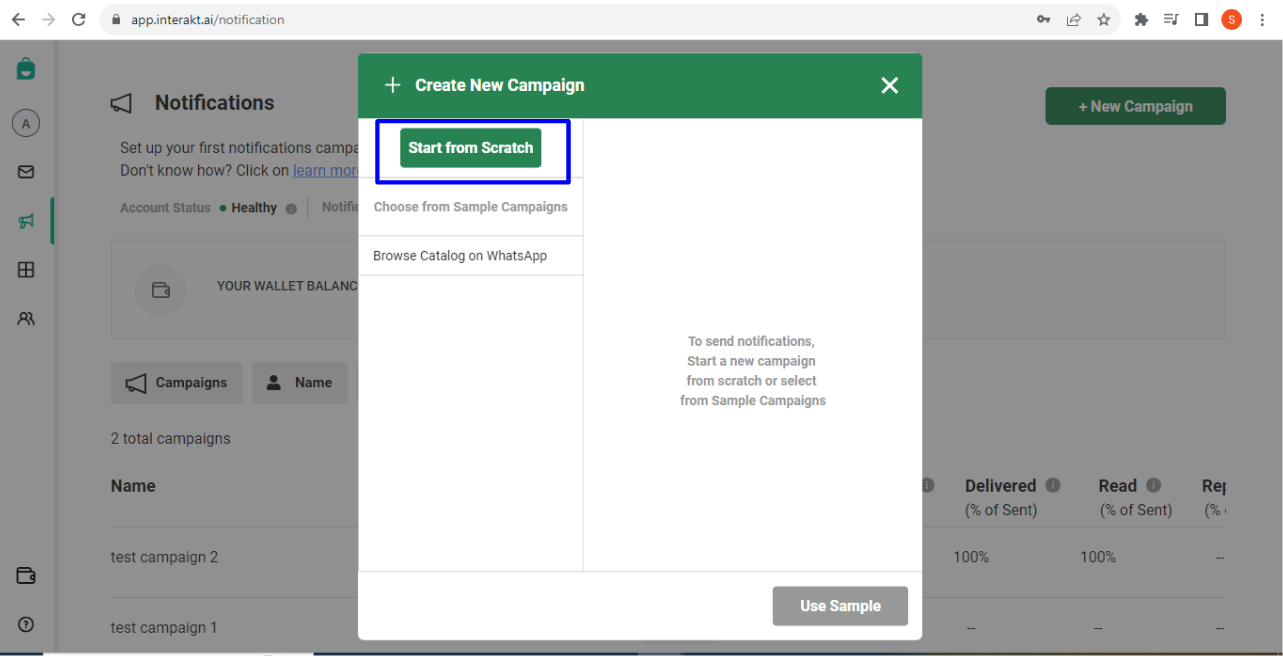
– Next, provide a name for the campaign.

Choose a campaign audience:
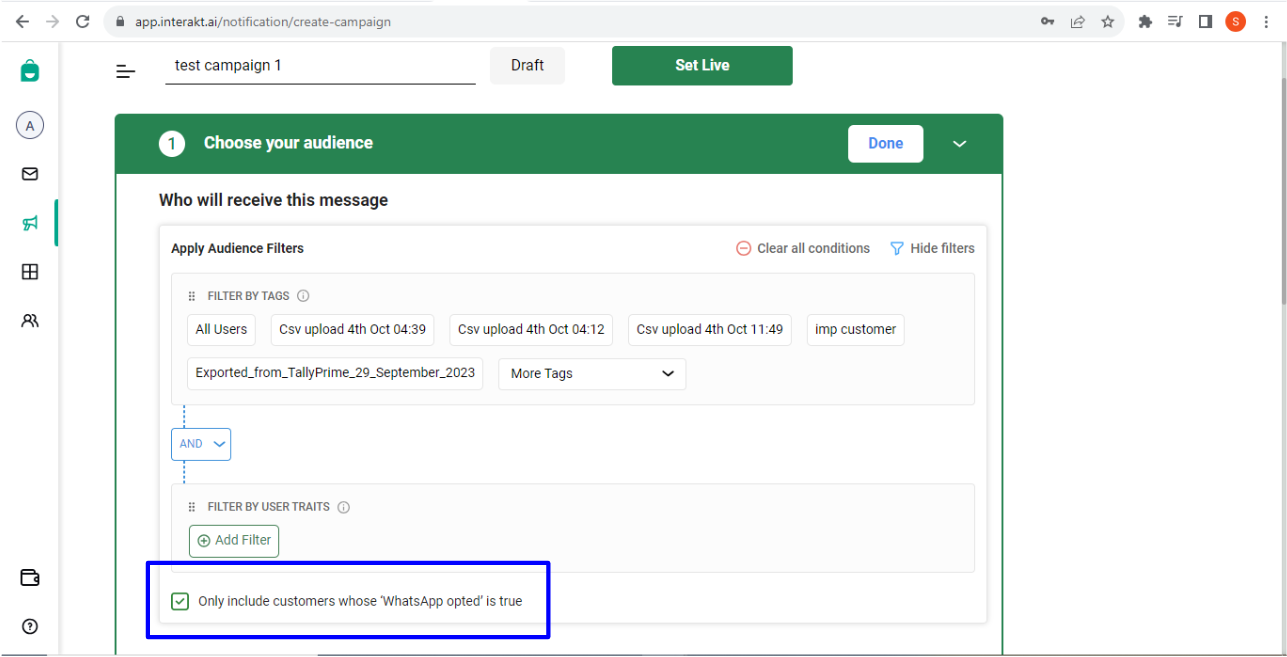
– Next, click on the 1st step ‘Choose your audience’. Here, you can filter the audience via tags and via user traits (contact fields). More details on how to filter the audience are given here.
Remember to click the checkbox (shown in the blue box below), to include only those customers whose ‘WhatsApp Opted’ is true. This is very important for ensuring that your campaign is not sent to any contact, who has already opted out from receiving your communications. If you miss out on excluding WhatsApp Opted Out contacts, those contacts might mark your number as Spam, which in turn might lower the quality status of your WhatsApp number, and might also lead to your number getting banned (in extreme circumstances).
Configure Message Template to be sent:
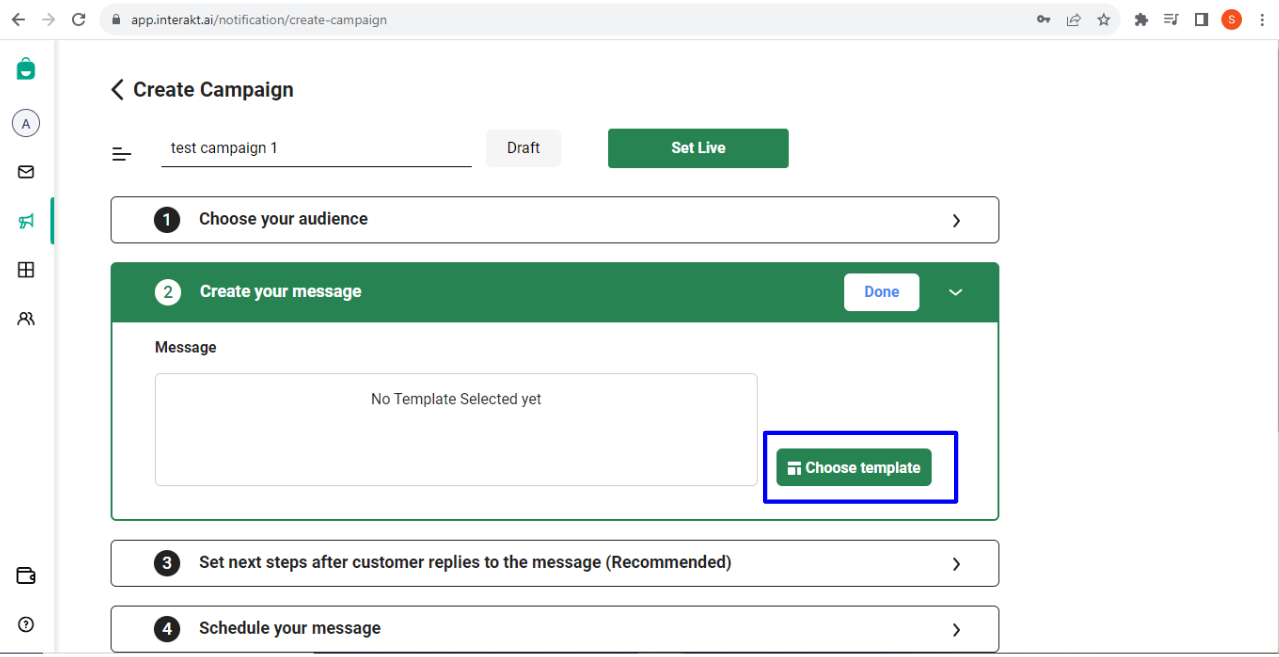
– Next, click on the 2nd step ‘Create your message’.
– Then click on Choose template. From the list of approved templates, select the template that you want to send out in this campaign.

– If there are variables in your template, you will have to provide the value for those variables. Variables are generally included in a template, if their value is supposed to be different for every contact to whom the message is to be sent.
– If that is the case for your campaign, choose a contact field (attribute / trait) from the dropdown, which should be mapped on the variable. For example, if you select the field as ‘Name’, then the variable will be replaced by the ‘Name’ of every contact.
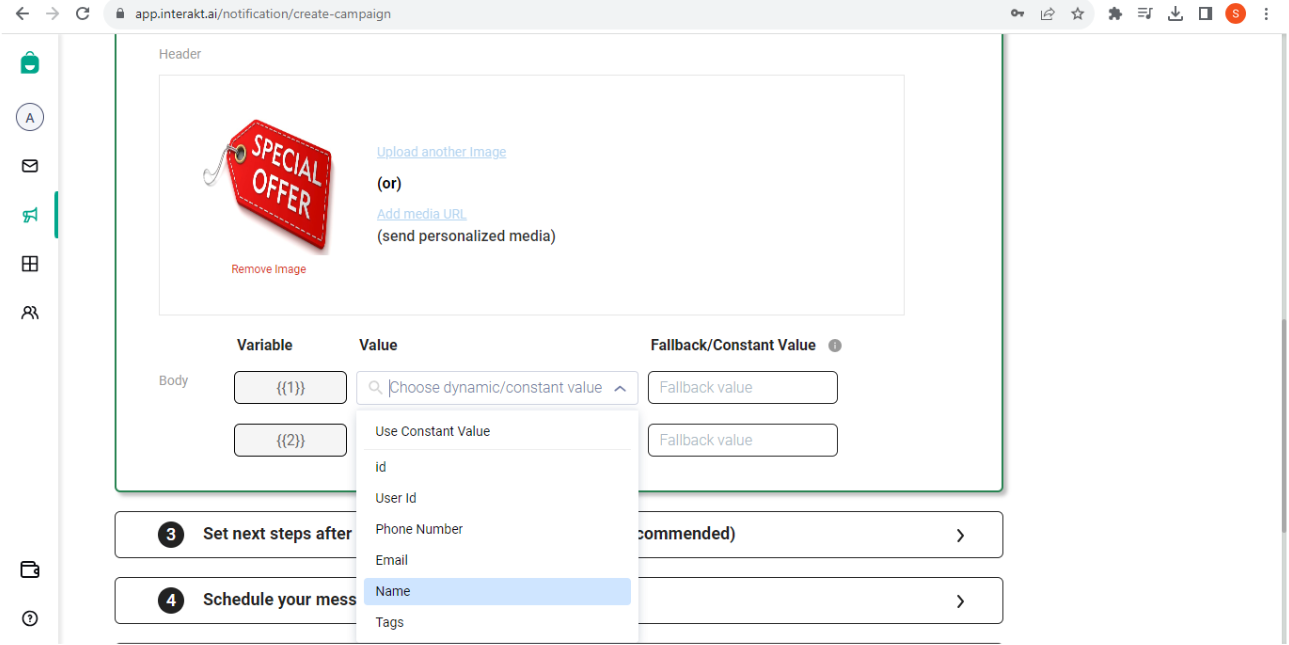
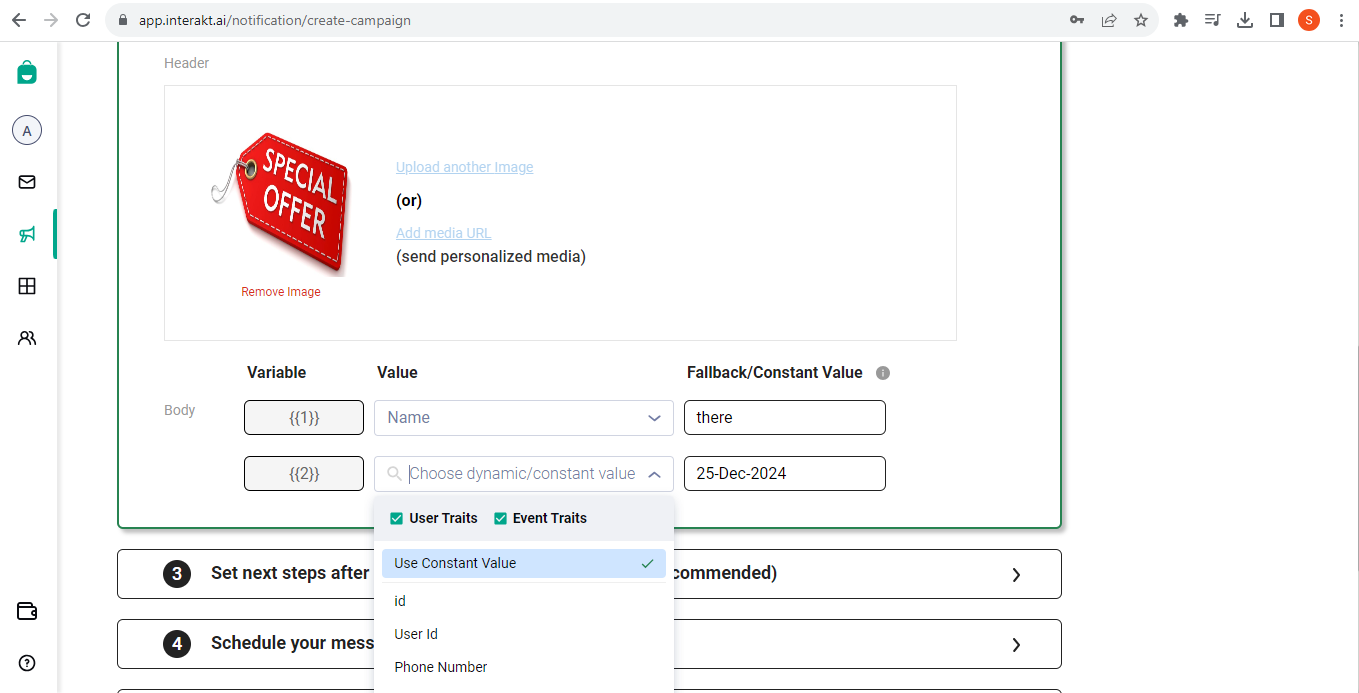
In case you want the variable to take the same value for all contacts in your campaign audience, you can simply select ‘Use Constant Value’ in the dropdown, and then type the constant value, in the text box on the right.
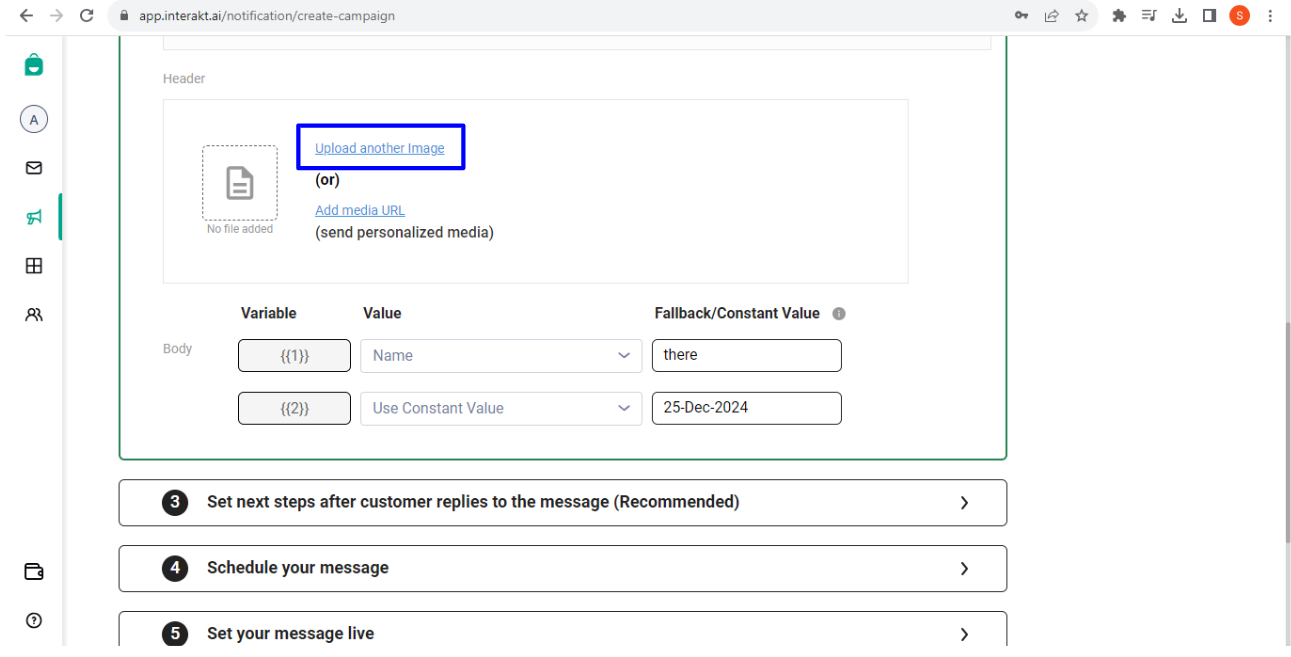
– If your template has a media header (that is, image / video / document header), you can:
• Keep the same media file that was originally attached to your template.
• Replace the media and upload a new media file, which will be sent to all contacts in your campaign audience.
• To do this, click on ‘Remove Image’.
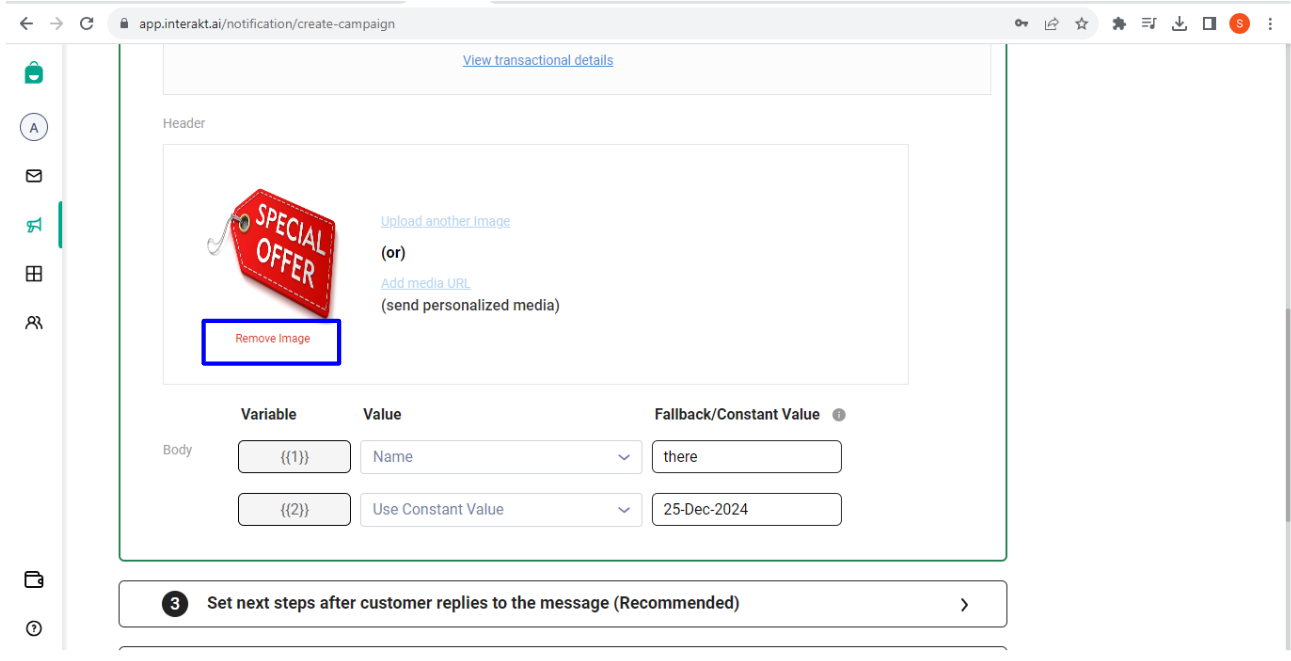
• And then, click on ‘Upload another Image’ and select the image from your system.
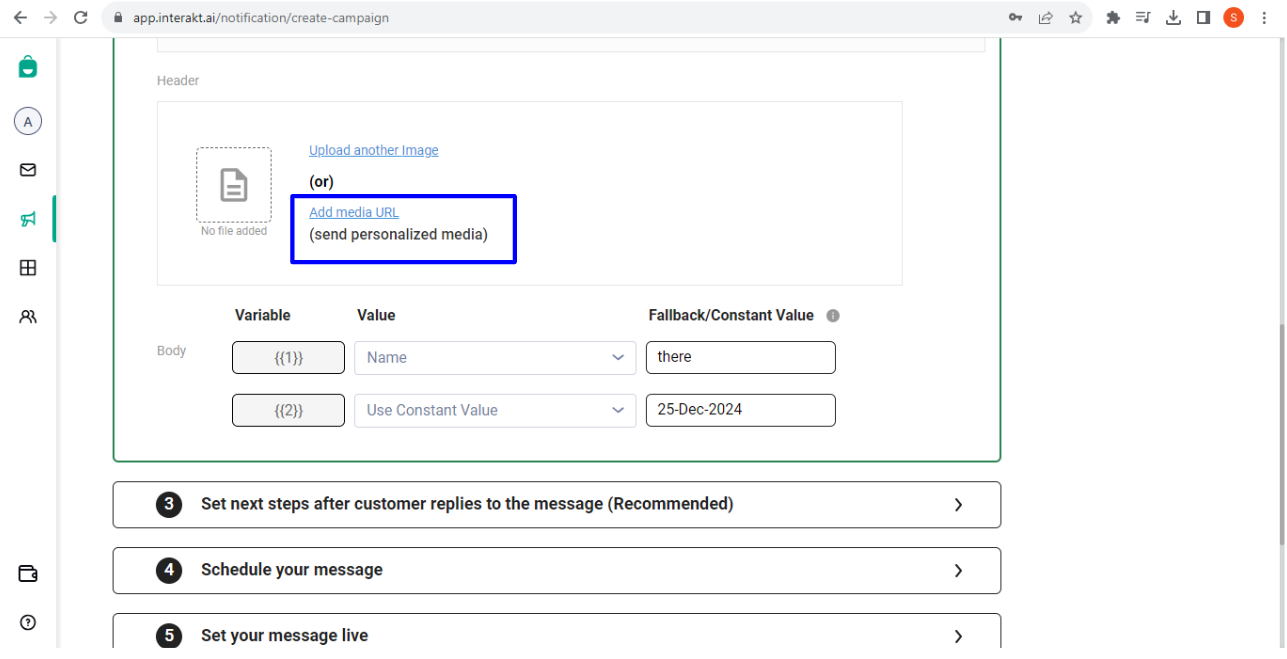
• Send dynamic media files, for example different media files to different contacts
• To do this, click on ‘Remove Image’.
• Then click on ‘Add media URL’
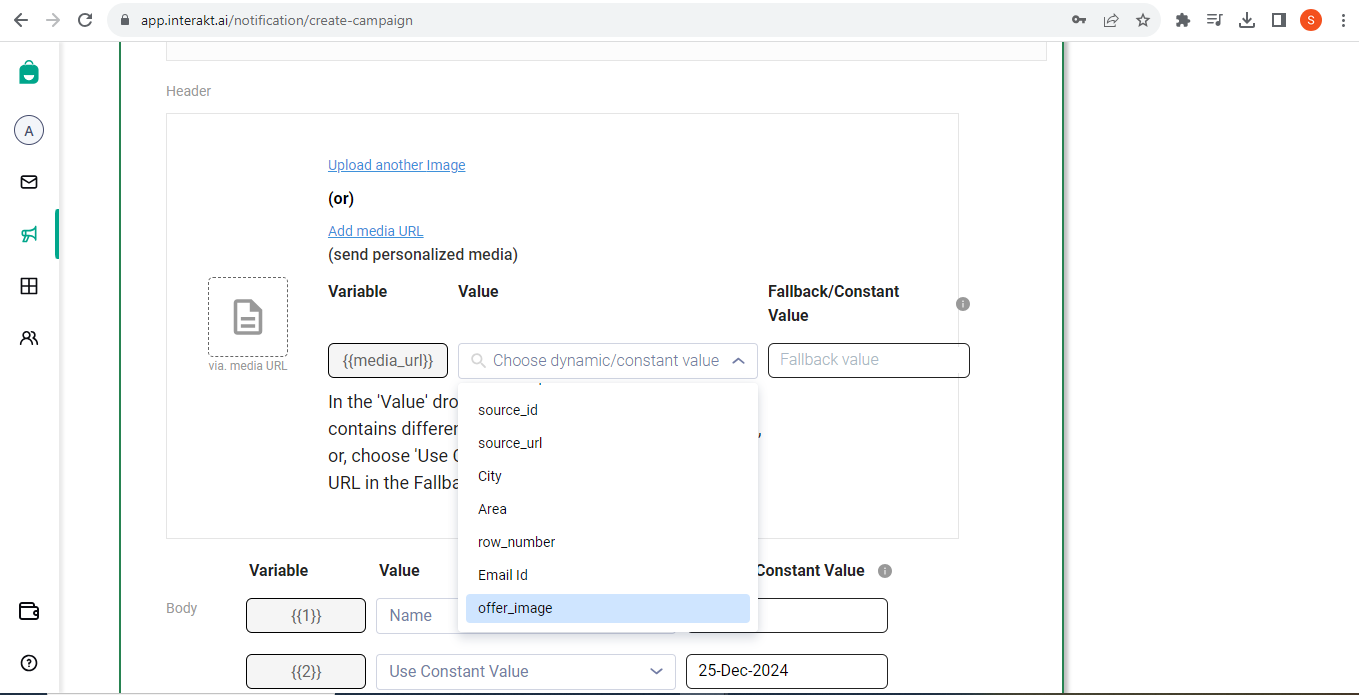
• For the {{media_url}}, choose a contact field (trait/attribute) from the dropdown. Make sure that the field for each contact contains a publicly accessible media URL.
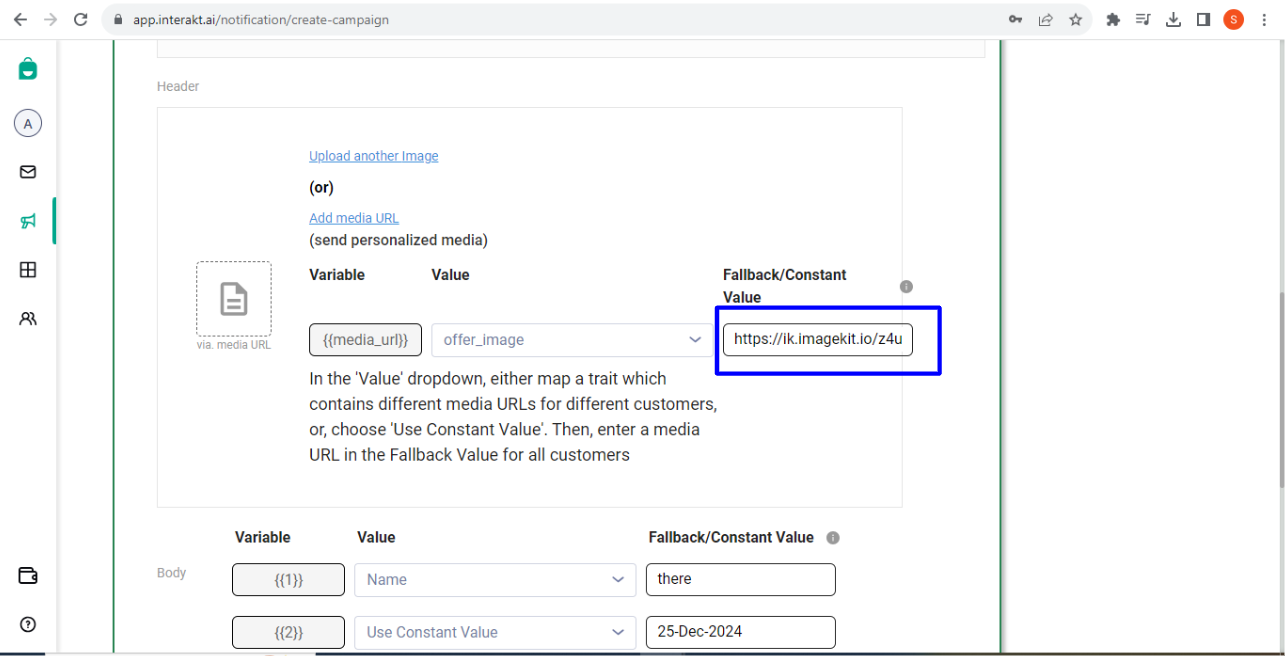
In the fallback value textbox, provide a fallback media URL like https://ik.imagekit.io/z4utvq9kty5/No_image_available.svg_ps105MiAq.png. This media URL will be sent if the field (chosen in the previous step) does not contain a media URL for a particular contact.
Understand Campaign Cost Estimate:
– As soon as you select a template, an estimate* of the campaign cost and its impact on your wallet balance will be displayed on the screen. Note that this cost will get deducted from your wallet balance immediately after you send out the campaign. (In the Track Expenses section of your wallet, this deduction will appear as ‘Balance Parked for Campaign : test campaign 1’.)
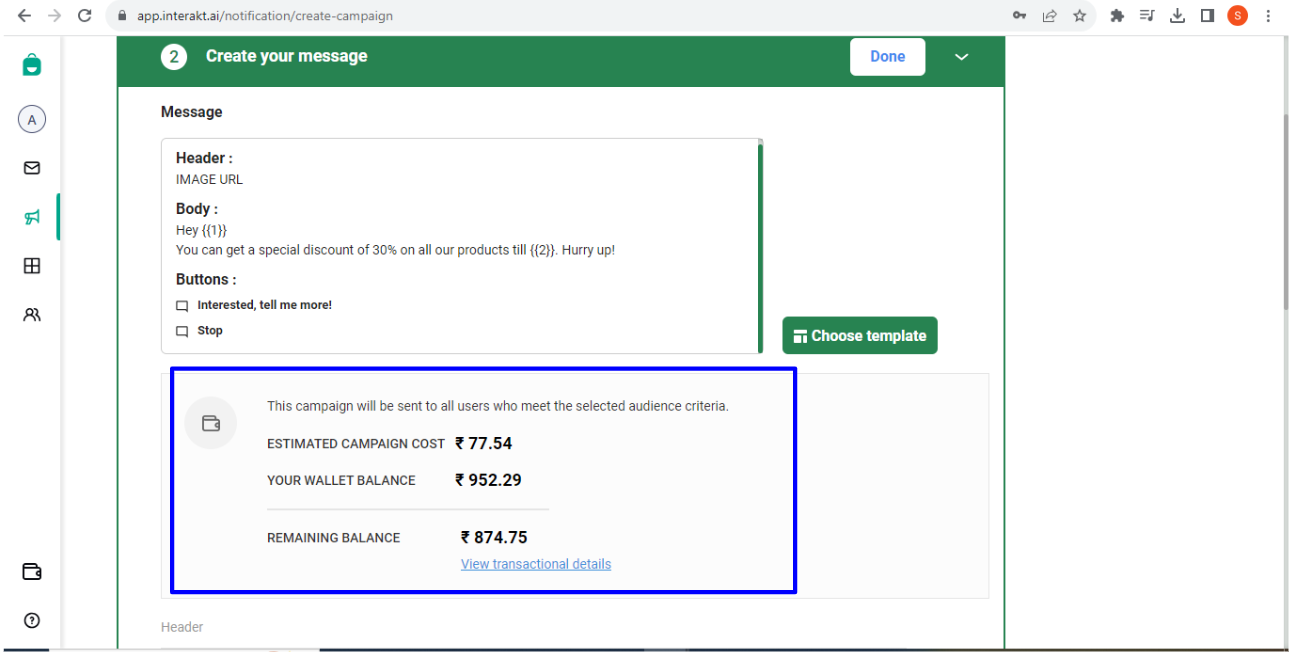
* This is only an estimate and not the actual cost of the campaign. The actual cost may be different depending upon how many contacts the campaign gets successfully delivered to. The actual cost is calculated at the end of each day. At the end of each day, the balance that was parked for the campaign will get unparked (i.e. the balance will be added back to your wallet). Then, the balance will again be deducted – this time on the basis of the actual delivery stats of the campaign. Note that this balance deduction (at the end of the day) will not happen at a per-campaign basis – instead, balance will be deducted for all conversations that happened during the course of the day – irrespective of whether the conversation originated out of a campaign, or from TallyPrime.
Adding an Opt-out flow to the campaign:
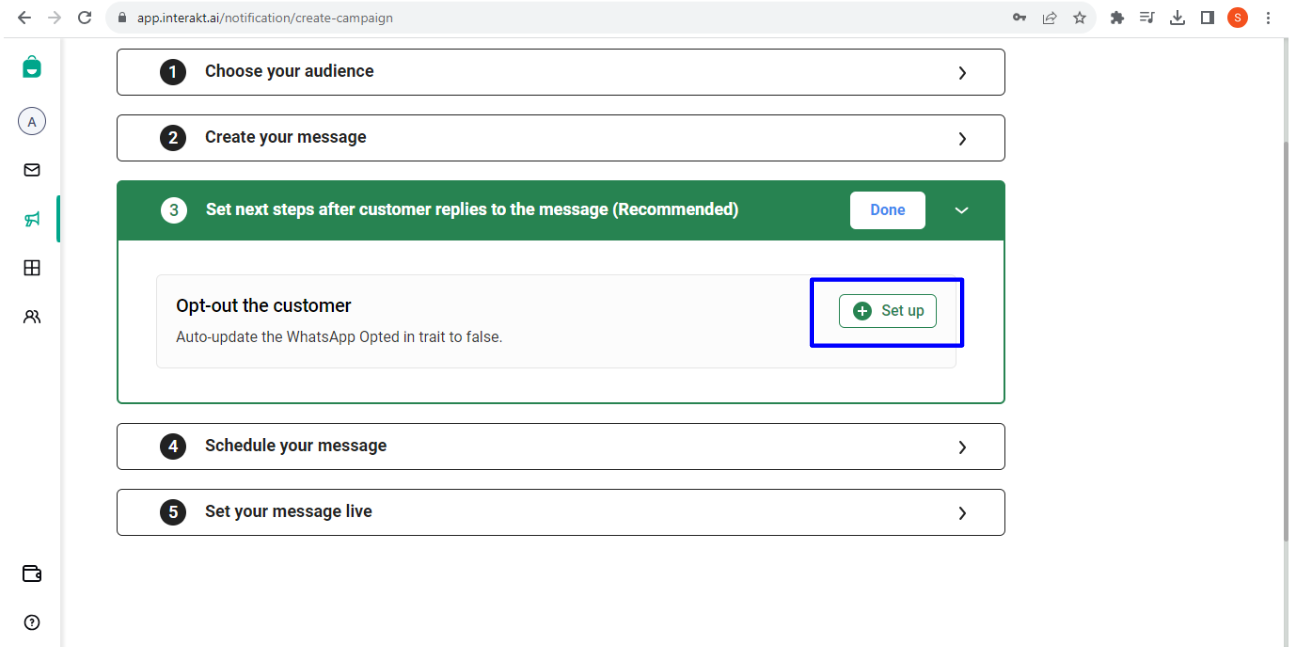
– After having selected the template for your campaign, you can add an ‘opt-out flow’ to the campaign. This step is optional, but highly recommended, to avoid having your number marked as ‘Spam’ by recipients. Note that, if a high number of recipients mark your number as Spam, your WhatsApp API number’s quality status might be lowered by WhatsApp, and in extreme cases, it could also lead to the number getting banned.
In this step, you can ensure that, if your campaign’s recipient replies ‘STOP’ or ‘Stop’ to your campaign message, then that recipient’s ‘WhatsApp Opted’ status will automatically be turned to ‘No’ in your Interakt account. This will ensure that you can easily exclude those contacts from your future campaigns.
To configure the opt-out flow, click on ‘Set up’, as shown below.
In the pop-up that opens, you will have to set a trigger for this flow. Trigger means a reply from your campaign’s recipient, which when received, the ‘WhatsApp Opted’ status will automatically be turned to ‘No’.
Trigger Type:
• On Button Click → If the selected template for this campaign has a Quick Reply Button, then, you can select that button’s click as the trigger.
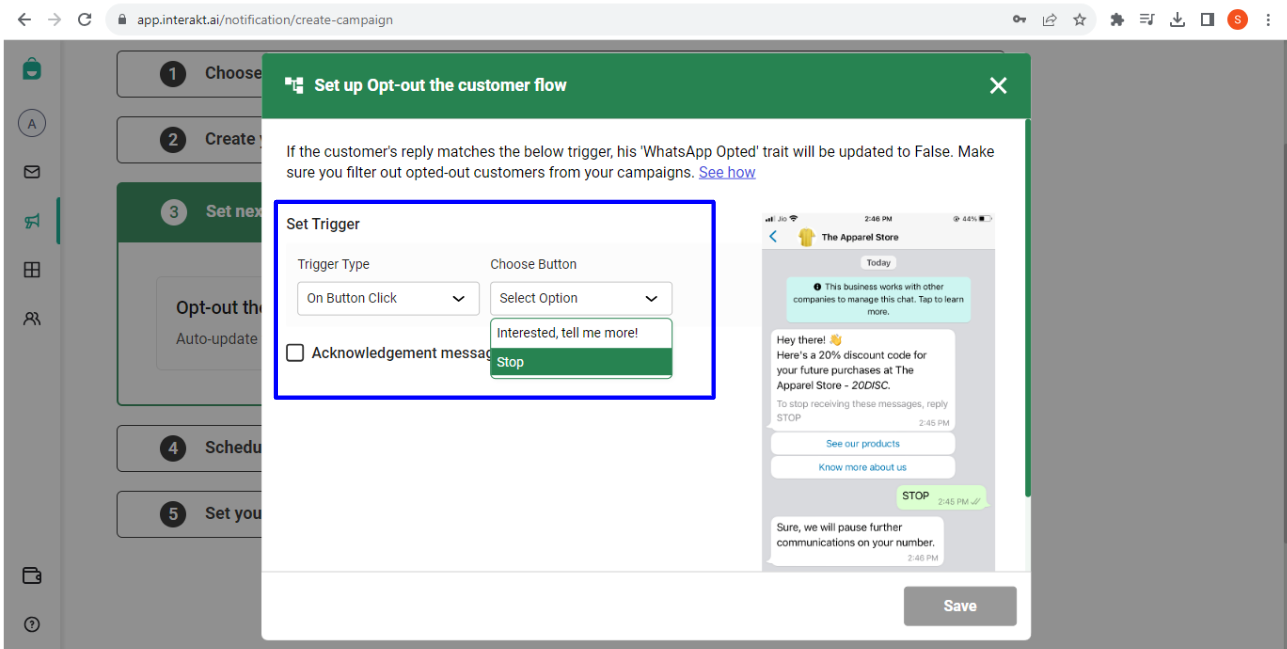
• On Typed-Out Reply → If the selected template has no Quick Reply Button*, you can select the ‘Trigger Type’ as ‘On Typed-Out Reply’, and then type the exact reply keyword, which should act as the trigger.
(*At the time of creating the template, you should have included a line in the template, asking recipients to type ‘STOP’ in response, if they want to opt out.)
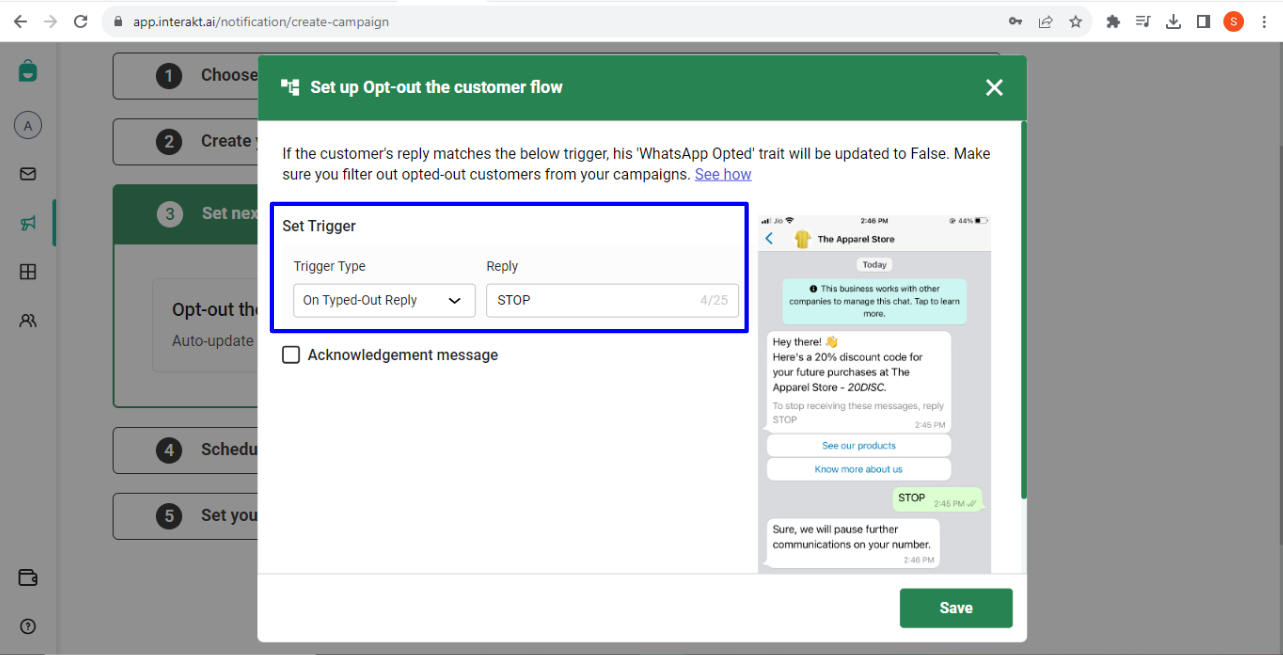
Acknowledgement Message:
After the trigger is received i.e. after the recipient sends the reply as specified in the ‘trigger type’, you might want to send an acknowledgement to them, like, ‘Sure, we will not message you further’. If you don’t want to send any acknowledgement message, you can de-select the checkbox.
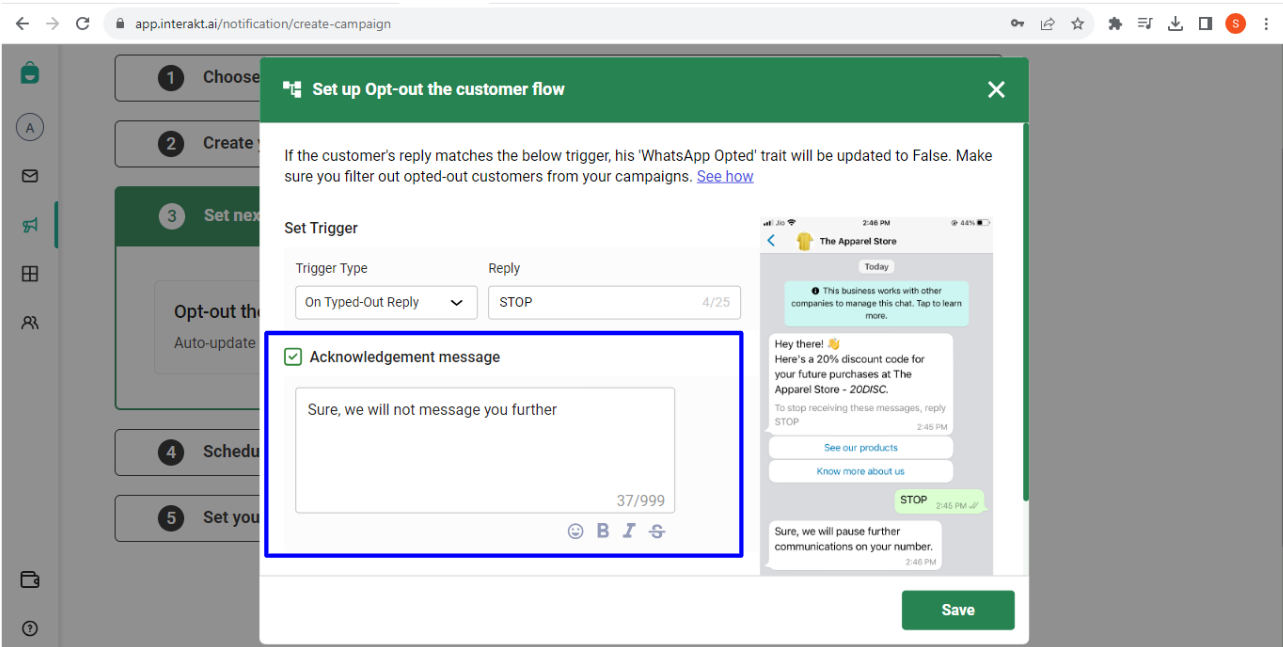
After having set the Trigger Type and the Acknowledgement Message, click on Save.
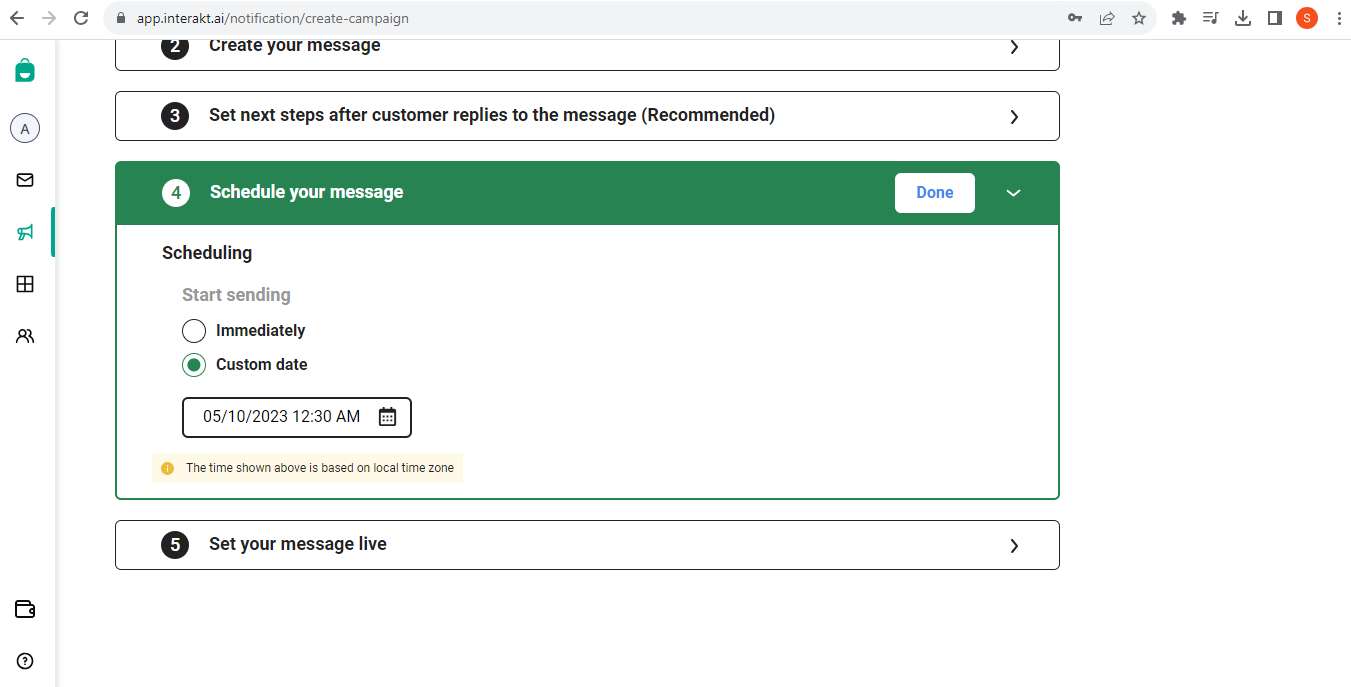
Schedule your campaign:
– Next, click on ‘Schedule your message’. Here, you can schedule your campaign to go out immediately, or, you can schedule it for a later date. To select a later date, select ‘Custom date’ and then select the desired date and time.
– Next, click on ‘Set your message live’. Now that your campaign is ready to be sent, you can just click on ‘Set live’ and your campaign will be queued to be sent. Alternatively, you may click on ‘Save as Draft’ and send out the campaign later.
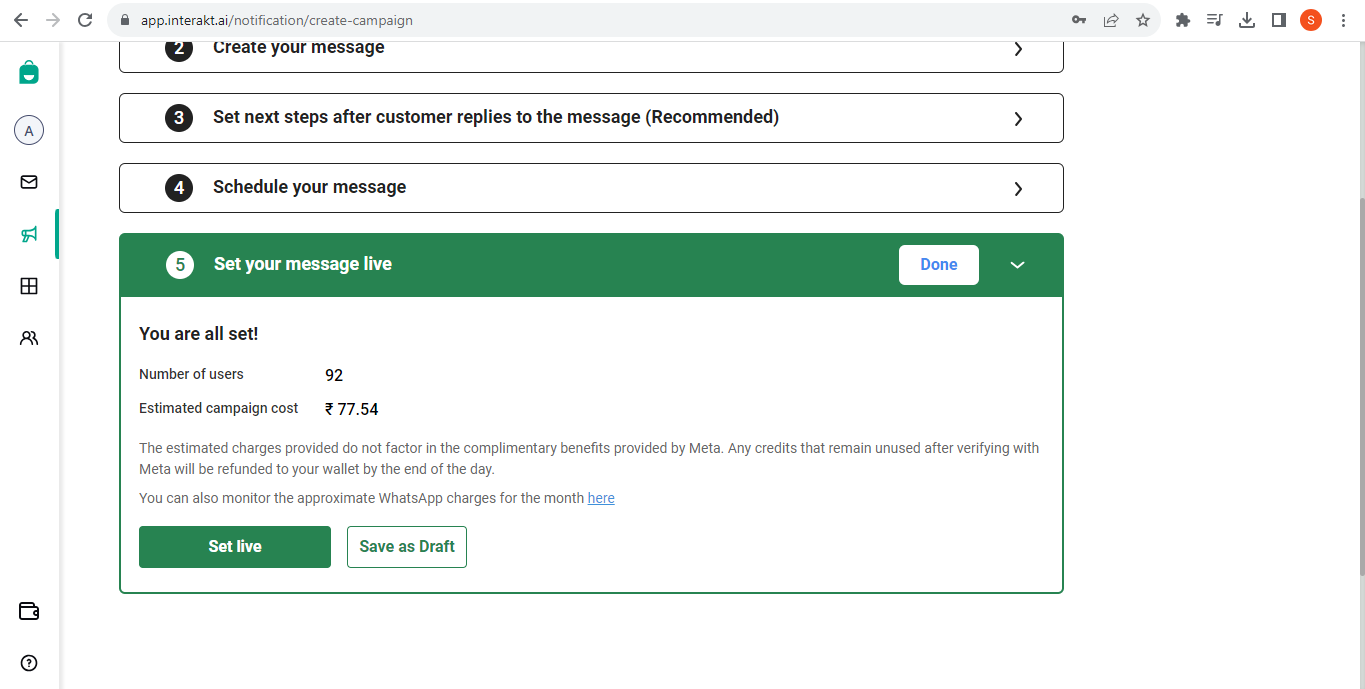
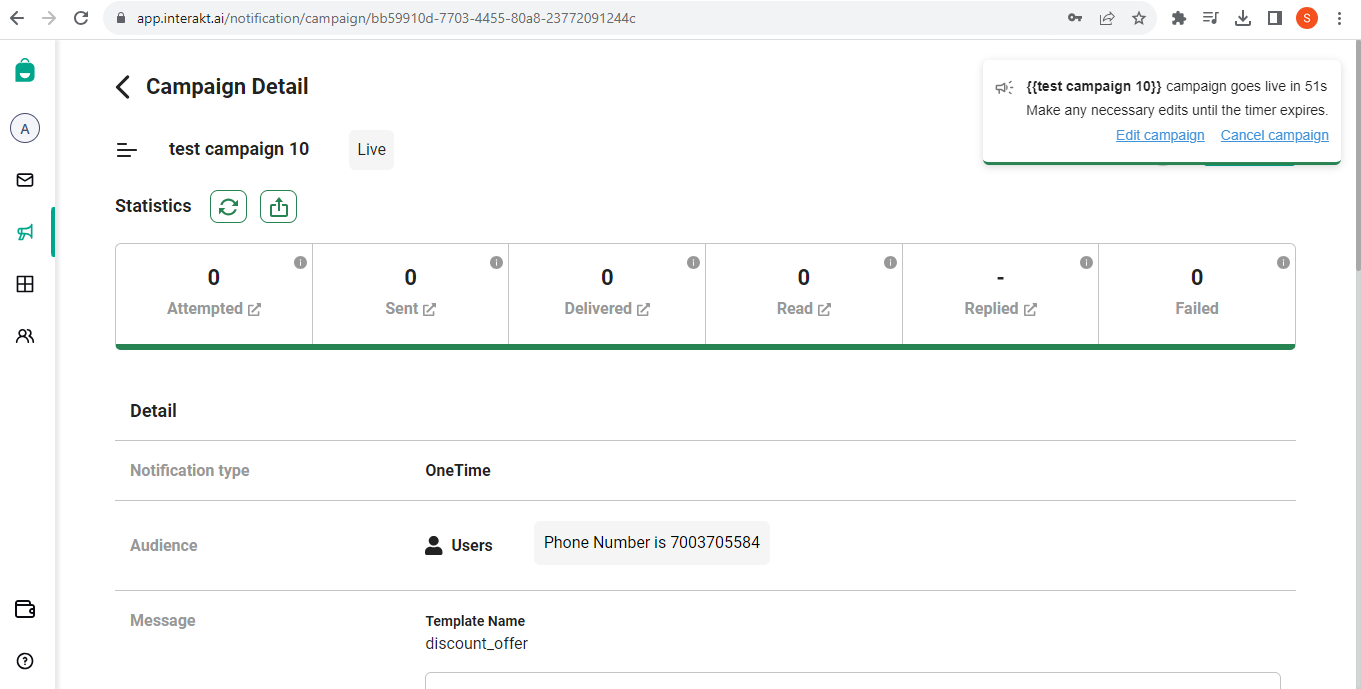
After clicking on ‘Set Live’, a 60 seconds timer will appear on the top right. In these 60 seconds, you can cancel the campaign, or edit it.