What are Workflows?
Workflows in Interakt are a powerful no-code automation feature that allows businesses to create WhatsApp chatbot flows that respond to customers, collect data, and guide users through various processes—all without writing a single line of code.
These are especially useful for:
-Automating FAQs, lead qualification, order tracking, and more
-Asking sequential questions in a structured conversation
-Capturing user responses and storing them as variables
-Exporting collected responses for further analysis or engagement
By setting up workflows, you can engage users in personalized conversations, gather essential information, and automate responses that previously required manual intervention.
Use Case Examples
Interakt Workflows allow you to:
-Collect and save customer details like Name, Email Address, Phone Number, Job Title
-Trigger follow-ups based on collected data
-Use stored information to personalize WhatsApp campaigns
-Run flows like Order Tracking, Product Feedback, Returns/Exchanges, etc., within a single chatbot
Saving User Responses: Variable Types
When a user answers a question inside a workflow, you can save their response in one of two ways:
1. User Traits
️– Persistent data saved to the user profile
️– Ideal for values like name, email, or location
️– Can be reused in future automations or campaigns
2. Workflow Variables
️– Temporary values used only within the current flow
️– Useful for short-term logic (e.g., a choice between two paths)
Use User Traits when the data needs to be remembered for future use.
Use Workflow Variables for temporary responses within the conversation.
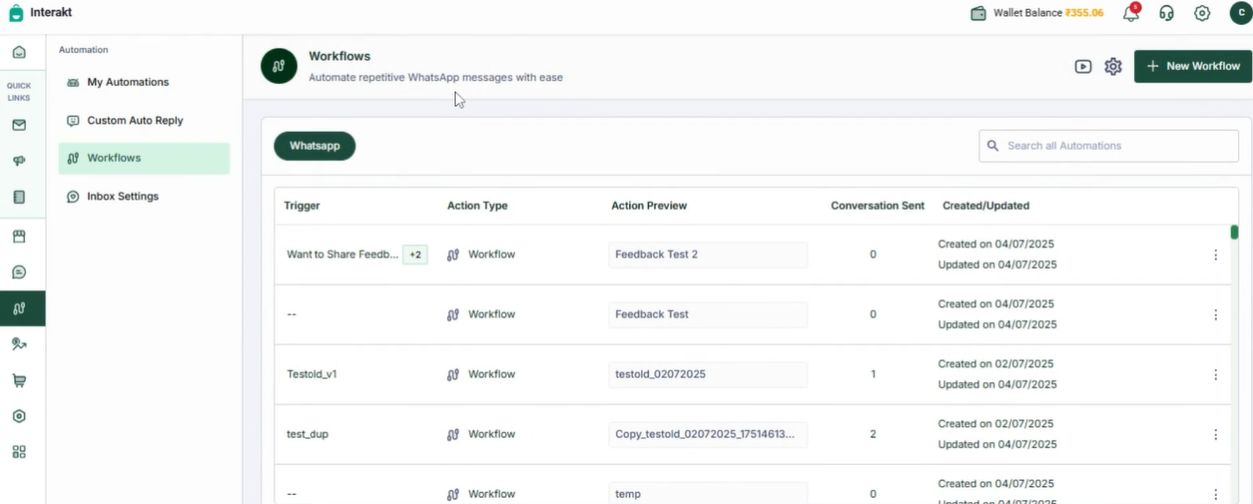
Step-by-Step Guide: How to Create a No-Code Workflow
Step 1: Navigate to the Workflow Builder
1.Login to your Interakt account
2.Go to Automation
3.Click on the Workflows
4.Click “+ New Workflow” (top-right corner)
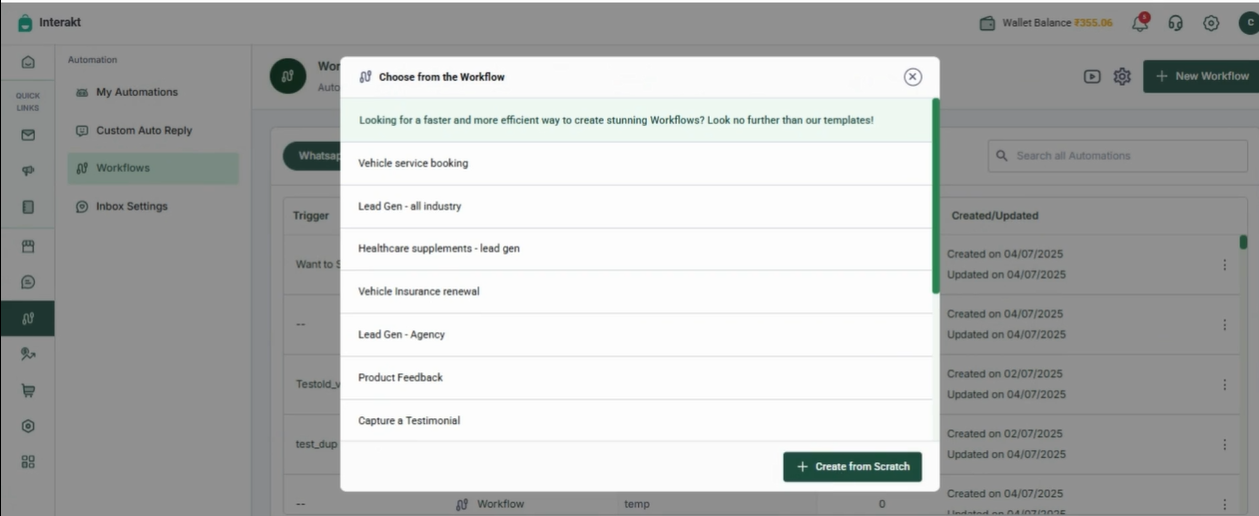
Step 2: Choose a Template or Start from Scratch
-Choose a predefined template, or
-Click Start from Scratch for a custom setup
Step 3: Name Your Workflow
-Enter a unique name (e.g., Product Feedback Flow)
-Make sure it’s not identical to existing Workflows or Custom Autoreplies
This avoids trigger conflicts and ensures only one response is sent per user action
Step 4: Set a Trigger
Triggers determine what starts the workflow. There are 2 options to set a trigger.
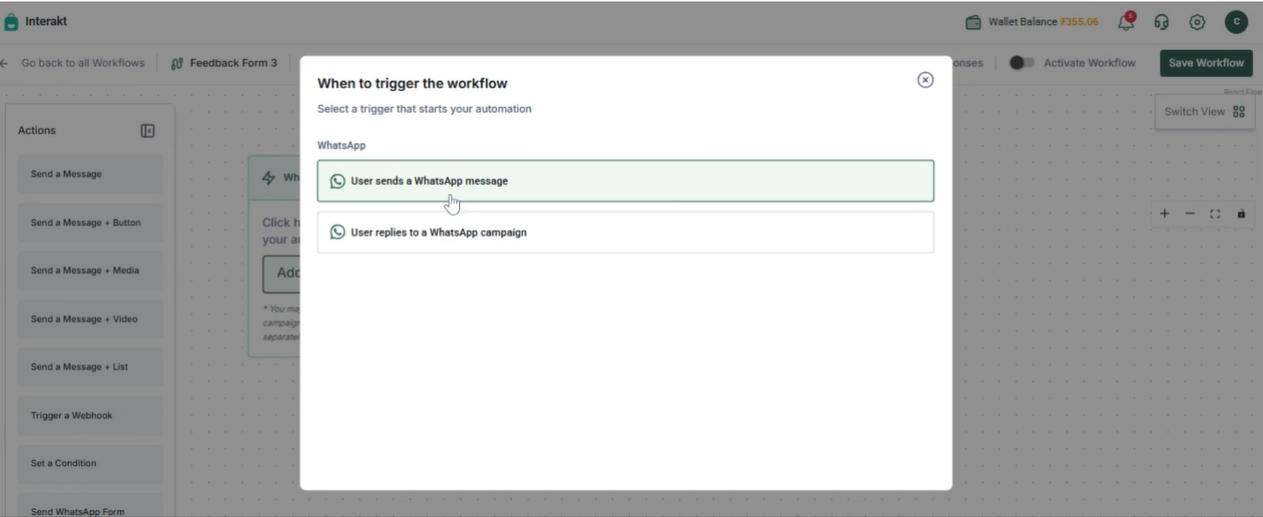
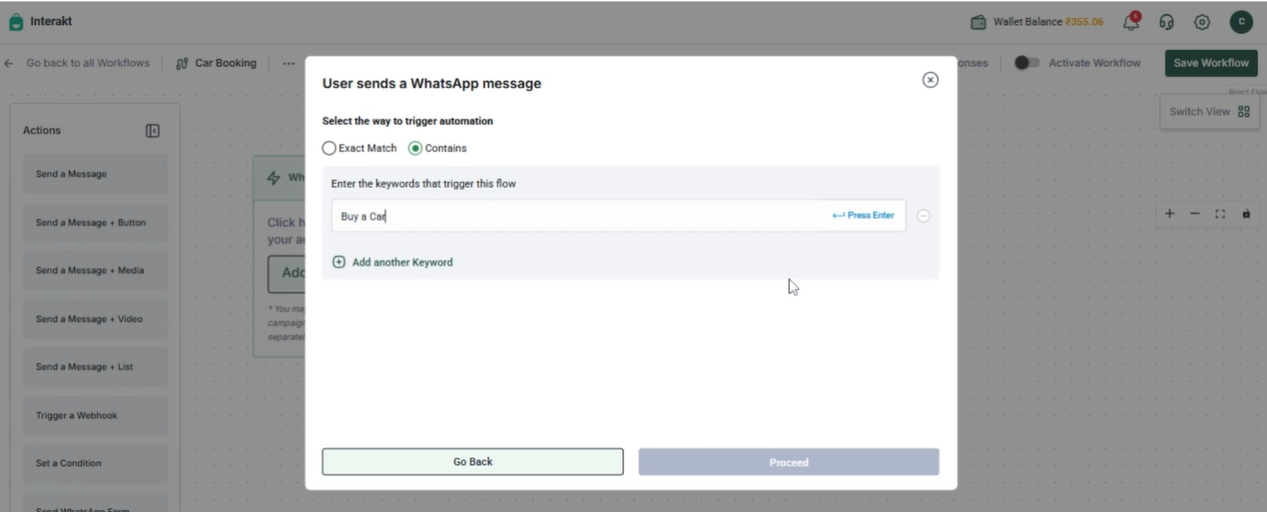
Option 1: User Sends a WhatsApp Message
-Trigger type: Exact Match or Contains Keyword
-Set a specific keyword that initiates the workflow. This keyword must be unique across all Workflows and Auto-replies. It cannot be used in more than one Workflow or Auto-reply.
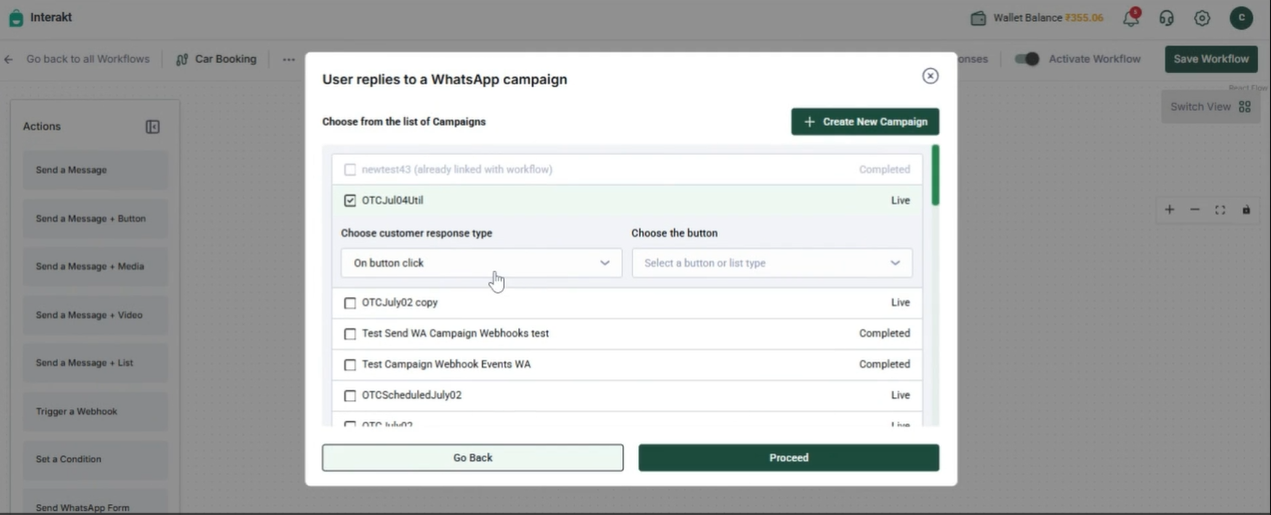
Option 2: User Responds to a WhatsApp Campaign
-Select the campaign that this workflow should respond to.
-Now Choose Trigger on Button Click or on Typed Reply
Step 5: Build the Workflow Flowchart
Use the drag-and-drop builder to structure your chatbot:
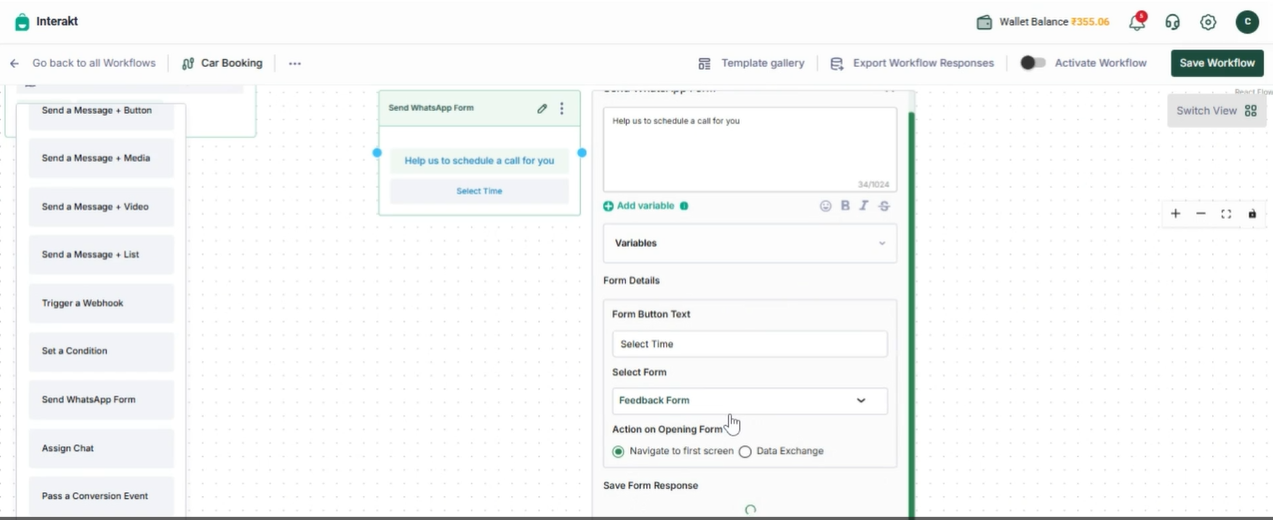
Example: Add a WhatsApp Form
1.Drag Send WhatsApp Form from the left panel
2.Enter:
-Display text: “We’d love your feedback!”
-Button label: “Give Feedback”
-Select your form
-Choose Navigate to First Screen
3.Click Save Step
Add a Thank You Message or a Response you want to share once the form is filled.
1. Drag Send Message node below the form
2.Message: “Thank you for your feedback! 😊”
3.Optional: Add buttons, images, or files
4.Click Save
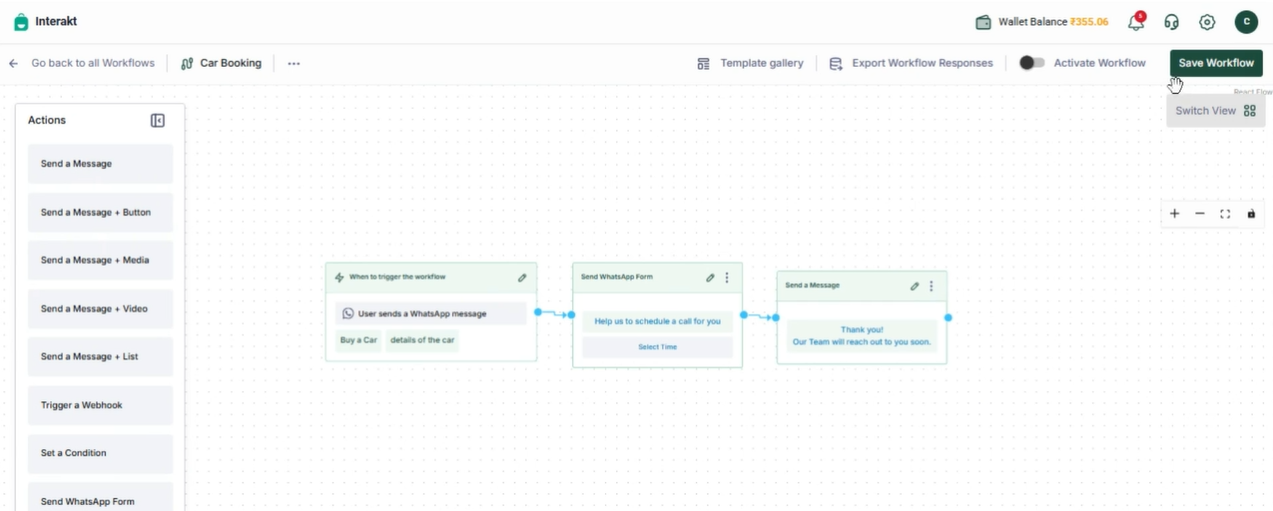
Step 6: Save & Publish
Click Save Workflow to activate your chatbot automation.
Steps to Setup Workflows With Webhook
Interakt now allows users to trigger webhooks as part of the workflows they have set up. You can now easily integrate API calls into the workflows to interact with external systems and get or update data. The steps and methods to set up a webhook are explained below.
Note: Webhooks are available only for Advanced and Enterprise users.
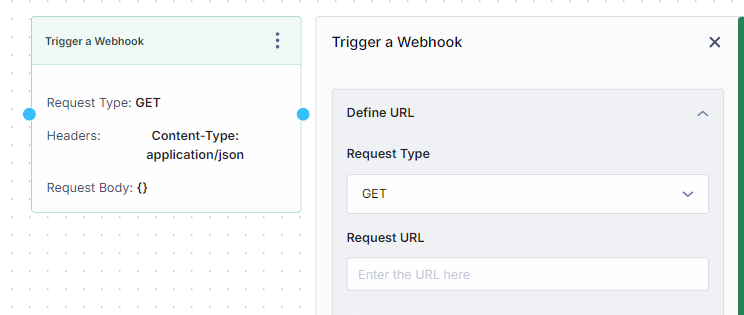
Step 1: Define URL
In this step, you can request an API using any of the request type options: Get, Post, Put, or Delete. Input the URL in the field below “request type” to call the specific API.
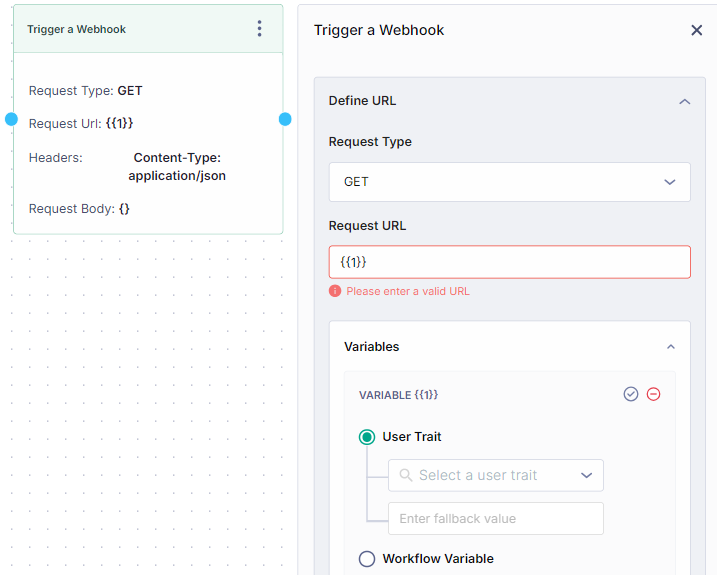
You can also add a variable as part of the URL you’re requesting by selecting “Add variable” and choosing a “user trait” or “workflow variable”.
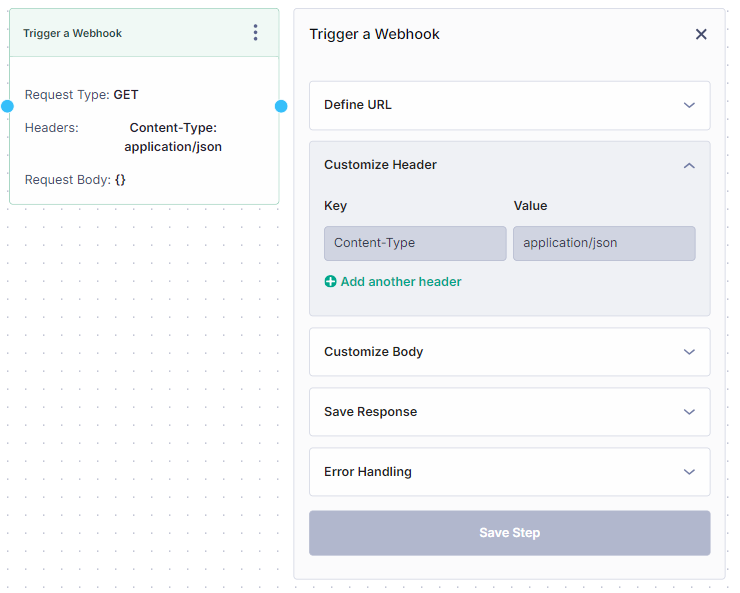
Step 2: Customize Header
After configuring the URL, the header has to be customized. Please note that we currently only support JSON by default. You can add extra header parameters if required.
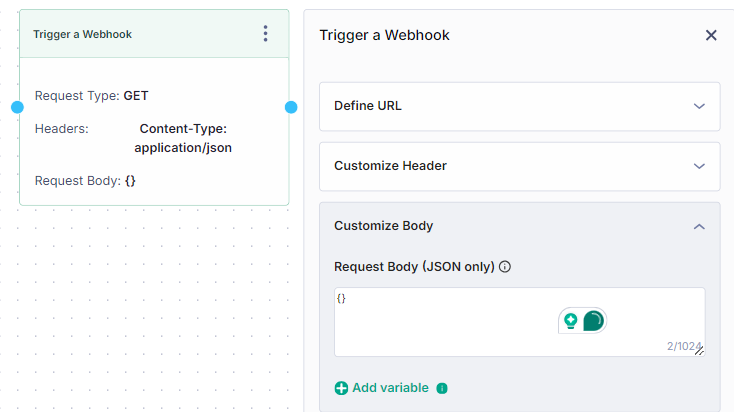
Step 3: Customize Body
Once you’ve customized the header, the body of your response should be configured.
If, for example, you’re handling a user query about the shipping status of an order and you’ve collected the order ID in the previous step, it has to be passed to the API via Body params.
Please note that the custom values in the “Request body” field must also be in json format only, with a character limit of 200.
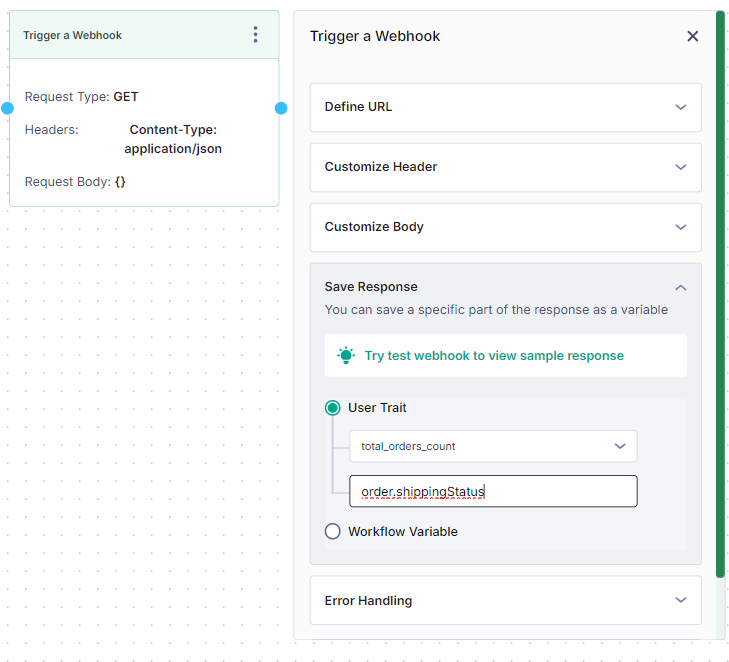
Step 4: Save Response
After you’ve sent an API request and received a response, it needs to be saved as a user trait or a variable.
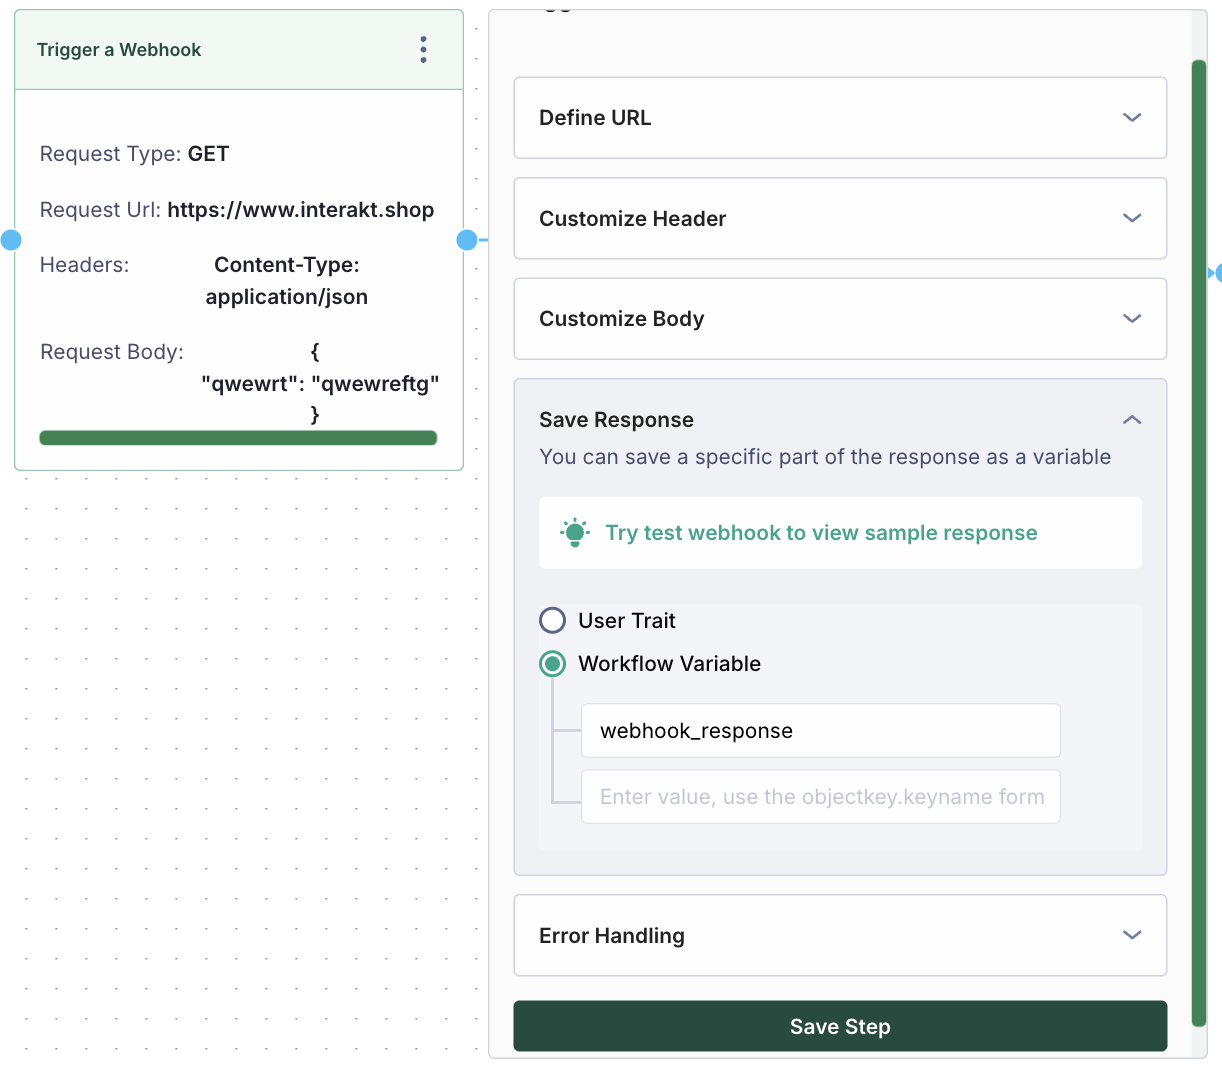
For this step, you must test the webhook for a sample response. Once you click on “Test Webhook” CTA, you’ll be shown a list of variables configured in your Request, Header and Body. You must enter test values into the respective variable fields to test the webhook and then it calls the API for a response.
Once you’ve received the sample response from the API, you must collect the relevant data such as “order ID” or “shipping status” and save it as a user trait or workflow variable. For this, input the corresponding key in the objectkey.keyname format from the API response.
Ex: if you want to store the shipping status, you have to use Order.shippingStatus in the “Entire response Body” above
  {
   “Order”: {
       “orderId”: “xxxxx”,
       “shippingStatus”: “in Transit”,
   },
   “userId”: yyyy
}
Step 5: Error Handling
If the API response shows an error in its output, you can craft a default error response, which will be displayed for all the APIs that are failing. Workflow bot breaks and the subsequent steps will not be executed.

What is a Node?
Each step ( message Box) in the workflow is represented as a node. The following basic actions are available for each node:
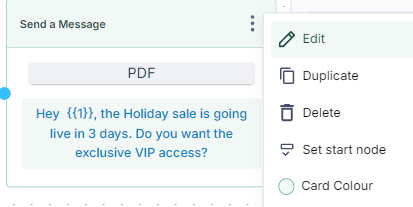
• Duplicate: Creates a duplicate of the node.
• Delete: Prompts a confirmation alert before deletion.
• Color Code: Users can assign color codes to nodes, making it easier to navigate large workflows with multiple nodes.
• Edit: Opens an edit view for the node.
• Set start node – You can easily set a start node by clicking on the ‘Se Start Node’ tab. Once you do, a flag will appear on the top left side of the Node.
You can easily Duplicate & delete a node from the 3-dot menu.
• Unset Start Node:
‣ By default, the first node is the start node.
‣ Users can unset the start node and assign another.
‣ Before saving, the system validates whether a start node is set. If none is found, an error prompts: “Please select the start of the workflow before saving.”
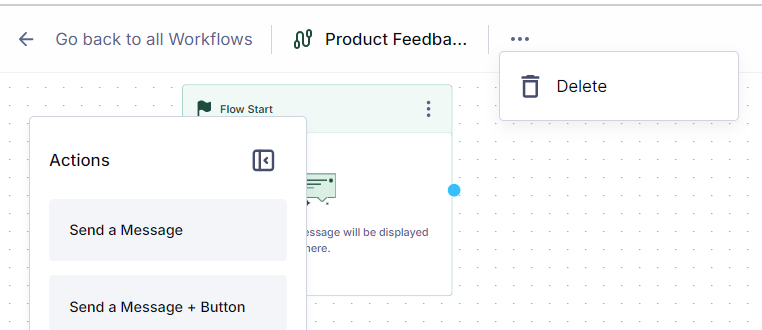
Delete\ Rename a Workflow
You can also delete the whole workflow by clicking on the 3-dot menu button next to the workflow name.
2. Rename a workflow from inside the workspace.
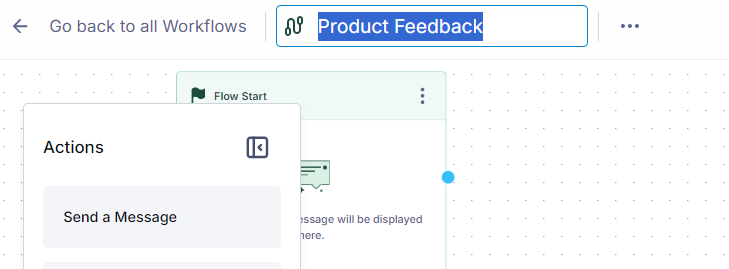
Action Panel
• Displays Action tools, with a hover preview showing a sample message
• The “Start Here” node includes a “+” icon that opens the Action tools dropdown.
How to connect nodes using Branches?
• Users can create a branch from one node to another.
• Users can also create a branch from buttons or lists
• The Action tools dropdown opens automatically if a branch points to an empty destination node.
Branch Actions:
○ Users can delete a branch
○ Color code the branches – For example, in a complex workflow that includes stages like Order Placed, Order Tracking, Product Feedback, and Return/Exchange Policy, you can assign color codes to the parent nodes for better clarity—such as blue for feedback and pink for order tracking. Any subsequent nodes branching from the parent will automatically inherit the same color, ensuring consistency and easy recognition across the workflow.
Saving the User Response
Now, you have to save the user response for the future or each subsequent conversation. Click on “Save user response”. You’ll see two methods to save the user response: “User Trait” and “Workflow Variable”.
How to use User Trait?
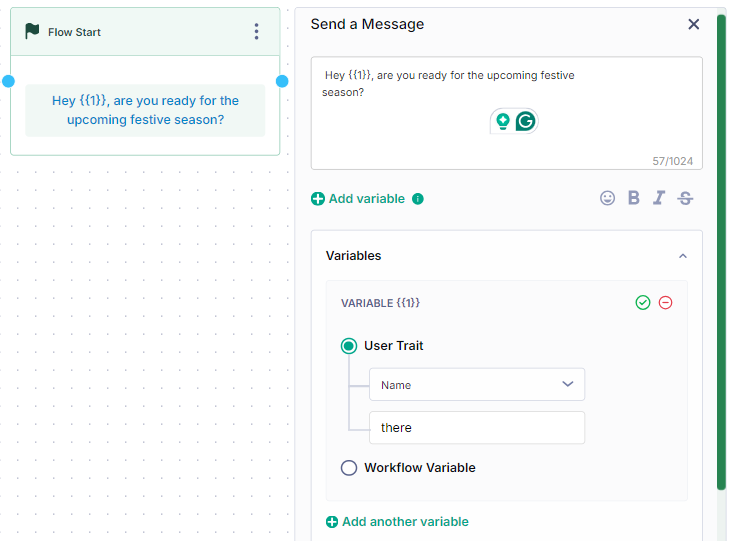
“User Trait” should be used when you want to permanently store that value. For example, if it’s the username, phone number or email address that you want to save across the user’s record, which can be used in a campaign or another workflow, then you should select the respective “User Trait” and click “Save”.
How to use Workflow Variable?
If you want to store a temporary variable while responding to a user query (eg: the user asks for the shipping status of their order ID) and don’t need to save it as a permanent variable across the user’s record, then you should select “Workflow Variable”, name the variable, and save it for the second response.
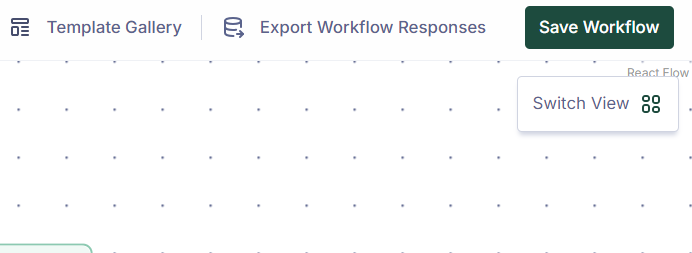
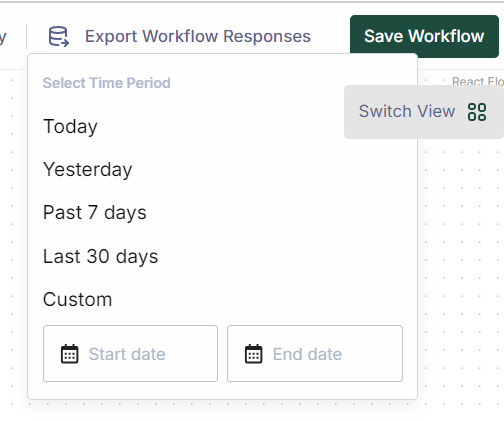
How to export a Workflow on WhatsApp?
If you wish to export the workflow report, click on the ‘Export Workflow Responses’ and you can select the period of the report you want. The report will be sent to your registered email id from where you can download the report.
Notes
• Undo/Redo functionality: To undo or redo an action item
• Zoom in/out: To zoom in & out of the screen
• Help icon: Opens the video modal
• Switch View
○ How to access the Basic workflow builder
You can also use our older version of workflow, that is basic workflow view by using the Switch View button. To learn more about the Multi-step view, please click here.
○ You can only switch view for the workflow if –
‣ You have saved the workflow
‣ And if you have not created any branches.
• To save the workflow, just click on the Save Workflow button in the top right-hand corner.