Setting up WhatsApp API number via Tally
Steps for setting up WhatsApp API number via Tally:
1. Raise request for WhatsApp API from Tally Customer Portal
2. Get credentials to your Interakt Account in the account creation email
3. Understand important points about WhatsApp API
4. Things you will need before setting up your WhatsApp API number
5. Create your WhatsApp API account & connect number to it
6. Ask Tally Partner to activate WhatsApp subscription
1. Raise request for WhatsApp API from Tally Customer Portal
a. Open https://customer.tallysolutions.com/ > WhatsApp for Business.
You might be asked to log in with valid credentials.
b. Click the WhatsApp for Business tab on the left, and click the link to open the form to buy WhatsApp for Business.
c. Verify the Product Information, Contact Details, and select the partner details. As you can notice, some of the information is prefilled based on the details registered with the Tally Serial Number.
d. Click Submit. A request is submitted to your designated Tally Partner.
Your Tally Partner will send out a request to Interakt to create an account with your details.
2. Get credentials to your Interakt Account in the account creation email
As soon as your Interakt account gets created, you will receive the credentials for your Interakt account via E-mail.
• The e-mail will be sent from [email protected] and will have the Subject as ‘Welcome to Tally X Interakt!’
• The email will be sent with the following information on the e-mail ID which was received from your Partner for creating your Interakt account.
⁃ Username: The same e-mail ID where you receive the account details.
⁃ Password: This is case sensitive.
• You can reset the password later from https://app.interakt.ai/login.
• To log in to your Interakt account, go to https://app.interakt.ai/login and enter the username and password there.
Note: If the phone number provided by your Tally Partner at the time of creation of the Interakt Account is a valid WhatsApp number, then the credentials will also be sent via WhatsApp to that number.
3. Understand Important Points about WhatsApp API
After logging in, you will see a page, like the one shown below:
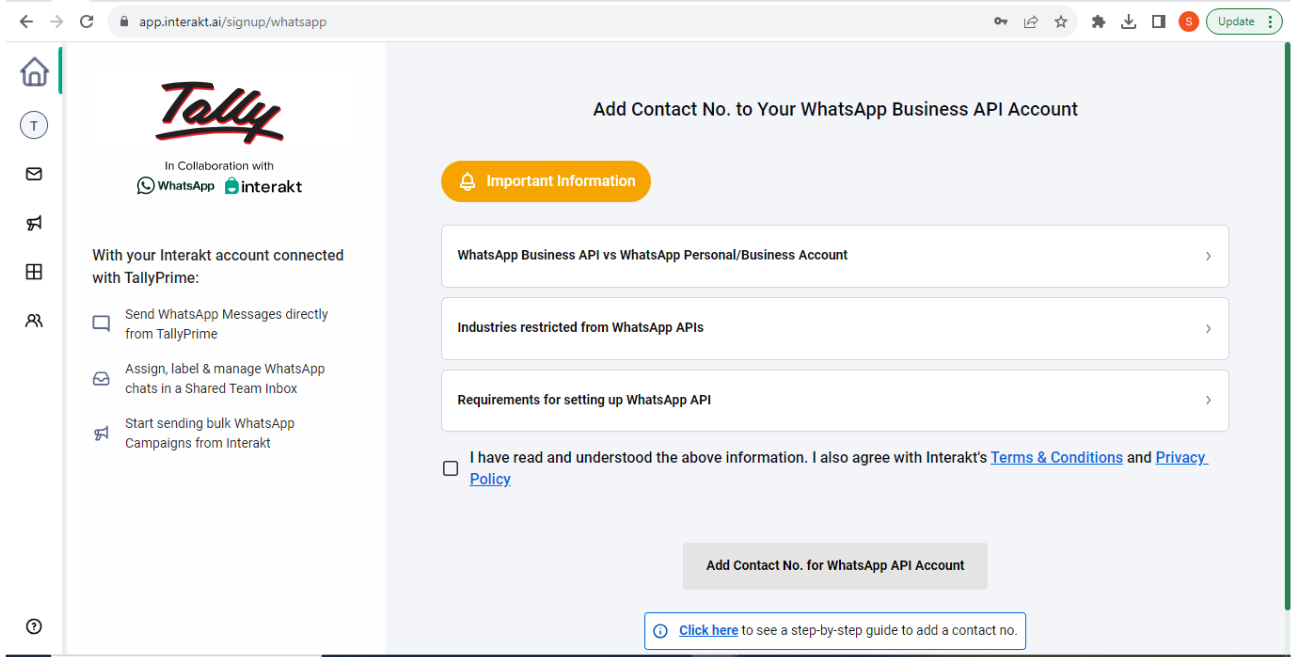
In this page, you will find some important information regarding WhatsApp API. Please make sure that you read through all the 3 sections:
1. Differences between WhatsApp API & WhatsApp Personal / Business Apps
2. Industries Restricted from WhatsApp API
3. Things you’ll require to setup your WhatsApp API account
After going through the above, click the checkbox below to confirm that you have read & understood all the points. By clicking this checkbox, you would also be agreeing to Interakt’s Terms & Conditions and Privacy Policy.
4. Things you’ll need before setting up your WhatsApp API number
Before clicking the ‘Add Contact No. for WhatsApp API Account’ button, you ideally need to have the following things ready:
1. The contact number which you’ll use for your WhatsApp API account.
a. The Contact No. should not be already registered for WhatsApp Personal or Business Apps. If it is already registered for those, you will need to delete the existing WhatsApp account on that number, and then, register the number for a WhatsApp API account with Interakt.
b. If you already have a WhatsApp API account, registered through another Business Solution Provider (BSP), please reach out to your Tally Partner or Tally Customer Support, for migrating your number to Interakt.
c. Ensure that you can receive an OTP with the Contact No. either through SMS or call.
Note: After having used the number in a WhatsApp API account, you can shift the number back to WhatsApp Personal or Business apps, only if there has been no exchange of messages on the number for at least 30 days (as per WhatsApp’s rules).
2. An active Facebook Business Manager (FBM) account
a. You must have admin access to the FBM account created for your business.
b. If your company does not have a FBM Account yet, you can click the ‘Add Contact No. for WhatsApp API Account’ button to create one.
Note: While creating a new FBM Account, you will be required to provide a website URL ( get a website ) or a social media profile page URL (like, a Facebook page). In case your company does not have a website, you can do the following simple steps to create a Facebook Social Media page:
⁃ Log in to your Facebook account.
⁃ Select Pages and click Create. Or, directly go to facebook.com/pages/create.
⁃ Enter a Page name and select the Category. Add a Page bio, if needed.
⁃ Click Create.
⁃ Add your bio, profile picture, and cover photo.
⁃ Click Done.
5. Create your WhatsApp API account & connect the number to it
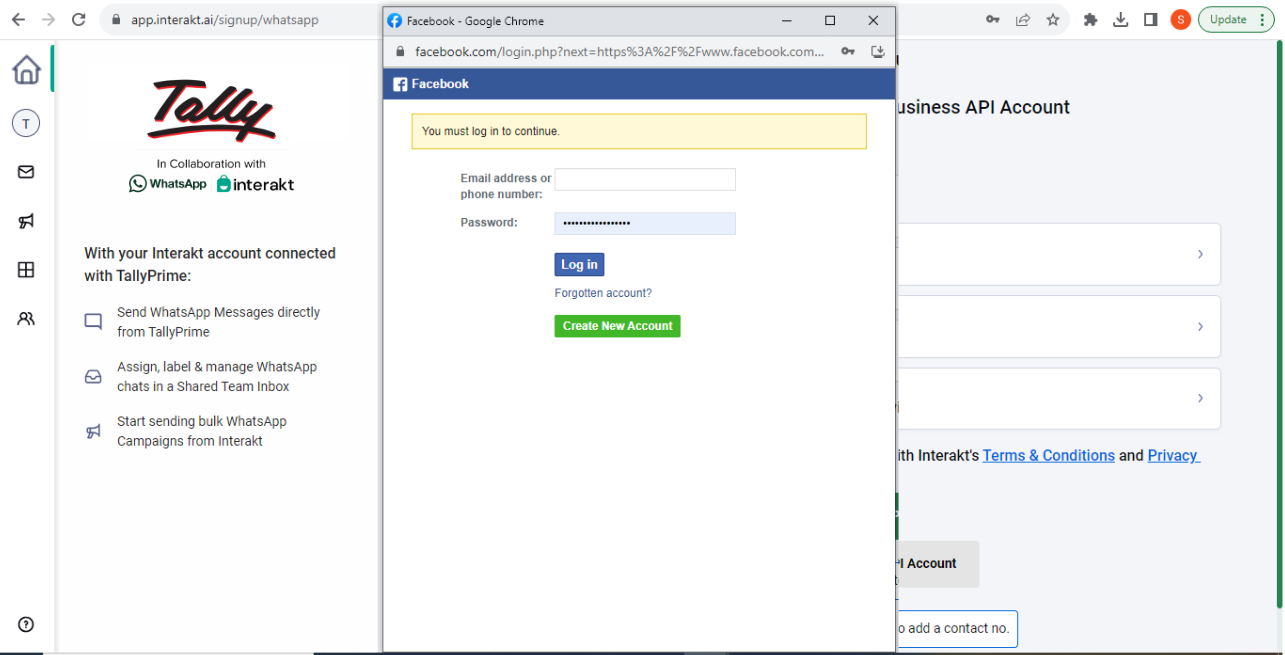
⁃ Click the ‘Add Contact No. for WhatsApp API Account’ button.
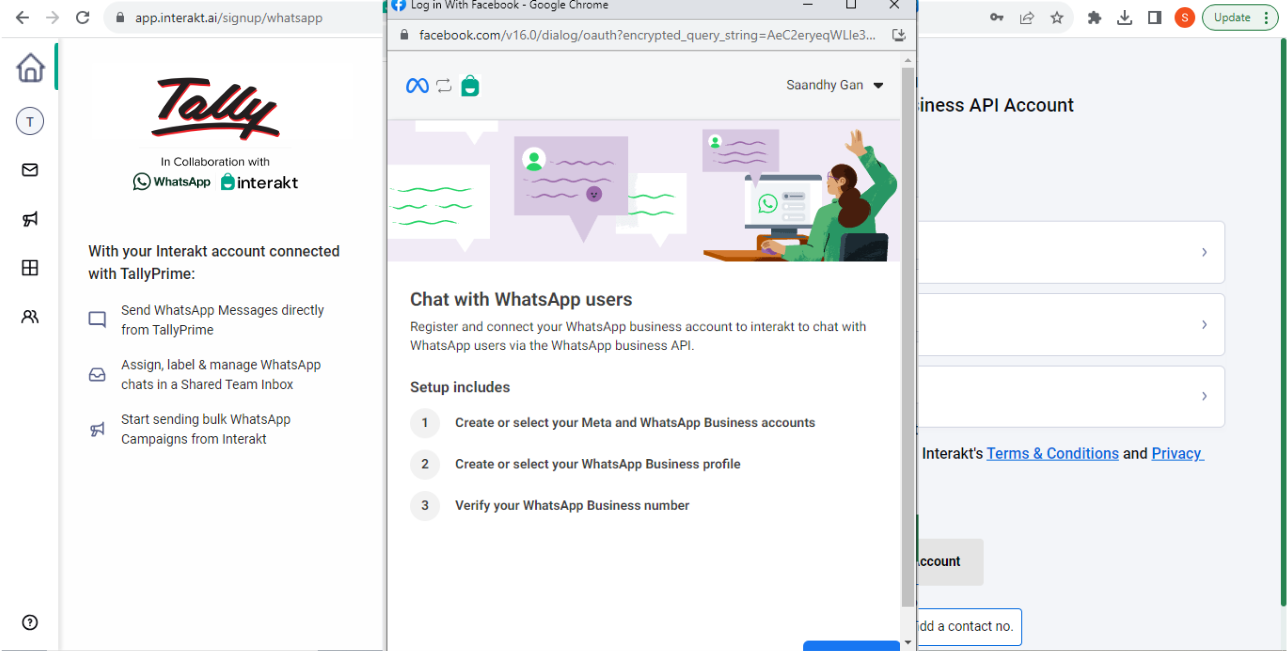
A new window will open up, as shown below.
If you are not already logged into your Facebook Account in that web browser, it will show as below. You will be required to log into your Facebook Account:
If you are already logged in to your Facebook Account in that web browser, it will show as below:
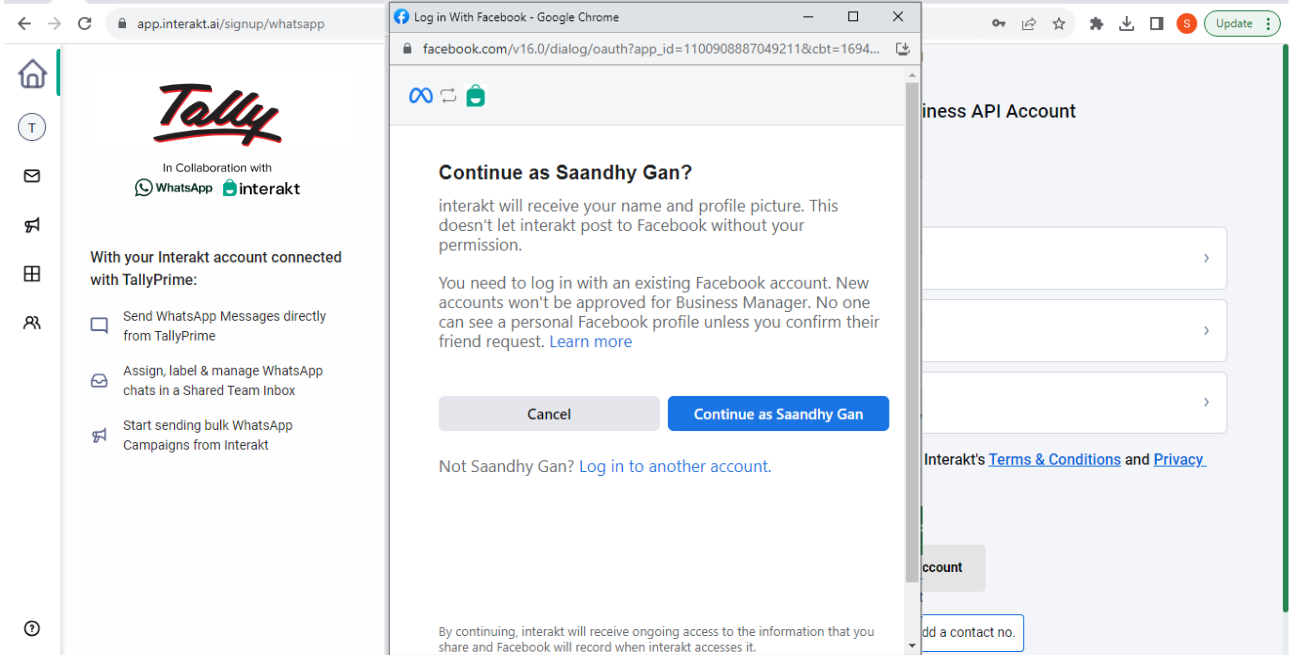
⁃ Click ‘Continue as ….’.
⁃ Next, you will be shown the below screen. Click ‘Next.
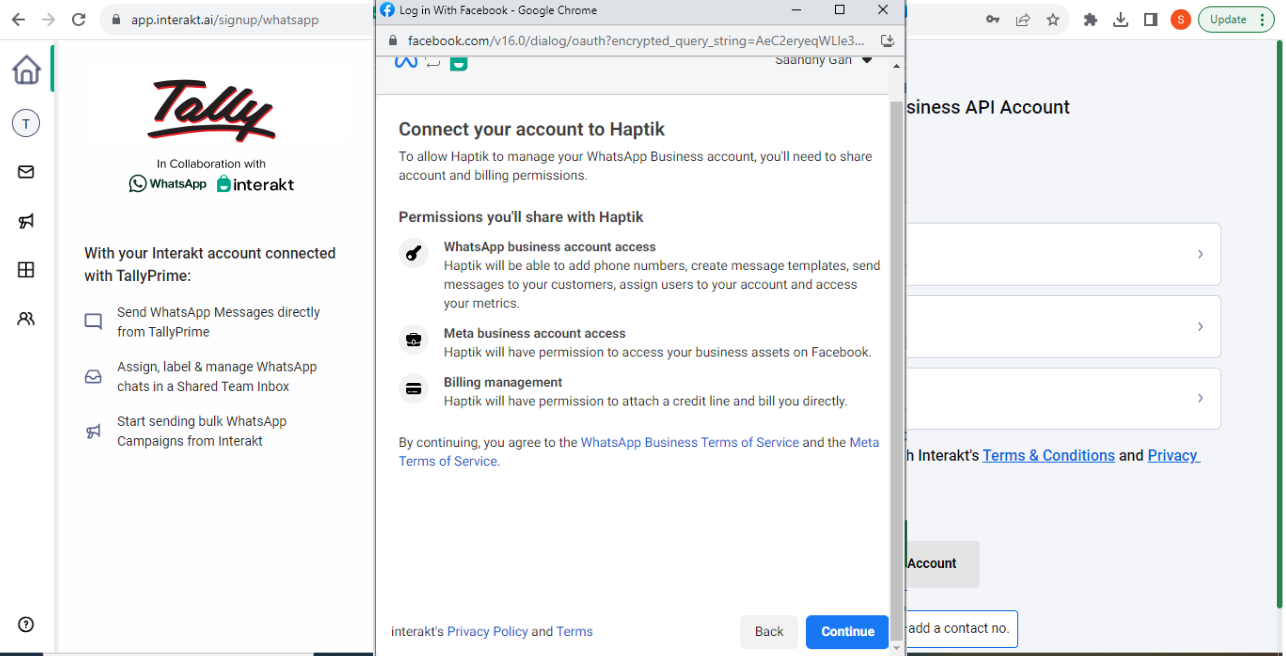
⁃ Next, you will be shown the below screen. Click ‘Continue’.
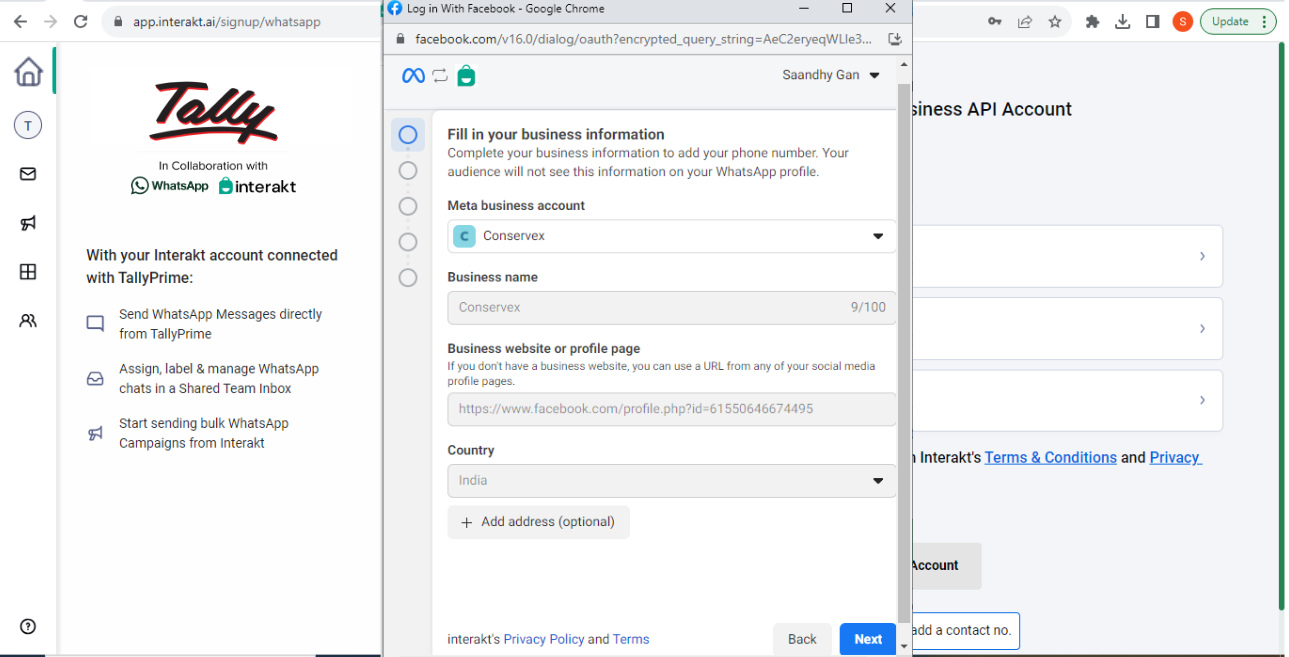
⁃ Next, you will be shown any of the below 2 screens, depending on whether you already have a Facebook Business or not. If you have a Facebook Business, you can select the same from the drop-down and then click Next, as shown below.
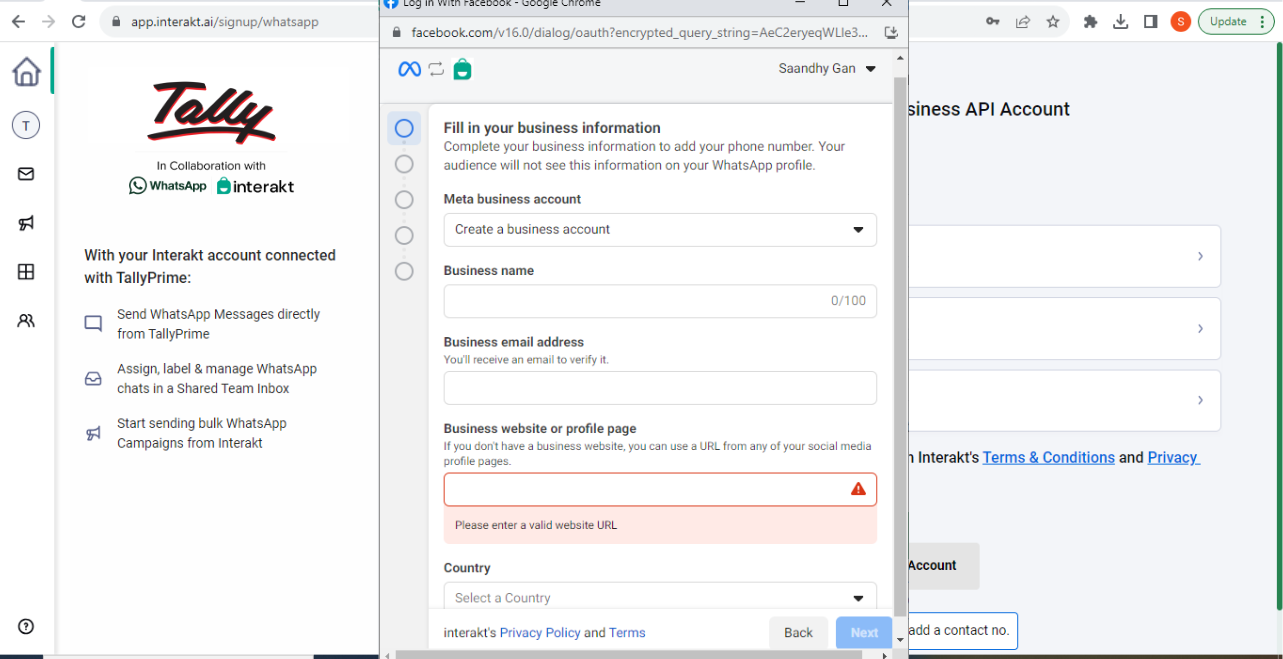
If you do not have a Facebook Business yet, you can create a new Facebook Business account by filling the form as shown in the below screenshot.
Please ensure the following things while filling the form:
⁃ Provide your accurate Business Name, for example – ABC Enterprises Private Limited.
⁃ If you are providing the URL of a Facebook page, make sure that:
a. The name of the Facebook page matches the Business Name that you are providing here.
b. You include a bio, profile pic and cover pic on the Facebook page.
⁃ After you have selected / created the Facebook Business, you will be shown the below screen. Here, you will be asked to create a new WhatsApp Business (API) Account or select an already existing WhatsApp Business (API) Account.
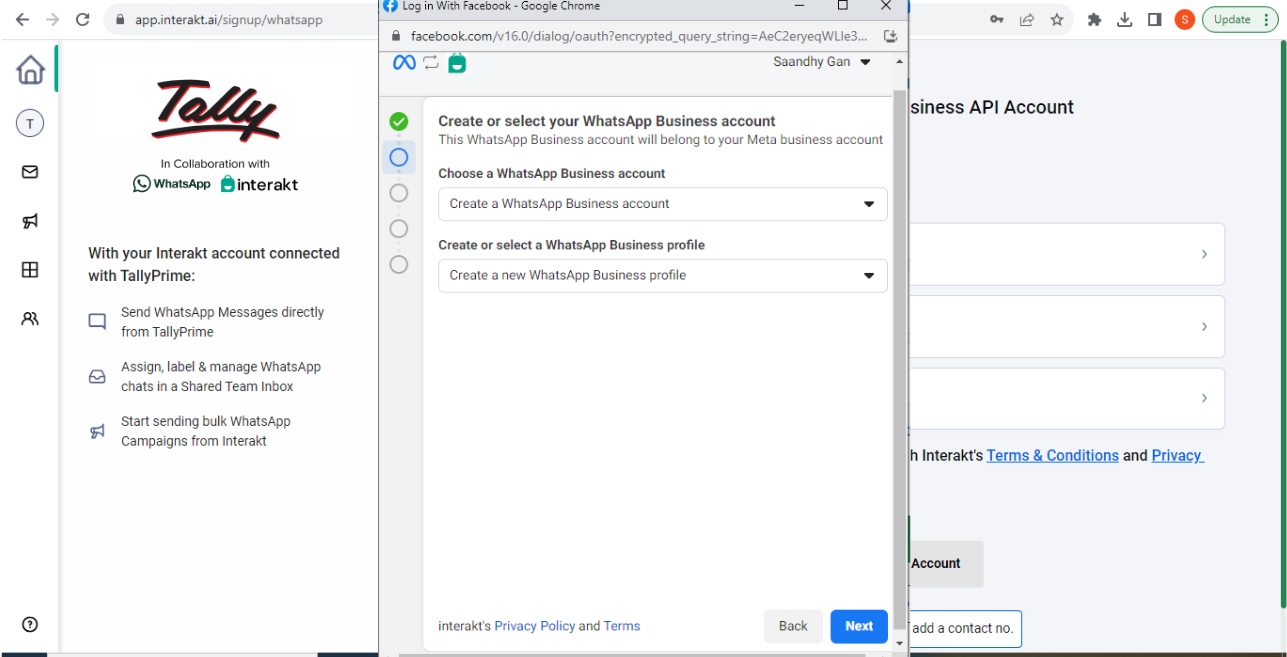
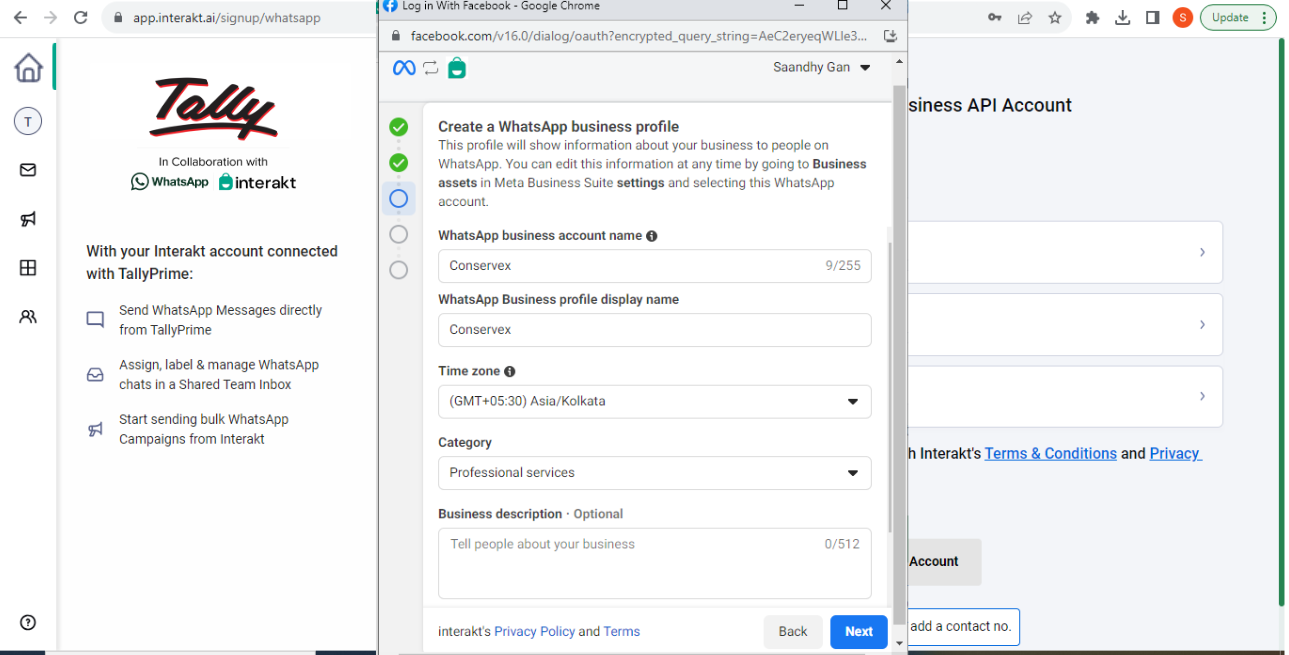
– Next, you will be shown the below screen. Here, you can provide the following:
‣ A name for your WhatsApp Business (API) Account → This name will not be displayed anywhere to your customers.
‣ WhatsApp Profile Display Name → This name will be displayed to your customers when they chat with your WhatsApp API number on WhatsApp. We recommend you to keep this Display Name exactly the same as the name of your Facebook Business.
‣ Timezone
‣ Category of your business
‣ Business Description
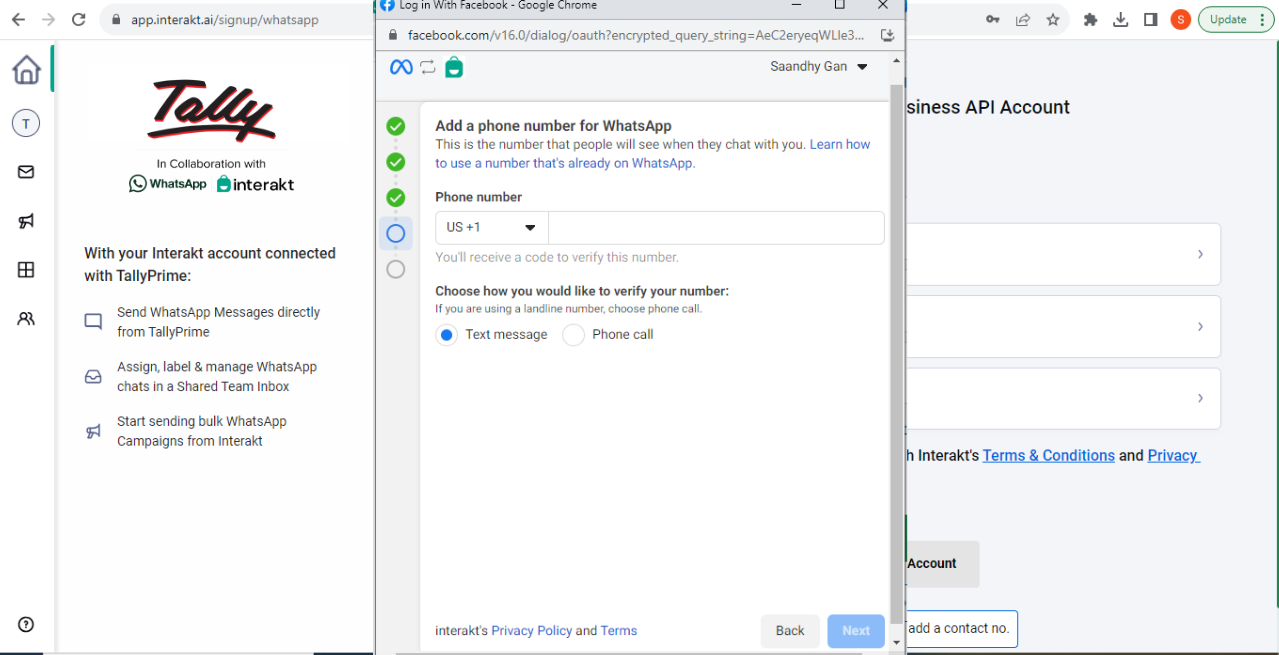
⁃ Provide the number that you want to use, and select the medium via which you would want to receive the OTP on that number.
⁃ Enter the OTP that you receive.
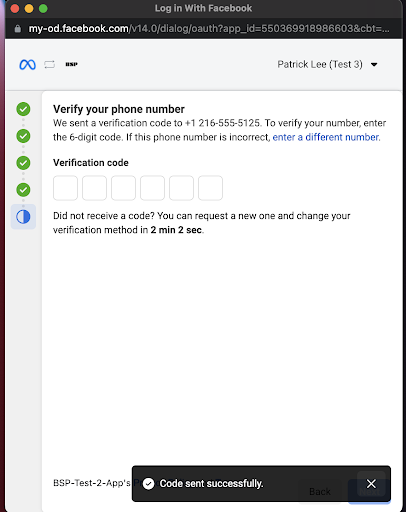
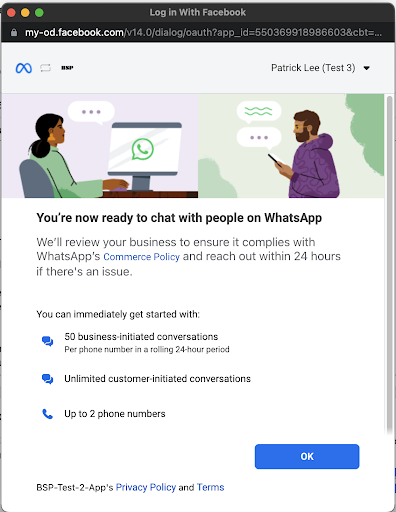
⁃ If the OTP entered is correct, the following success screen appears. Click ‘OK’.
⁃ The following screen appears on successfully connecting your number to the WhatsApp Business API Account.
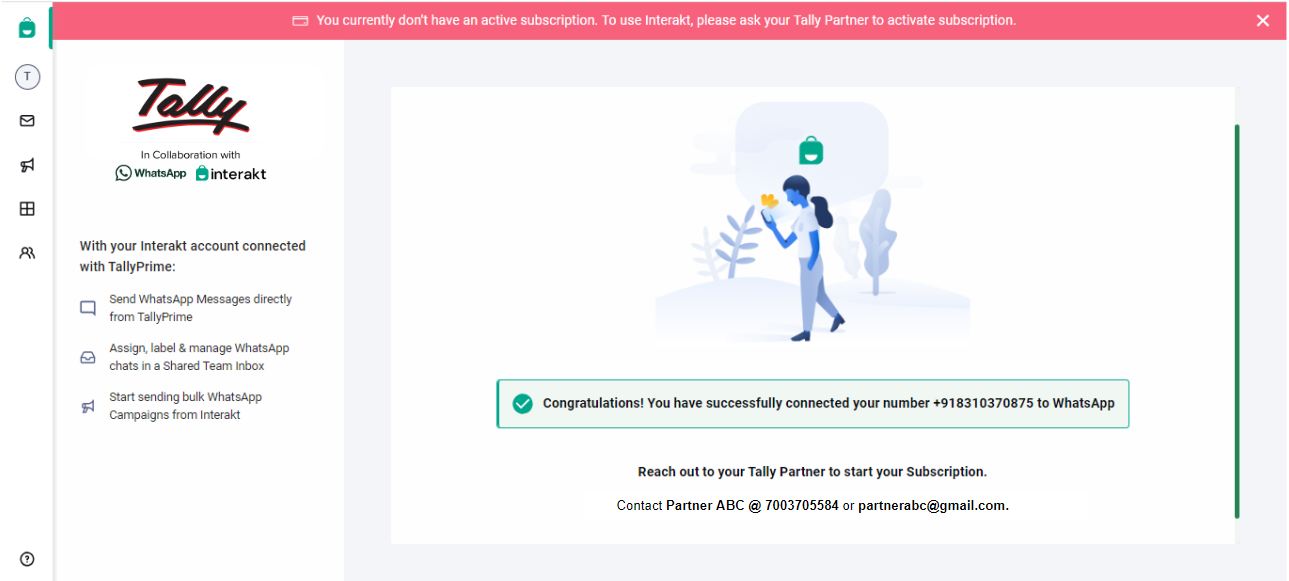
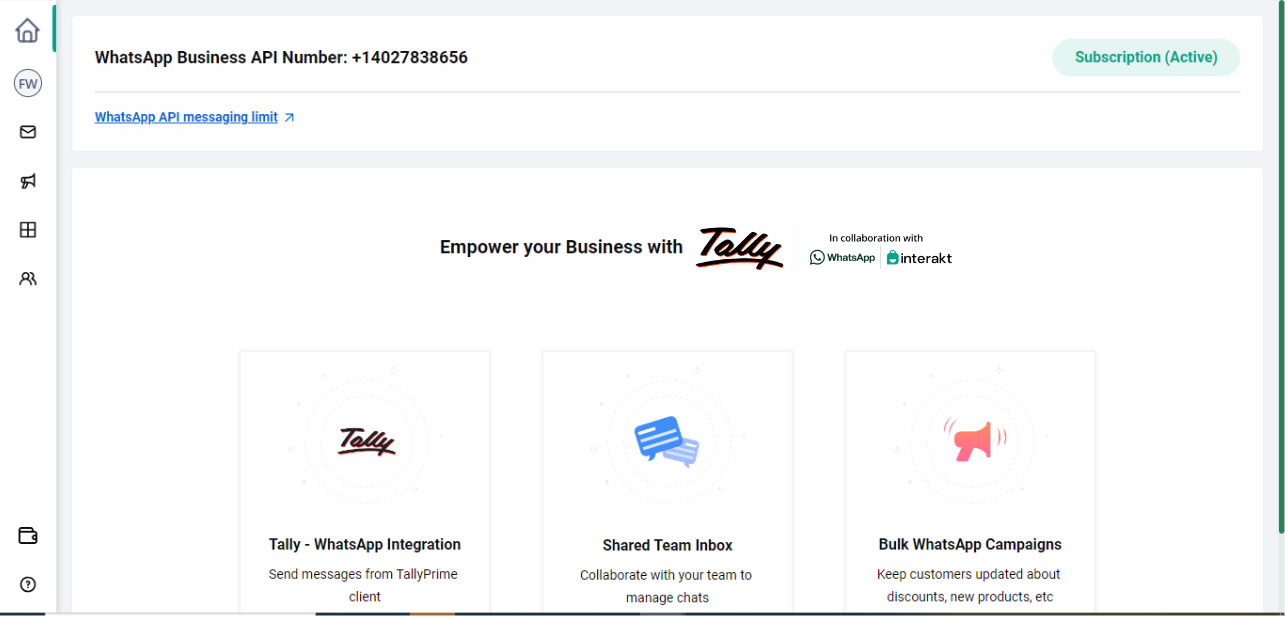
6. Ask Tally Partner to Activate Subscription
At this point, after your number has been successfully connected, please reach out to your Tally Partner to get your subscription activated.
Once the Partner activates your subscription, you will receive an e-mail confirmation for the same.
You can then come back to your Interakt account (app.interakt.ai) and refresh the page. On refreshing the page, you should see the below screen, indicating that your subscription is active.
You can now follow the instructions here to start sending messages from TallyPrime.