Ever wondered if you could just streamline the conversations occurring on WhatsApp and use the data across other departments?
As businesses start to scale communication on WhatsApp, we have seen them face the common challenge of sharing insights with other teams including order management, shipping, operations or even other marketing departments.
But what if we said that a Zapier to WhatsApp integration can address this issue? In this post, we’ll show you how.
Is Zapier to WhatsApp integration possible?
Zapier is an effective tool to connect applications and automate routine tasks like creating support tickets, registering leads in CRM systems, message forwarding and more. And the fact that Zapier can be used without prior knowledge or proficiency in coding or developing, and enables integration with diverse applications makes it a highly potent tool.
Zapier to WhatsApp integration, however, isn’t possible directly at the moment. But businesses using WhatsApp can use a different way to integrate other applications via Zapier; like by using a WhatsApp Business API provider like Interakt.
6 Ways To Use WhatsApp Zapier integration
By allowing you to integrate with diverse applications and effective automation, Zapier can put your WhatsApp business game on a different level, enabling you to grow at a better scale. Here are some of the benefits of Zapier to WhatsApp automation:
1. Routine task automation
With Zapier’s automated workflows or Zaps, you can connect different apps and services such as WhatsApp to improve efficiency. This allows you to streamline routine tasks like managing incoming customer queries and orders on auto instead of having to input data manually.
2. Enhanced communication
Zapier to WhatsApp integration will allow you to automate sharing real-time updates and notifications to both your customers and your team through WhatsApp. Your team can be notified about sales, new leads, customer queries, tasks and more seamlessly. Additionally, with the dynamic data from other apps, you can enhance customer interactions and engagement through personalization.
3. Simplified workflow management
Zapier is an easy-to-setup and user-friendly platform which makes it ideal even for those who aren’t technically proficient. Zapier’s dashboard provides a comprehensive view of your automated processes and allows you to manage all your workflows and integrations from there.
4. Integration flexibility
Zapier is a flexible platform that can integrate with different apps and services besides WhatsApp, which enables comprehensive workflows which can enhance your business processes and span across multiple platforms. You can also ensure that the integrations align with the requirements of your business operations by configuring triggers and actions within Zapier.
Steps To Automate WhatsApp Workflows on Zapier with Interakt
A. Getting Started with Zapier:
Create a free account on Zapier, or choose any of their paid plans. Since our method below makes use of a premium app ‘Webhooks by Zapier’, you would necessarily have to purchase a paid plan on Zapier to use the premium app.
Here’s the flow you need to follow on Zapier:
1. You need to specify a Trigger that will take place in your Software. Zapier will look out for that Trigger.
2. Whenever the trigger happens, Zapier will execute an Action via ‘Webhooks by Zapier’. The Action would be an API call to interakt’s API endpoint.
Let’s understand this better:
• Creating a Trigger – The Trigger steps will vary depending on the software you have chosen.
• Creating an Action – The Action steps will be uniform. While specifying the JSON Request Data of the API call, you will be required to select the particular fields (from the software with which you are integrating) whose values need to be mapped to the parameters in the API call. You will have to take care to select the right fields. We have shown the fields you should select while integrating with Zoho.
B. Creating a Trigger
1. In your Zapier account, click on ‘Create Zap’.
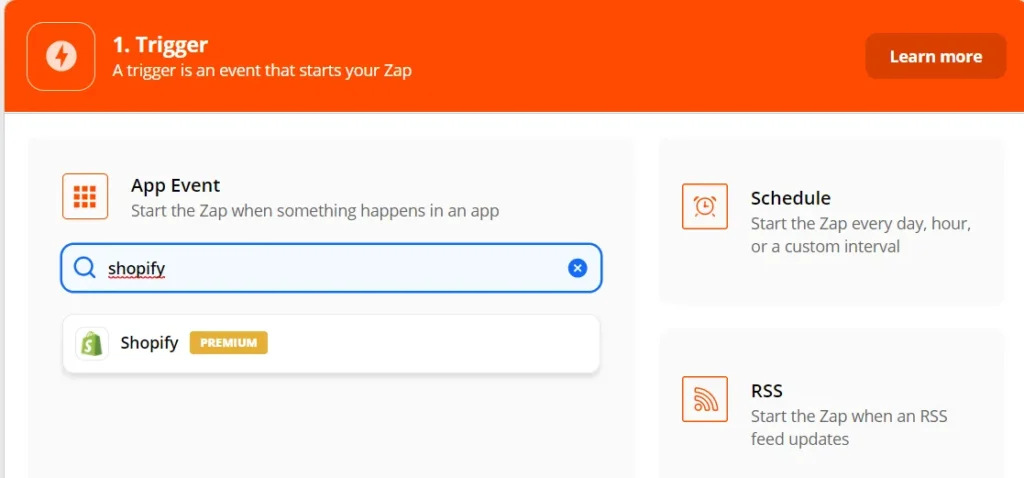
2. For the Trigger event, choose the app where the trigger event will occur.
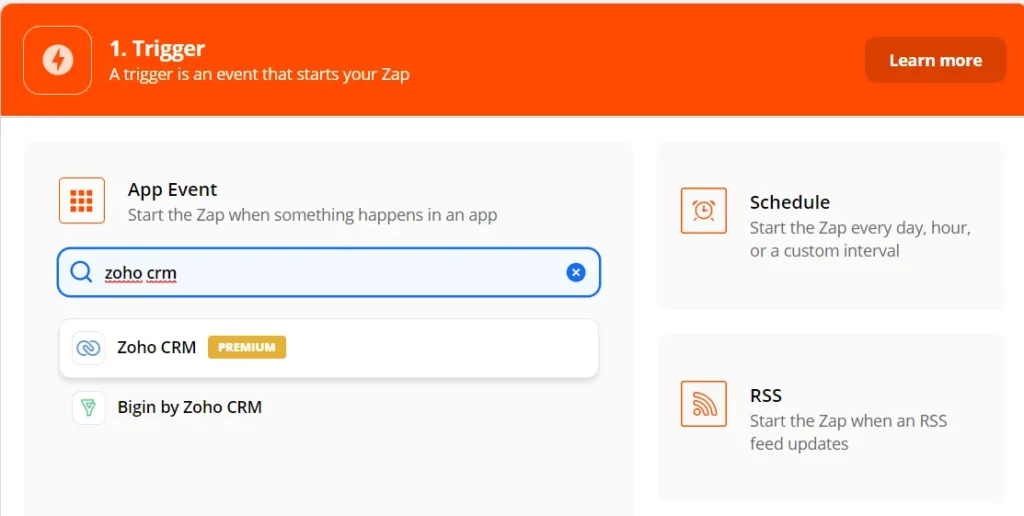
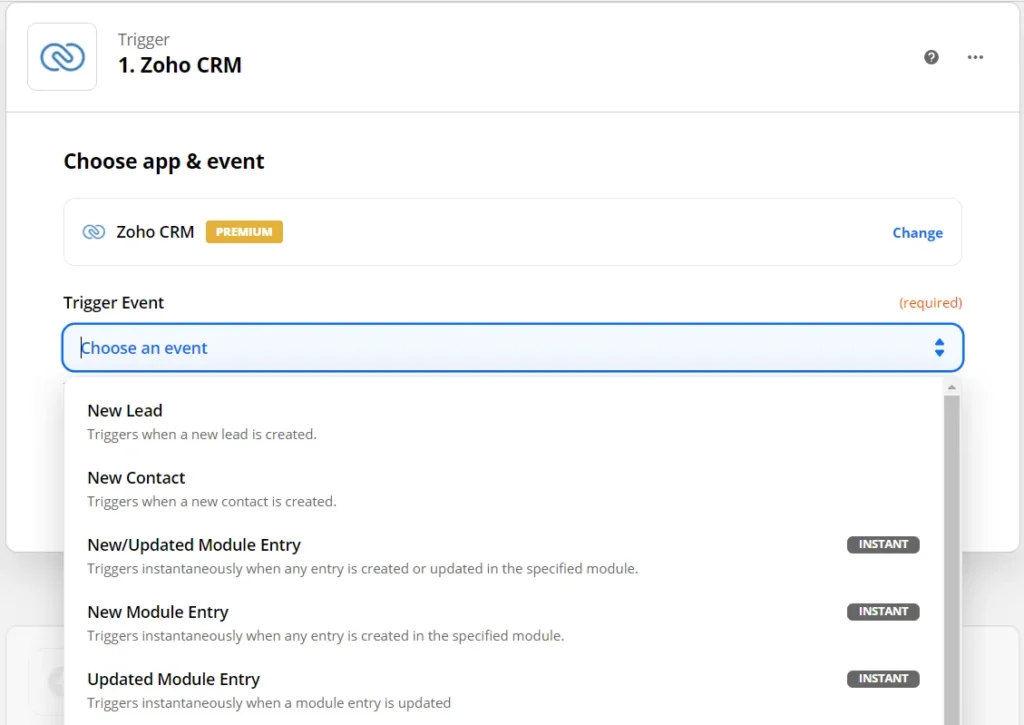
3. For Trigger Event:
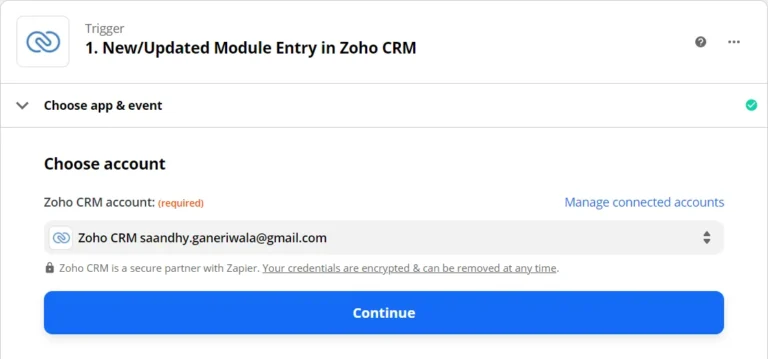
– In the case of Zoho CRM, choose the Trigger Event as ‘New/Updated Module Entry’’ – later you can select a particular Module (like Contacts, Calls) within which the event will be watched.
• Select Module as Contacts if you want contact details (added on Zoho) to get automatically added to Interakt
• Select Module as Calls if you want user call activity to get automatically added for that user on Interakt as an event
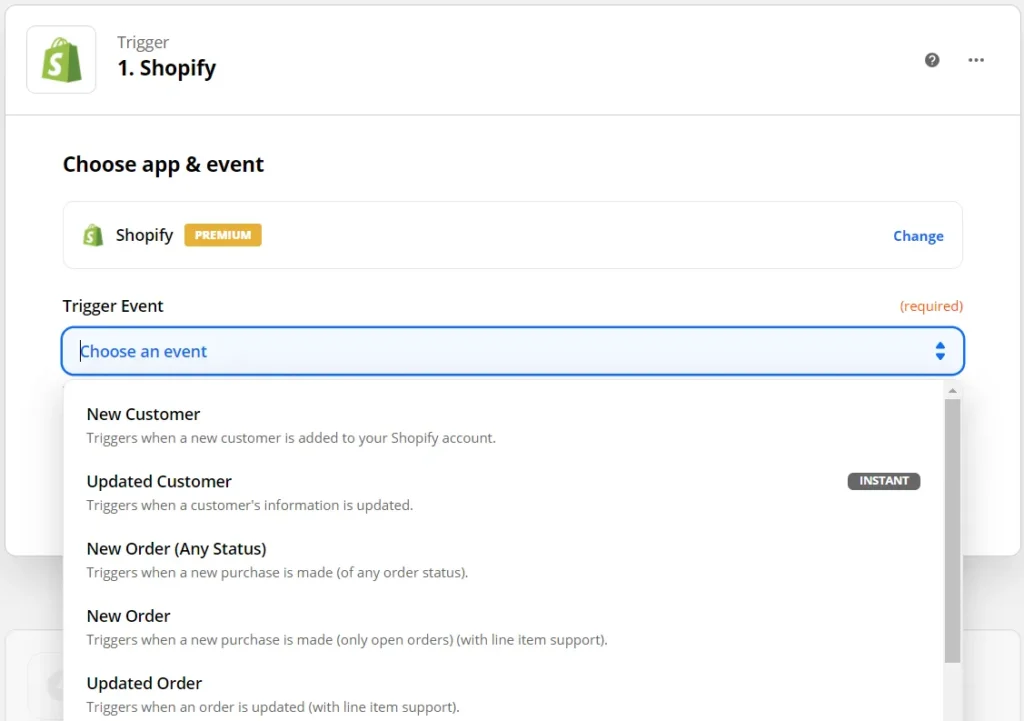
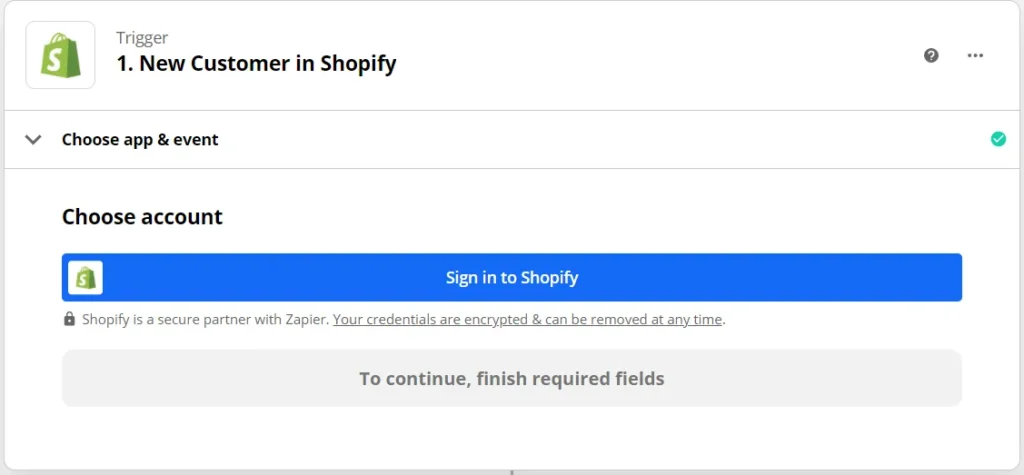
– In the case of Shopify, examples of Trigger Events which can be selected are:
• ‘New Customers’ – if you want to send details of a new customer to Interakt
• ‘New Order’ – if you want to send details of a new order placement to Interakt
• ‘New Abandoned Cart’ – if you want to send details of an abandoned check out event to Interakt
4. Next, you will need to connect your Zoho CRM / Shopify account with Zapier.

5. After your account has been connected, you might need to select a module from your CRM / store wherein the Trigger will be watched (For example – in the case of Zoho, the selected ‘Module’ could be ‘Contacts’).
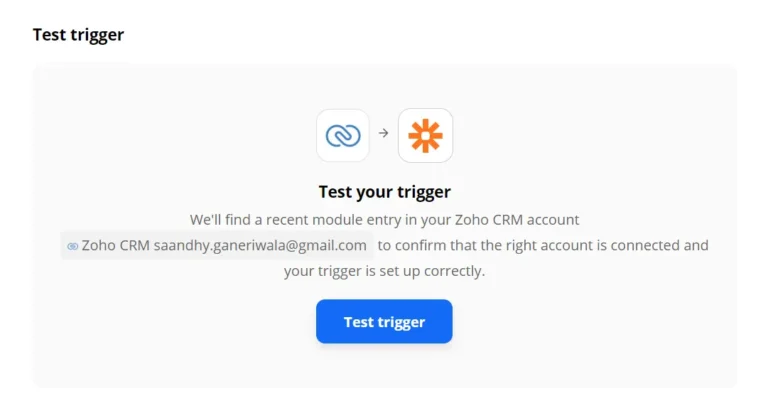
6. Zapier will then try to test the trigger. It will search for:
• A recent entry in the selected module in your CRM Zoho, or,
• It will try to find a recent customer / order / cart abandonment instance on your online store Shopify
C. Creating an Action
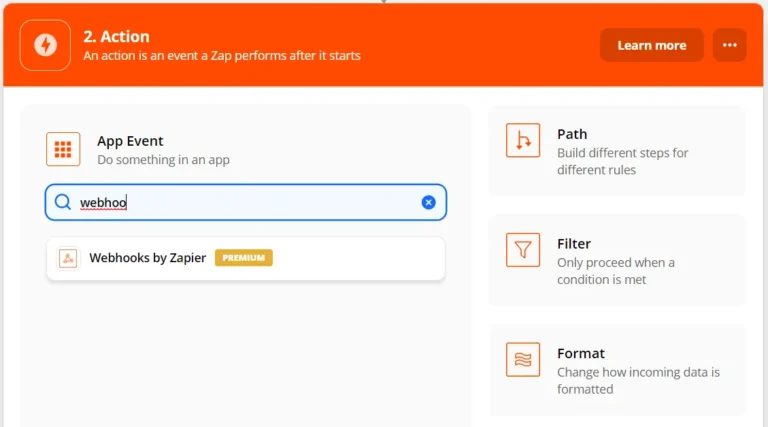
1. Once the trigger is tested successfully, click on ‘Continue’. For the ‘Action event’, select the app named ‘Webhooks by Zapier’.
2. In ‘Action Event’, choose ‘Custom Request’.
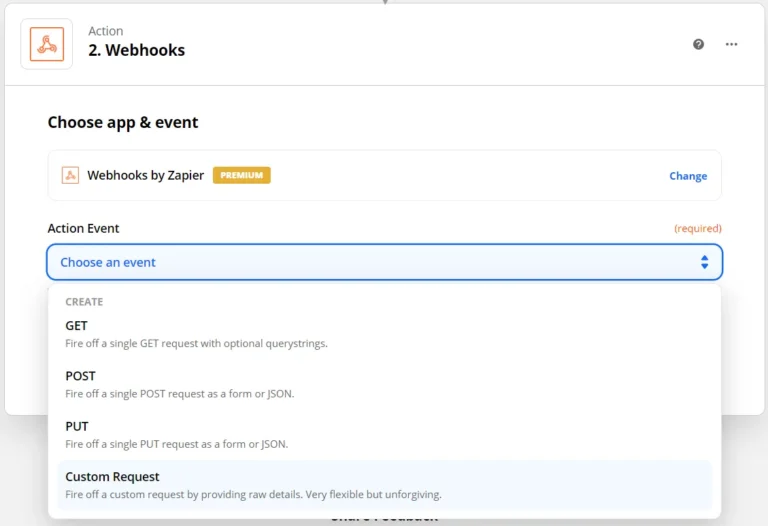
3. In ‘Method’ – choose Post
4. In the ‘URL’:
• If you are looking to add users (added in your CRM / software) to interakt, you can use: https://api.interakt.ai/v1/public/track/users/
• If you are looking to add events for a particular user (added in your CRM / software) to interakt, you can use: https://api.interakt.ai/v1/public/track/events/
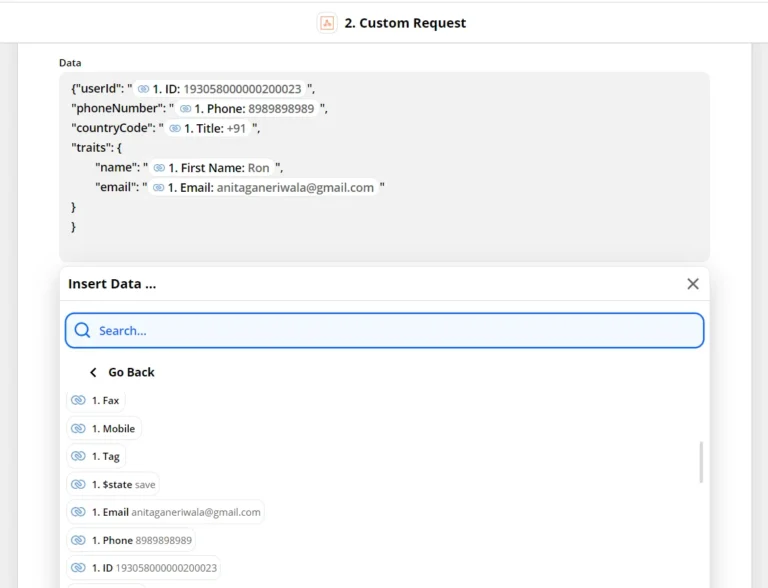
5. ‘Request Data’ section:
a. If you are adding a user:
{“userId”: “X”,
“phoneNumber”: “Y”,
“countryCode”: “Z”,
“traits”: {
“name”: “A”,
“email”: “B”
}
}
• X, Y, Z, A, B are all fields in Zoho / other softwares, whose value will be taken as the value for the parameters in the API call ie “userId”, “phoneNumber”, “countryCode”, “name”, “email”.
• You may choose the fields (X, Y, Z, A, B) as per your use case.
• Specifying either of “userId” or (“phoneNumber” & “countryCode”) is mandatory.
• We strongly recommend specifying the “userId” since the same can be referenced if you want to add an event for the same user.
• You can add as many traits as required and map the trait values to corresponding fields in your software (shown below for Zoho).
b. If you are adding an event.
{“userId”: “X”
“event”: “call made”,
“traits”: {
“startime”: “S”
}
}
• Make sure X = the field which you mapped against the parameter ‘‘userId’’ when you added this user to interakt (via triggering of the zap for adding the user)
• You can name the “event” as you wish. Here the “event” name is given as “call made”.
• You can give as many traits for the event as you wish. Here we have specified one trait “startime” which is mapped to S i.e. the “Call Start Time” field in Zoho.

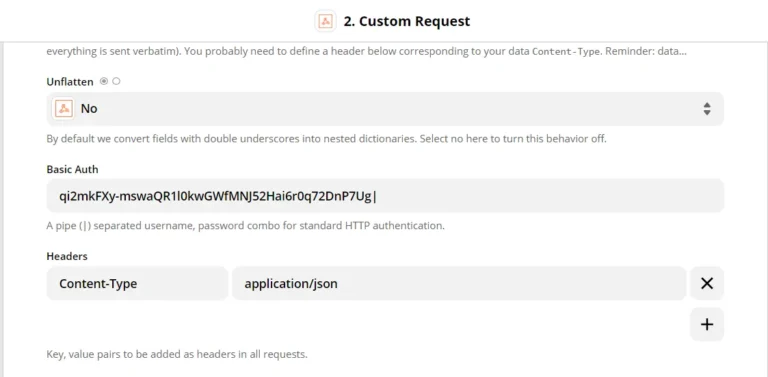
6. In ‘Unflatten’, choose No.
7. In ‘Basic Auth’, use the Base64 decoded version of the API key given in your account’s Developer Settings (remove the “:” at the end of the Base 64 decoded version and add a “|” there)
8. In ‘Headers’, provide ‘Content-Type’ as ‘application/json’
9. Then click on Continue.
D. Testing the Connection
10. So we’re almost there – before you take it live, you need to first test if the above connection works or not. For this, you could:
• Add a new user in your CRM / get a new user to sign up on your store (for example: here we show what happens when a new contact is created in the Contacts Module of Zoho)
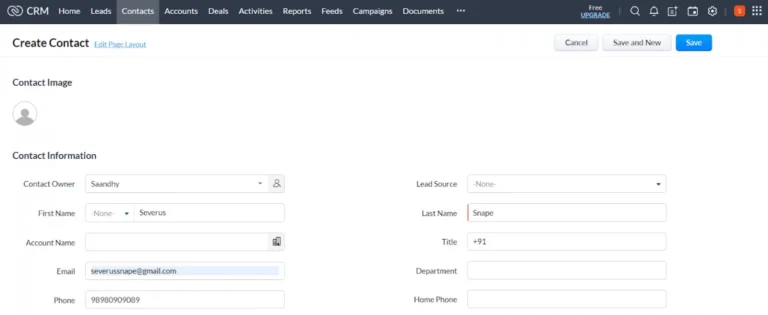
OR
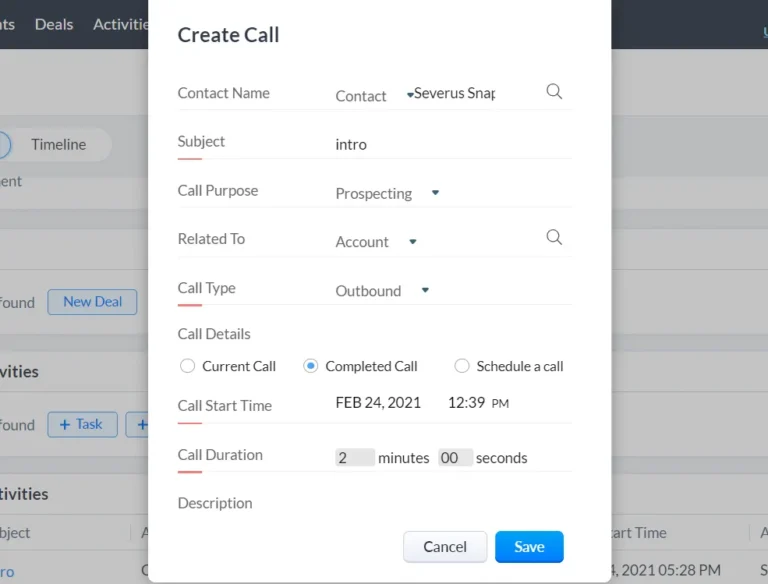
• Add a new action for the user in your CRM / get the user to take an action on your store (for example: here we show what happens when we add a new Call for the contact that we created in Zoho in the previous step)
• Then click on ‘Test & Continue’ on Zapier.
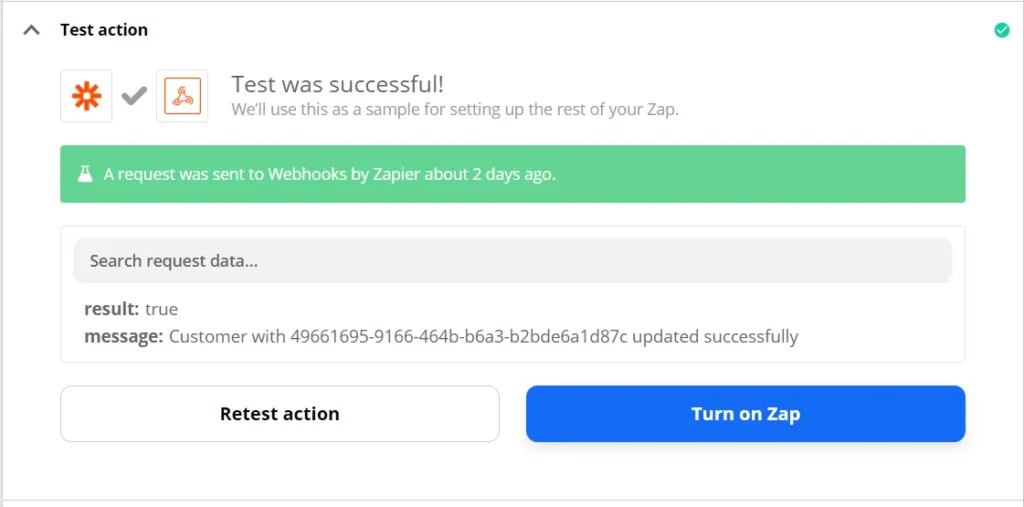
• Now, you will know that the Zap has worked if either of the below response messages are displayed:
– ‘Customer with <id> updated successfully’ (if you are looking to add / update a user)
– ‘Event created successfully’ (if you are looking to add an event)
• You could also check the result on your interakt account:
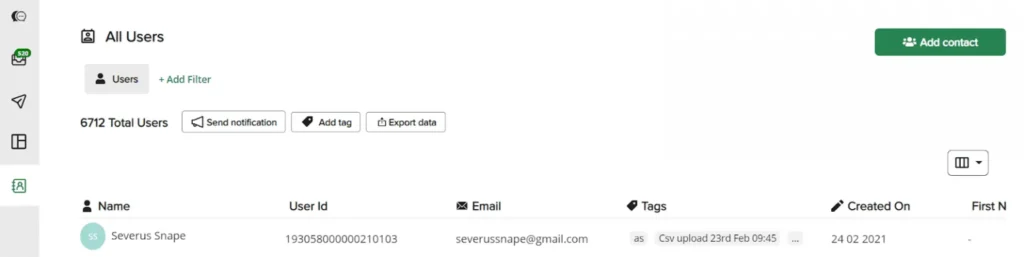
– Refresh the ‘Users’ page to see if the new user got added there or not.
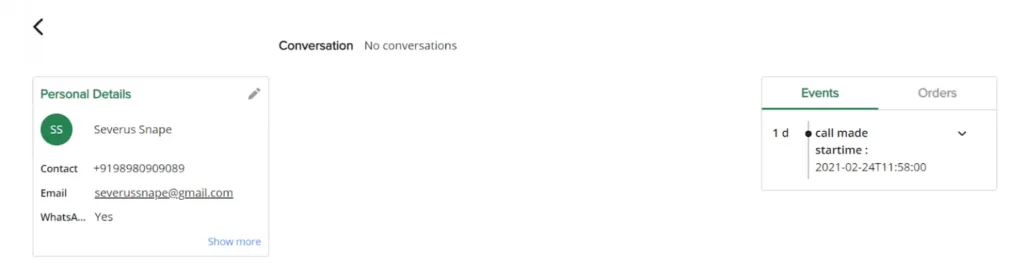
• Check the Events Timeline for that user to see if the event got added there or not
To check whether modification of the contact in your CRM / store translates into the contact being modified on interakt, this is what you need to do:
• Modify one of the field values of the contact you added (the field should have been used in the ‘Request Data’ above)
• Again, test the Zap in Zapier
• Check if the modules get executed.
• Go to your interakt account’s user page to check if the contact details got updated there
E. Setting the Connection Live
It’s time now to set the above connections live. On the bottom of your screen, you might notice a ‘Ready to turn your zap on?’ pop up. Just switch it to On and the Zap will be set live.
F. Sending an Automatic Notification on interakt
With your connection going live, you can now send WhatsApp Notifications via interakt for the below cases:
• When a new user is added to your interakt account from your CRM / store, or,
• When an event is received in interakt for a user from your CRM / store,
For this, you will need to set up an Ongoing Notification with the correct filter conditions. Setting up ongoing notifications on interakt can be done in just a few steps
Get set and ready to roll with connections on Zapier. Connect your apps to interakt via Zapier and work smarter with automated workflows. We’re here to assist you every step of the way.
If you face any issues in integrating any of your softwares to interakt via Zapier, just ping us on our WhatsApp support number!
Conclusion
Zapier to WhatsApp integration is your key to unlocking new doors than it was possible with just WhatsApp.
Integrate Zapier to WhatsApp with the assistance of Interakt to run highly performing workflows and carry out business processes smoothly and in a more cohesive way across all departments.