
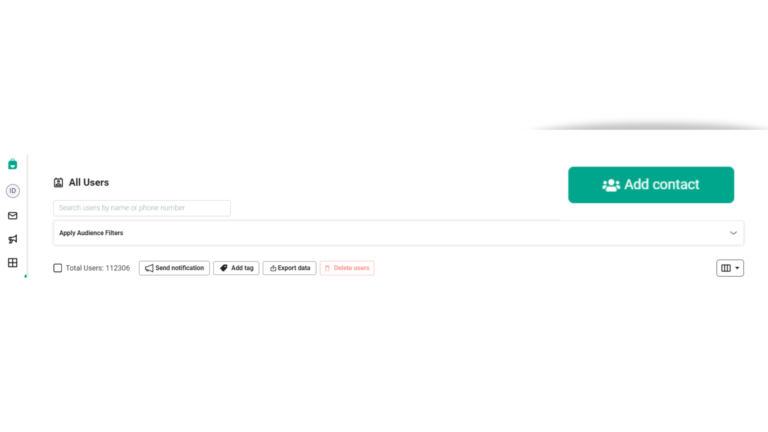
Welcome to Interakt’s Contact Management guide. It is also known as the All-Users Tab. The All-users tab is your smart contact book where you and your team can create, update, and manage your contacts on Interakt.
You can either do a bulk upload of the contacts or you can add them individually. You can also get an overview of all your business contacts in one dashboard – right from their basic contact details like name, contact number, or email ID to tags and any other information that you choose to specify as a customer detail. Interakt’s contact management feature lets you easily apply filters in the All-Users dashboard and pull up user details based on specific criteria. You also have the option to export your entire contact list or a filtered set of contacts as a CSV file.
In this article, we will understand the process of uploading your customer contacts on WhatsApp using Interakt’s All Users Tab.
How To Upload Contacts To Interakt
1. To upload new data on the Interakt Platform, you first need to go to the All User tab and click on Add Contact.
2. Once you click on the button, you’ll get the below pop-up on your screen. You’ll get three options here –
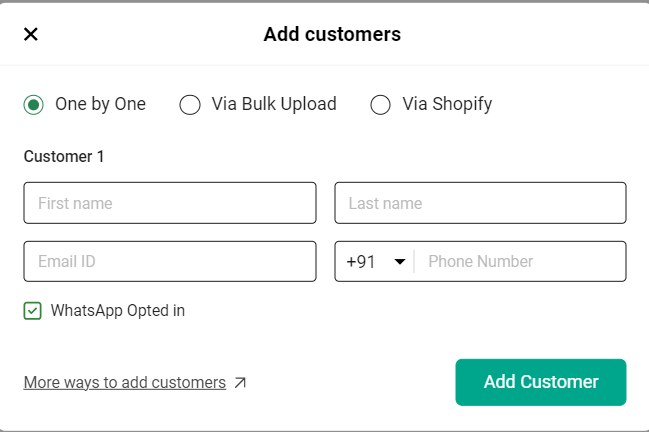
A. One by One
This option can be quite helpful if you want to add just 1 or 2 customer data to your database. Once the required details are added, just click on the Add Customer button and the user details will be added to the Interakt account. You’ll also be notified on the far right corner – Customer Details Added Successfully.
B. Via Bulk Upload
1. Prepare a CSV file with all the necessary details such as name, phone number, country code, email address, etc.
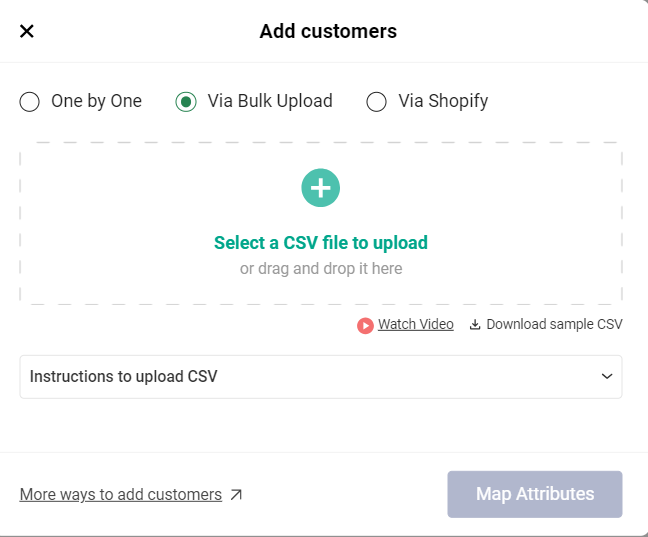
2. Upload the CSV file.
3. After uploading, you will need to add a tag to the list.
4. You can select one of the default tags, or click on “+See More” to explore custom tags or create a new tag for your list.
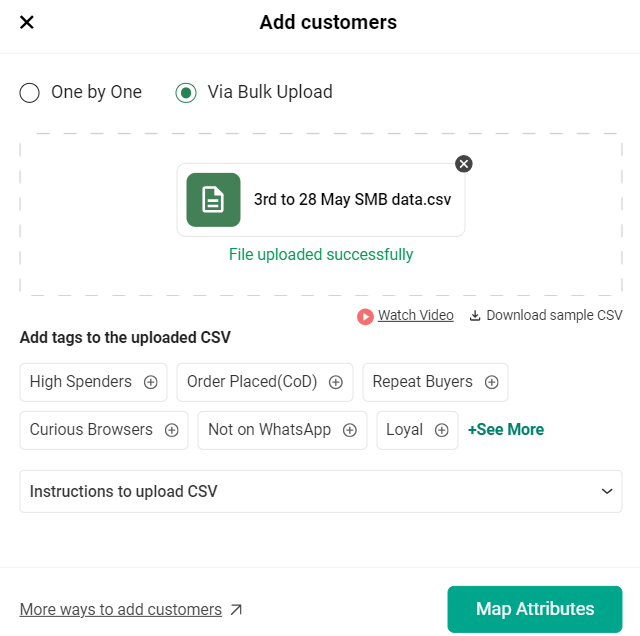
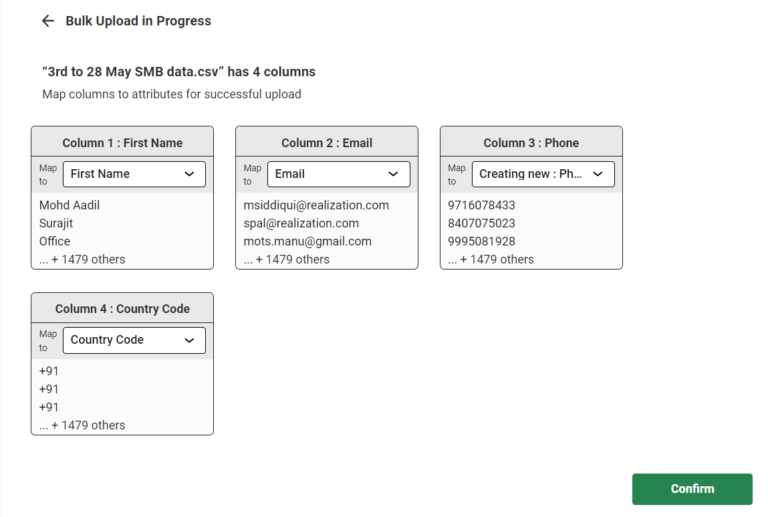
5. Once you have added the Tags, click on Map Attributes and you’ll be redirected to the attributes page. Here you can check if the details are mapped under the right categories and click on Confirm >> Finish Upload
Some Best practices for Bulk Uploading the customer data
• Max 50 MB file allowed, i.e., up to 500000 contacts
• CSV should mandatorily contain the Phone Number & Country Code in any 2 columns.
• If 2 (or more) contacts in CSV have the same phone number, they might not be added.
• If a contact in the CSV already exists in your account, the existing contact’s traits will be updated as per the traits given in the CSV. (matching of contacts is done based on Phone Number)
• To update the WhatsApp Opted status of a customer, include a column titled WhatsApp Opted and enter either TRUE or FALSE as the column values.
• To add a DateTime type trait (for example: birth_date, last_order_date etc), please provide column values in ISO format. For example – If suppose you want to pass the date time 31st October 2022 7:30 pm IST, you can do so in any of the below formats:
1.2024-10-31T19:30:00.000+05:30
2.2024-10-31T14:00:00Z
3.2024-10-31
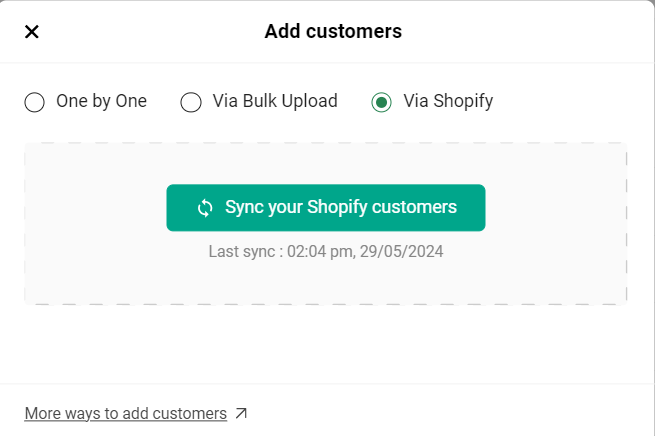
C. Via Shopify
For Shopify merchants, Interakt provides a seamless solution to sync customer data from the Shopify App to the Interakt platform.
Simply choose “Via Shopify” in the pop-up, then click the “Sync your Shopify customer” button. All your Shopify customers will be effortlessly synced to your Interakt account.