
")
Via Interakt, you can now let your customers prepay a discounted amount for your CoD orders, on WhatsApp itself.
This is how the flow will work:
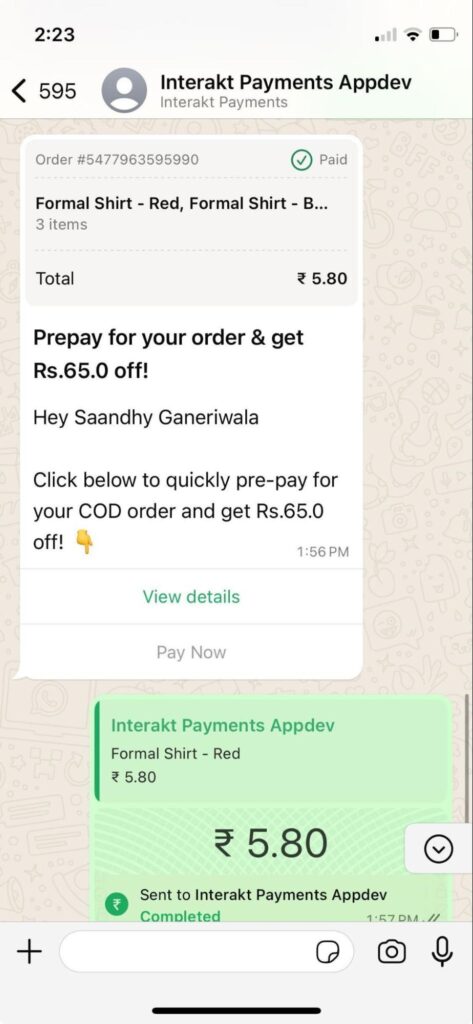
1. Once a CoD order is placed on your Shopify store, a ‘WhatsApp Pay message’ (as shown in the image below) will automatically be sent to your customer, offering them a discount for pre-paying.
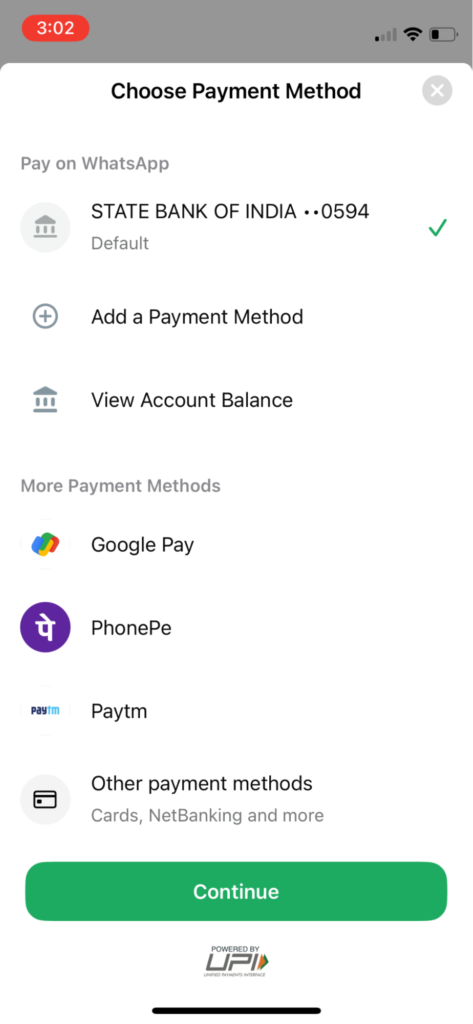
2. The customer can then make the payment on WhatsApp itself (via WhatsApp UPI / any UPI app on their phone / netbanking / cards etc).
(Note:
• WhatsApp Native payment feature is available for businesses with a +91 WhatsApp API number.
• WhatsApp Pay messages can only be sent to customers with +91 mobile numbers.
• You need to have an account with either Razorpay or PayU to be able to use WhatsApp Pay via Interakt.)
3. While setting up the CoD to Prepaid flow on Interakt, you’ll need to set an expiry period on the pre-payment option. Doing so will help prevent situations where customers pre-pay for orders after they’ve been shipped. For the expiry period, it is recommended to set the minimum time it would take for the order to be shipped.
4. After a customer has prepaid for the CoD order on WhatsApp, we will update the same in your Shopify store. This updation will be as per what you’ve configured while setting up the ‘CoD to Prepaid’ flow. The 3 configuration options available are as follows:
a. The old CoD order will be tagged as ‘Converted to Prepaid’.
b. The old CoD order will be tagged as ‘Converted to Prepaid’ + it will be cancelled + a new order will be created + the new order will be marked as paid + the new order will be tagged as ‘CoD to Prepaid’
c. The old CoD order will be tagged as ‘Converted to Prepaid’ + it will be marked as Paid
5. Whenever a customer pre-pays for a CoD order on WhatsApp, we will also send email alerts to your team members. While setting up the ‘CoD to Prepaid’ flow on Interakt, you can specify the email ids which should receive email alerts.
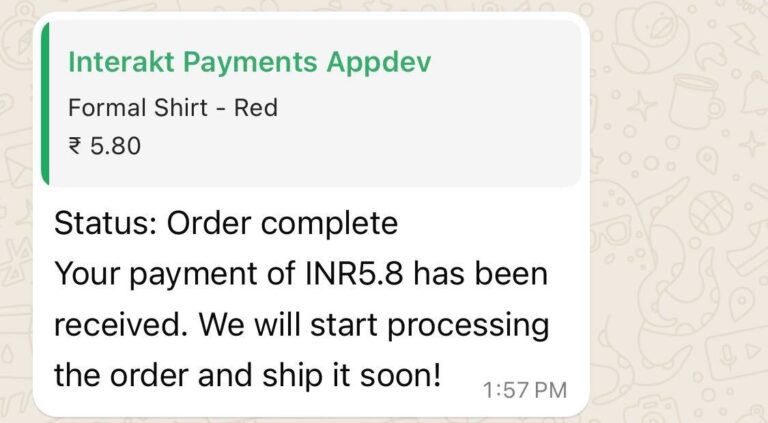
6.When a customer pre-pays for a CoD order on WhatsApp, a payment confirmation message is also sent to them automatically.
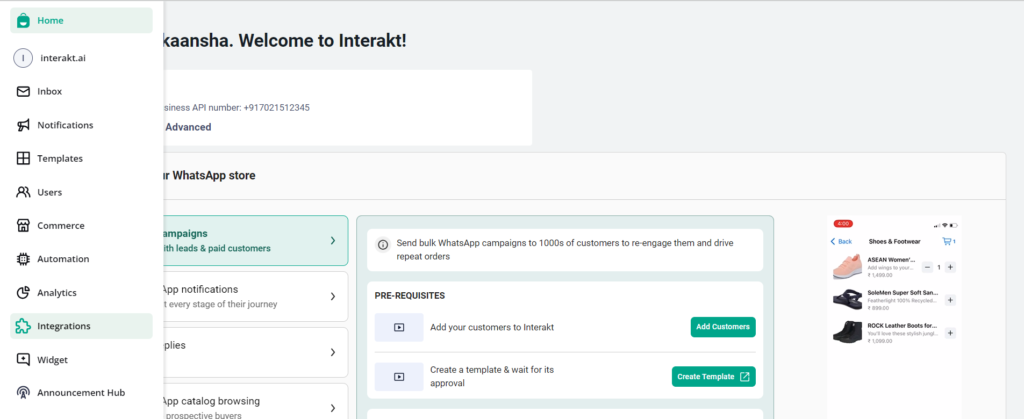
How to set it up on Interakt?
To set up the ‘CoD to Prepaid’ flow on Interakt, you need to do the following:
1. Create & install a Custom App on Shopify & enter the ‘Admin API Access token’ on Interakt
2. Activate WhatsApp Pay
3. Specify the discount that you want to offer customers for prepaying
4. Specify expiry period for the prepayment option
5. Specify how the order should be updated on Shopify (after customer has prepaid for it)
6. List the email ids on which we should send alerts (after each cod to prepaid conversion)
7. Get approval for the CoD to Prepaid template & set the campaign live
8. How to get a report of CoD orders which have been converted to prepaid?
9. [Optional] Send a personalised confirmation message for the prepayment
1. Create & install a Custom App on Shopify & enter the ‘Admin API Access token’ on Interakt
– In your Shopify Store Admin, click on ‘Settings’ in the bottom left.
– Next, click on ‘Apps and sales channels’ in the left.
– At the top, click on ‘Develop apps’.
– At the top right, click on ‘Create an app’.
– In the popup provide an app name (can be anything) & choose yourself as the app developer.
– Then click on ‘Create app’.
– In the page that opens, click on ‘Configure Admin API scopes’.
Select the following scopes from the list
-“Write_order_edits”
-“Read_order_edits”
-“Write_orders”
-“Read_orders”
– Then, click on Save. Make sure that these 4 scopes have appeared in the ‘Selected’ tab.
– Next, click on ‘Install App’.
-In the popup that opens, click on ‘Install’.
-After installation is done, click on ‘Reveal token once’ in the box titled ‘Admin API access token’.
– Make sure you properly copy the access token since it will be made visible only once.
-Paste this access token on Interakt.
2. Activate WhatsApp Pay
• WhatsApp Native payment feature is available for businesses with a +91 WhatsApp API number.
• WhatsApp Pay messages can only be sent to customers with +91 mobile numbers.
• You need to have an account with either Razorpay or PayU to be able to use WhatsApp Pay via Interakt.
Connect Payment Gateway on Facebook Business Manager:
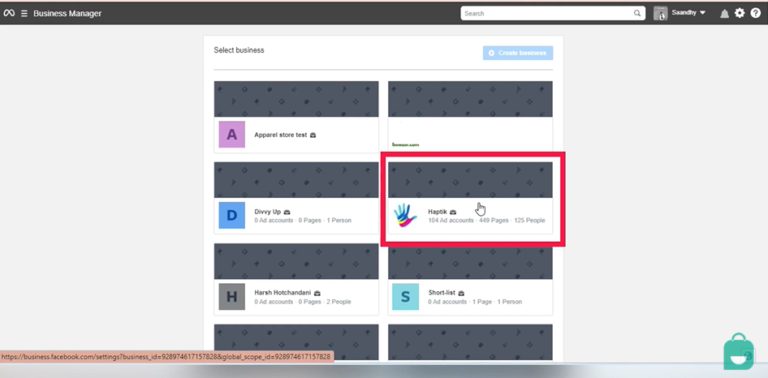
– Log into your Facebook business manager account at business.facebook.com/settings.
– Select the Facebook business containing your WhatsApp business account.
– Navigate to WhatsApp accounts > Settings > WhatsApp Manager.
– Hover over the left panel and click on India.
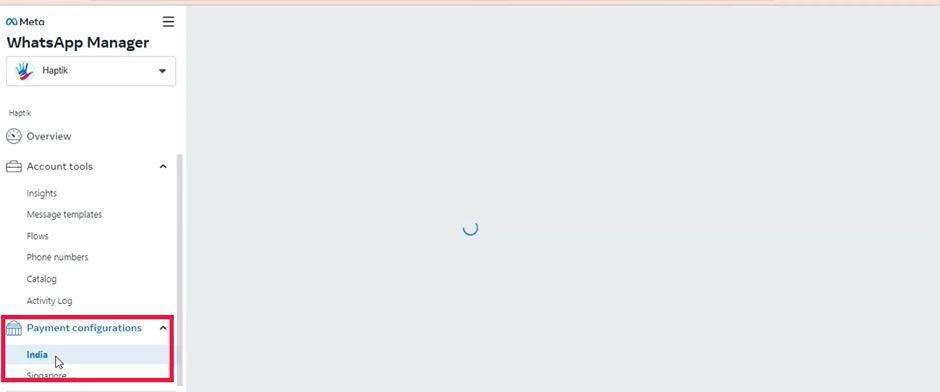
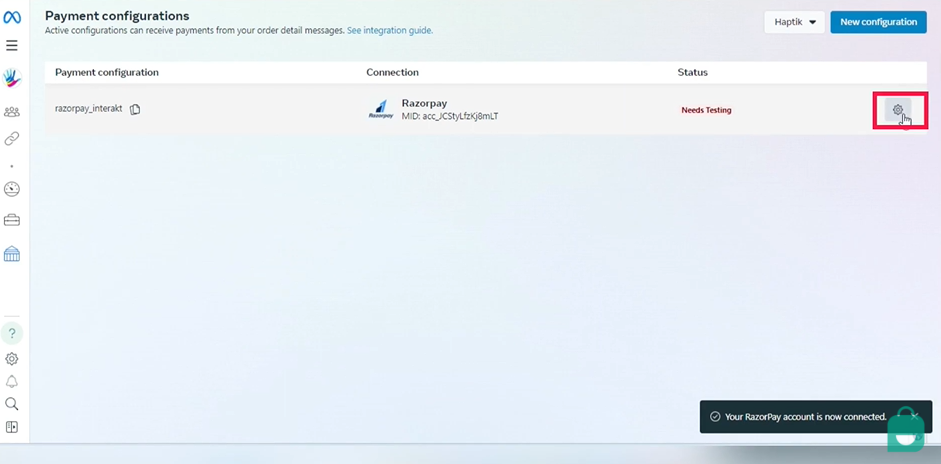
– Under the payment configurations, click on ‘New Configuration’.
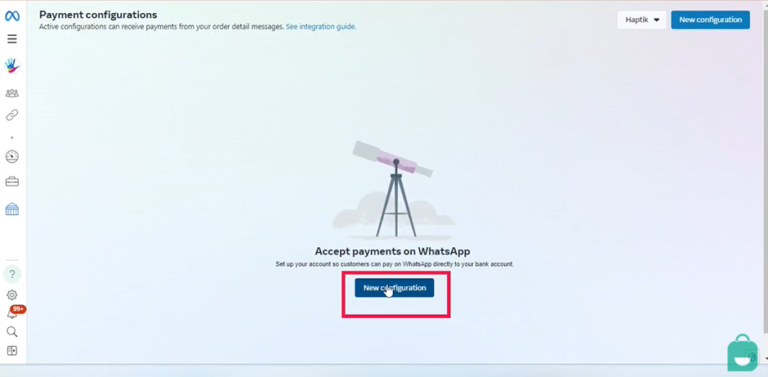
– Then click on ‘Get Started’.
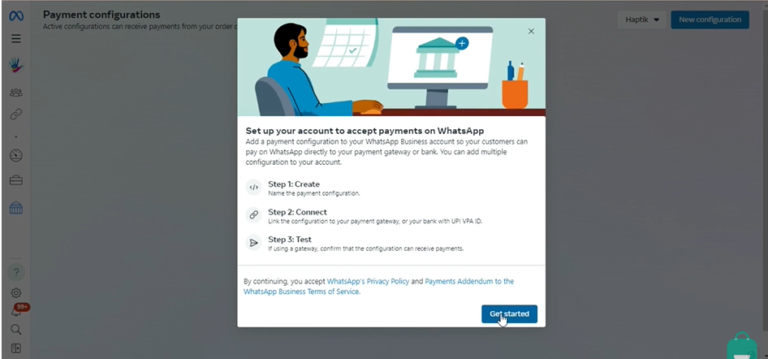
– Choose between Razorpay and PayU as the Payment Gateway.
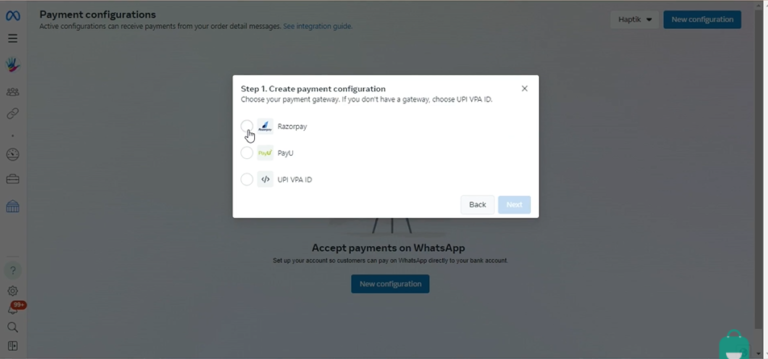
– Enter a payment configuration name, Merchant category code, and purpose code.

– You would be asked to enter your Facebook password again at this stage

Now click here (the highlighted part)
– Now select either of the two options provided here to connect the payment Gateway. You can either choose to connect the payment Gateway yourself immediately or you can email another member of your team to do the integration.
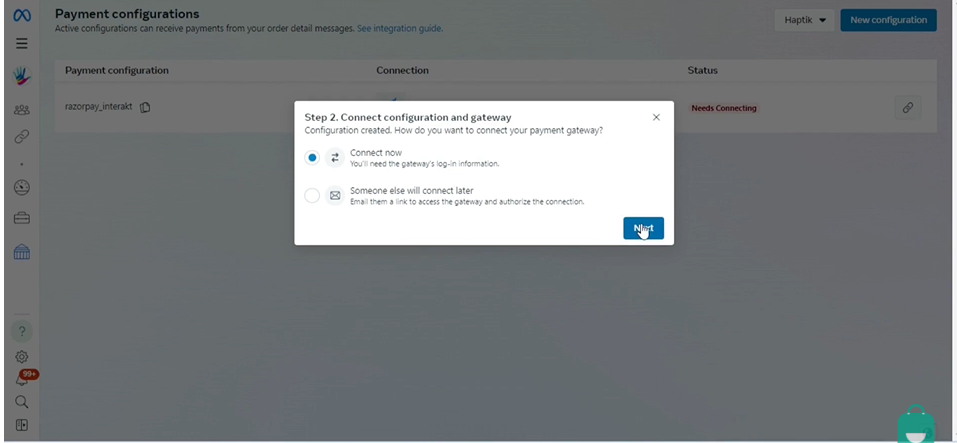
– Once you click on ‘Next’ you will be redirected to the payment gateway account where you will be required to give certain permissions to FaceBook.
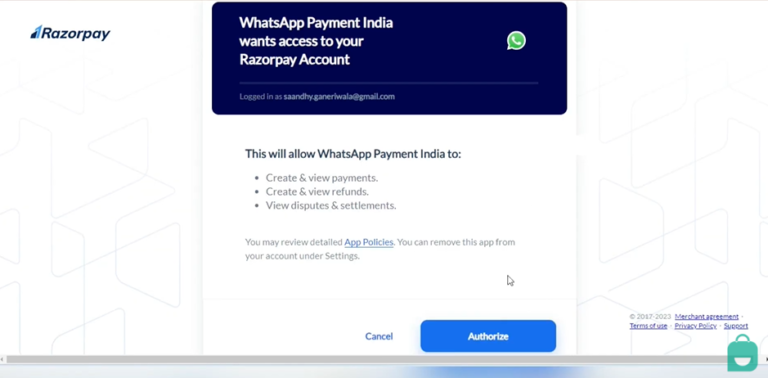
– Next, you’ll be brought back to Facebook, click on ‘Settings’
– Now click on ‘Test’ on the pop-up box.
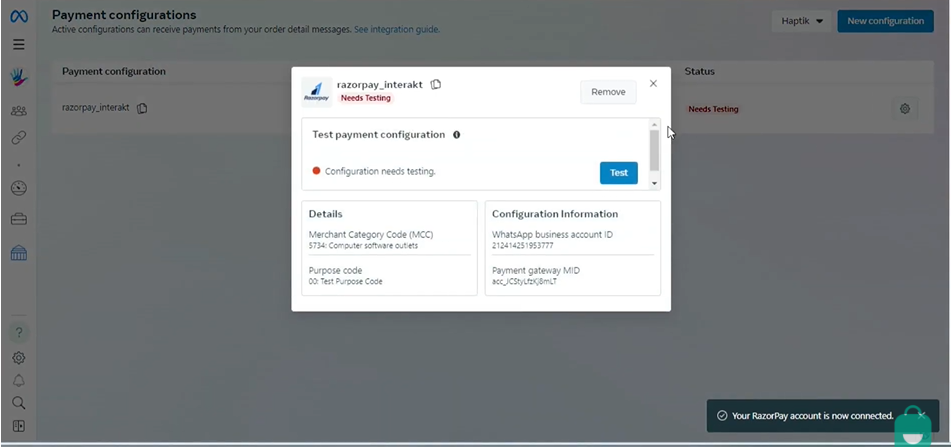

– If you see the – ‘Configuration Test Succesful’ message, you can now start receiving payments via WhatsApp Pay.
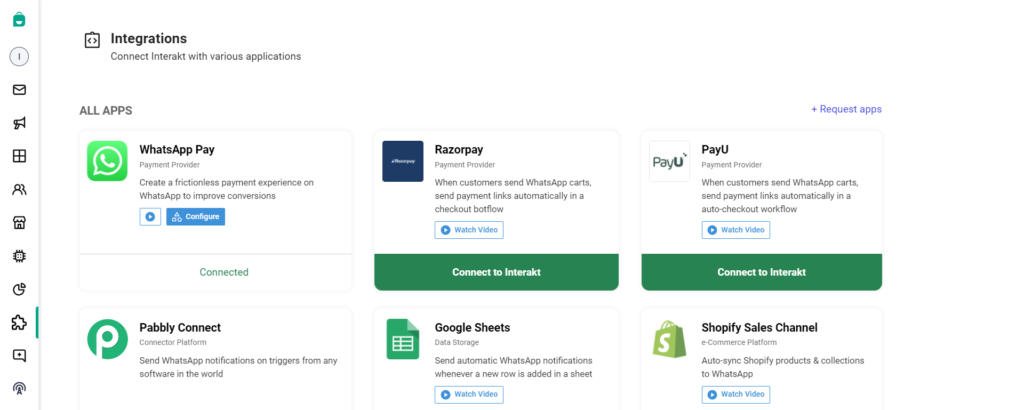
Activate WhatsApp Pay App on Interakt
– Go to the Integrations page on Interakt.
– In the WhatsApp Pay app card, click on ‘Connect’.
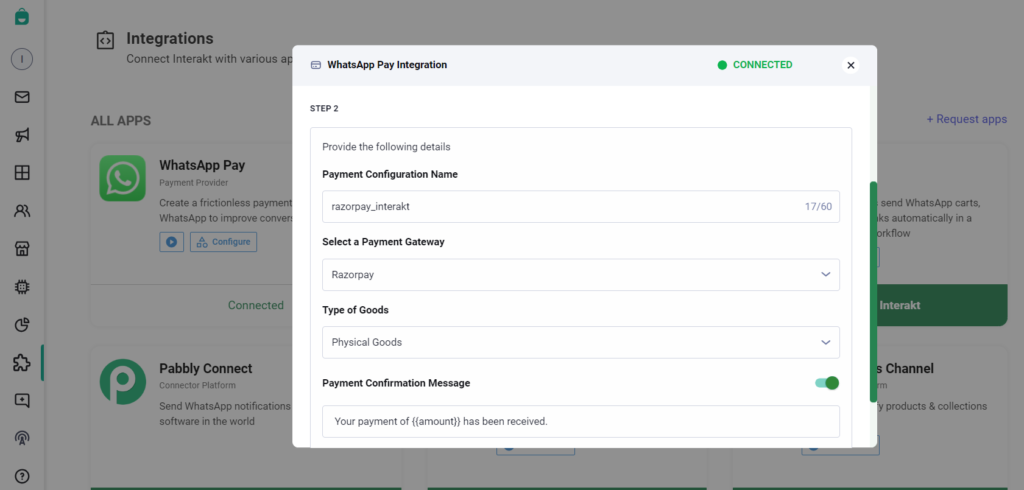
– Enter the same payment configuration name used in Facebook business manager
– Select the payment Gateway chosen in Facebook business manager.
– Specify the type of goods your business deals in.
– Customize the confirmation message template for payment completion. This message will be automatically sent to your customer when they make a payment via the WhatsApp Pay message.
Note – While configuring this message from the Integrations section, you can only include a variable for the {{amount}}. If you want to put more details in the confirmation message regarding the prepayment discount given, new order number, etc, you will have to configure a separate Ongoing Campaign with the event ‘COD to Prepaid Order Created’ as the trigger event. This event is sent for a customer whenever the customer prepays for a CoD order. You can map variables in your confirmation template to the traits within this event.
– Submit the configuration and wait for it to be enabled
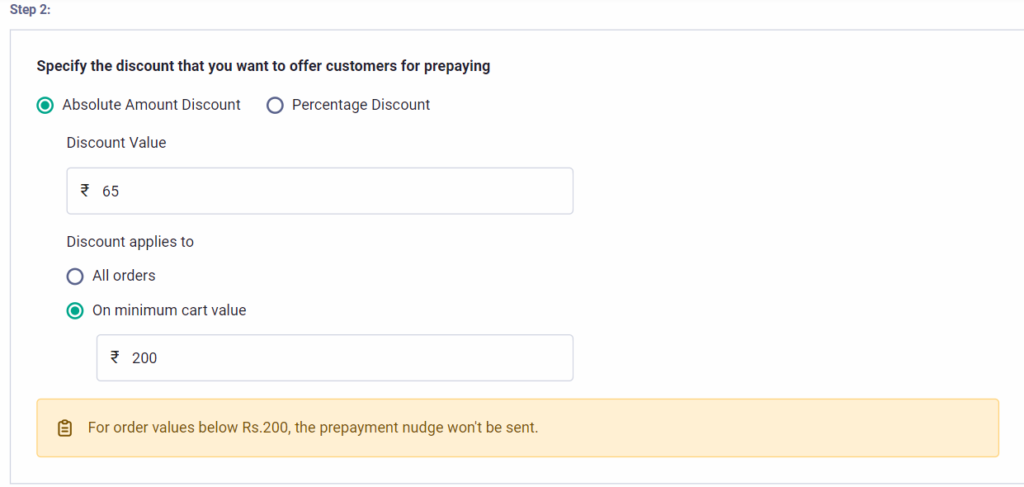
3. Specify the discount that you want to offer customers for prepaying
To incentivize customers to prepay for the order, a discount can be configured on the order value.
You can choose to apply any of the below kinds of discounts:
• Absolute Amount Discount
• Percentage Discount
Additionally, you can specify a minimum order value, below which the discount should not be applied.
Note – If a CoD order below the minimum order value is placed, then, the prepayment nudge won’t be sent to the customer at all.
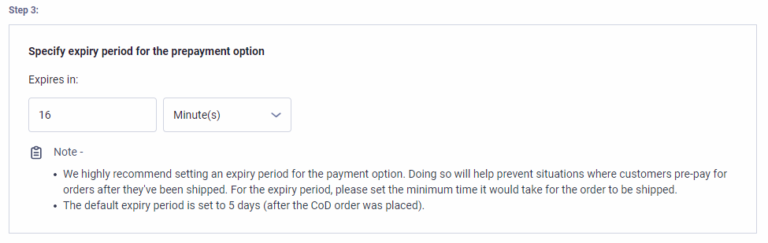
4. Specify expiry period for the prepayment option
Next step is to specify the expiry period for the prepayment option (expiry period is calculated from the time of placement of the CoD order). Doing so will help prevent situations where customers pre-pay for orders after they’ve been shipped. For the expiry period, it is recommended to set the minimum time it would take for the order to be shipped.
For example: If your team generally takes 24 hours to ship / dispatch an order, then, you should enter an expiry period lesser than 24 hours.
By default, the expiry period will be assumed to be 5 days after the CoD order was placed.
5. Specify how the order should be updated on Shopify (after customer has prepaid for it)
After your customer has prepaid for a CoD order, it would be very important for the same to be updated against that order on your Shopify admin & also in your Shipping Provider’s system.
There are 3 options available for this updation:
a. The old CoD order will be tagged as ‘Converted to Prepaid’.
b. The old CoD order will be tagged as ‘Converted to Prepaid’ + it will be cancelled + a new order will be created + the new order will be marked as paid + the new order will be tagged as ‘CoD to Prepaid’
c. The old CoD order will be tagged as ‘Converted to Prepaid’ + it will be marked as Paid
If your team manually updates orders in the Shipping Provider’s system, then, ( a ) or ( c ) would be ideal for them.
If the details of your orders get updated into your Shipping Provider’s system automatically from Shopify:
– And, your Shipping provider doesn’t allow changing a CoD order’s payment status → then option ( b ) would be most suitable
– And, your Shipping provider allows changing a CoD order’s payment status → then option ( c ) or ( b ) would be most suitable
Note regarding option ( b ):
As written in option ( b ), after prepayment, the existing CoD order will be tagged as ‘Converted to Prepaid’ and then cancelled. Upon cancellation, you would ideally not want to send a cancellation email or whatsapp message to your customer (as that could confuse them). From our end, we will ensure that:
– the standard cancellation email (sent by Shopify by default) won’t be sent for such cancellations.
– Moreover, we will also ensure that the order cancellation WhatsApp notification won’t be sent from your WhatsApp API number connected to Interakt.
However, if you have any email / sms automation app installed in your Shopify store, please ensure that cancellation emails are not sent for orders with the tag ‘Converted to Prepaid’.
In updation process (b), after canceling the existing order, we also create a new paid order in your Shopify admin and tag it as ‘CoD to Prepaid’. For this ‘paid’ order also, you might not want to send a confirmation email or whatsapp to your customer (as that could confuse them). From our end, we will ensure that:
– the standard order confirmation email (sent by Shopify by default) won’t be sent for such ‘CoD to Prepaid’ orders.
– Moreover, we will also ensure that the order confirmation WhatsApp notification won’t be sent from your WhatsApp API number connected to Interakt.
However, if you have any email / sms automation app installed in your Shopify store, please ensure that confirmation emails are not sent for orders with the tag ‘CoD to Prepaid’.

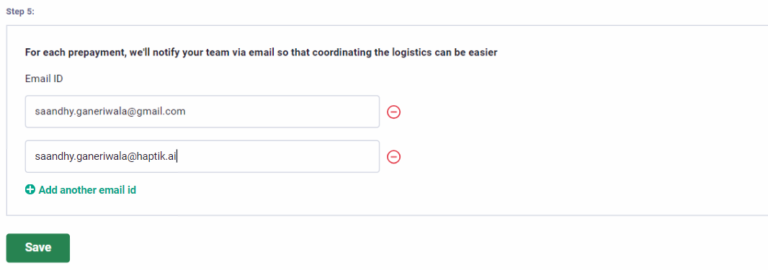
6. List the email ids on which we should send alerts (after each cod to prepaid conversion)
In case you want your team members to be alerted every time there is a CoD to Prepaid conversion, you can specify upto 6 email ids on which email alerts are to be sent.
7. Get approval for the CoD to Prepaid template & set the campaign live
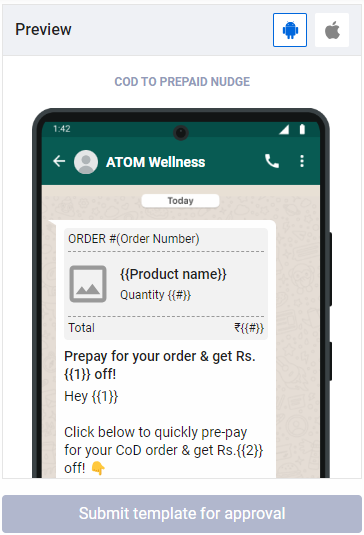
1. Next, you’ll have to get the WhatsApp Pay message template approved (which will be sent as the Prepayment Nudge to your customers).
2. We have created a sample message template as shown in the image. If you want to create a template of your own, we have explained below (in point 5) how that can be done.
3. You can simply click on ‘Submit template for approval’ button and this sample message template will be submitted. The approval should also come within a few minutes.
4. After the approval has come in, you will see a button to Set Live the ‘CoD to Prepaid’ campaign. You can click on it and the campaign will be set live.
5. You will also see a button to ‘Edit Campaign’. You can click on this button if you want to do any of the following:
• If you want the prepayment nudge to be sent few minutes / hours after the CoD order was placed, you can configure the same from the trigger settings of the campaign
• If you want to change the message template, you can do so from the Choose Template step in the campaign. Note → A custom ‘WhatsApp Pay’ template can currently only be created from your Facebook Business Manager account. Note the steps below:
– Go to https://business.facebook.com/wa/manage/message-templates/. You’ll have to log into your FB account and select the FB Business which hosts your WhatsApp API account.
– Click on Create Template on top right.
– While selecting Category, make sure you select Utility → Order details message.
– In the text header or body, you may include a variable for showing the prepayment discount amount to the customer. You can include other variables as well.
– After the template has been submitted & approved, you’ll have to sync the template into your Interakt account. To do that, go back to the Templates page in Interakt and click on ‘Sync’.
– After the template has appeared in your Interakt account, you will be able to select it from the list of approved templates, in the Choose Template step of campaign creation.
– Note that the variable where you want to show the prepayment discount, should be mapped to the following event trait : order cod → prepayment_discount

• After the campaign is set live, you can view the delivery stats of the campaign by going to the campaign details page.
8. How to get a report of CoD orders which have been converted to prepaid?
To get a report of the CoD orders converted to prepaid, you can simply filter the Orders list in your Shopify admin by the tag ‘Converted to Prepaid’.
You can also find the list of all customers who have prepaid for a CoD order, from your Interakt account. Go to the Users page and filter the user list by the event ‘Converted to Prepaid → Created On → has any value’.
9. [Optional] Send a personalised confirmation message for the prepayment
As mentioned before, you can configure 2 kinds of confirmation messages for prepayment:
1. Generic confirmation message – This confirmation message can only contain the ‘amount’ (which has been prepaid) as a variable. This can be configured from the Integrations page (WhatsApp Pay app).
2. Personalised confirmation message – To send a confirmation message with personalised variables like customer name / cod order number / new order number / prepayment discount etc, you’ll have to:
a. Set up an Ongoing Campaign on Interakt
b. In the trigger, select the event as ‘COD to Prepaid Order Created’ (note – this event will appear in the trigger events list only after cod to prepaid conversion has happened for atleast 1 customer in your account)
c. In the template message that you select, map the variables to traits within the event ‘COD To Prepaid Order Created’