
WhatsApp Business API offers businesses direct communication with their customers. To access WhatsApp API businesses have to be subject to certain criteria introduced by WhatsApp.
In this article, we will dive into the essential WhatsApp API requirements that businesses must meet to successfully setup WhatsApp Business API.
• Getting started with Facebook business Verification Process
• Application Process on Business Verification
• Approval review on Facebook Business Manager
• Quick Tips
• What should you do in case of a rejection?
List Of Documents To Get WhatsApp Business API
1) Getting started with Facebook Business Verification Process
• To apply for Facebook Business Verification, you need to submit documents that support the registered business’ legal name, address and phone number.
Facebook cross checks with the MCA (Ministry of Corporate Affairs) records to validate any information you submit to them. Hence, it is absolutely essential to submit the most up-to-date and correct documents because any discrepancy can lead to rejection or further questions.
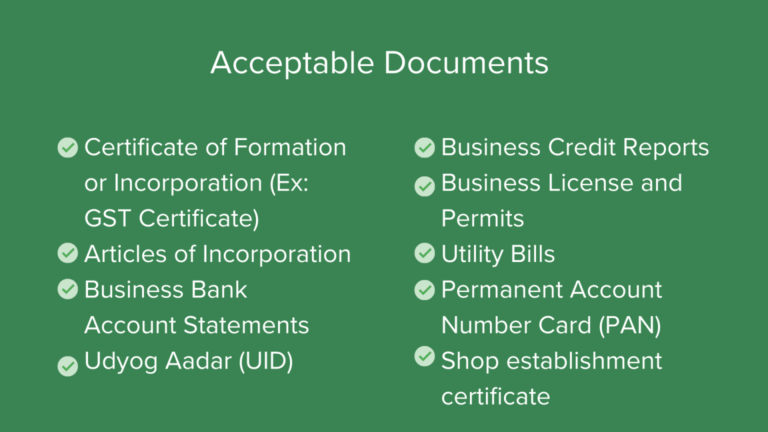
• Here’s a list of the WhatsApp API documentation required for WhatsApp Business API account that are mandatory for Facebook Business Verification (in order of recommendation).
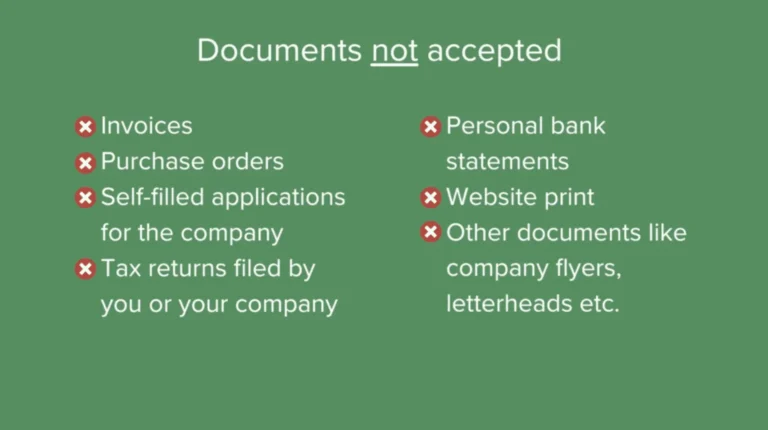
• Here’s a list of the documents that are not acceptable for Facebook Business Verification
2) Application Process for Business Verification
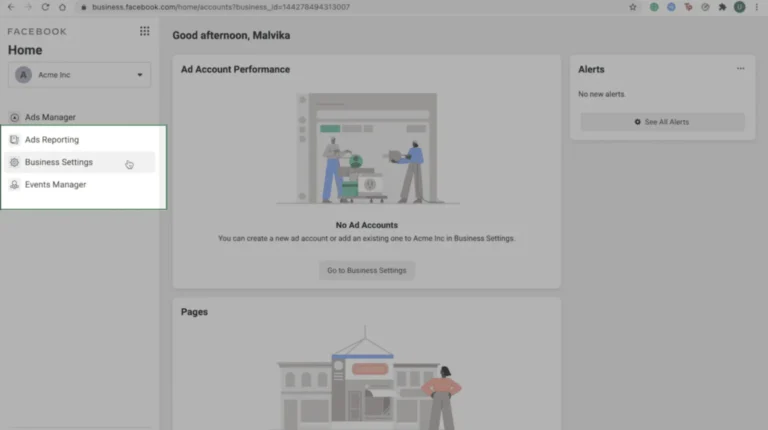
Step 1: To access your Facebook business manager account, go to your Facebook account and click on Business Settings.
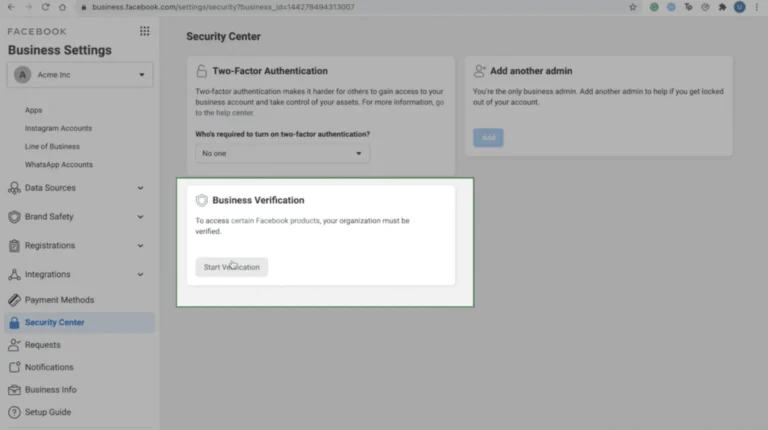
• On the left hand-side panel, scroll down and find Security Center, and click on Start Verification.
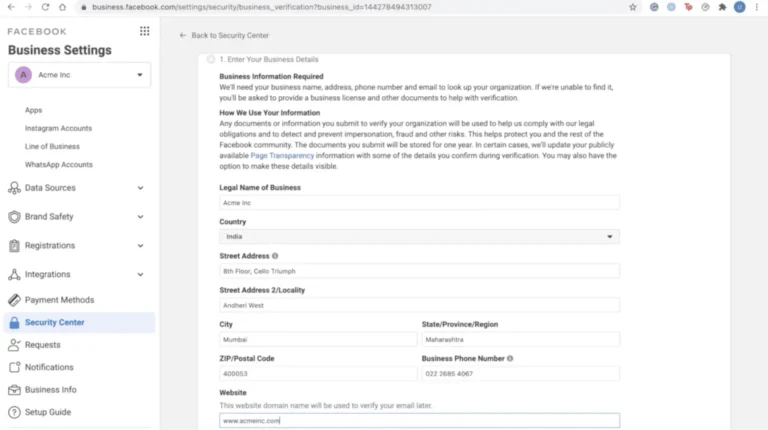
Step 2: Here, you will need to fill out all your Business Details – Name, Address, Phone Number and Website. Make sure this information is consistent with MCA records and with the Business Details in your supporting documents. Once you are done, click Next.
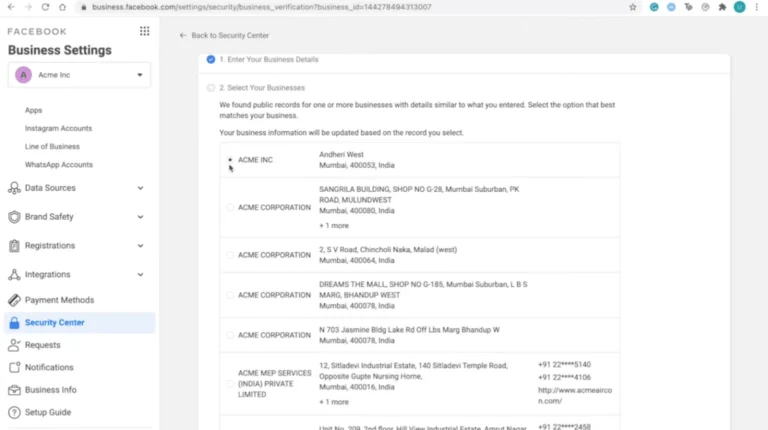
Step 3: Next, Facebook will generate a list of businesses that match the information you just entered. You need to select your business category from this list and continue.
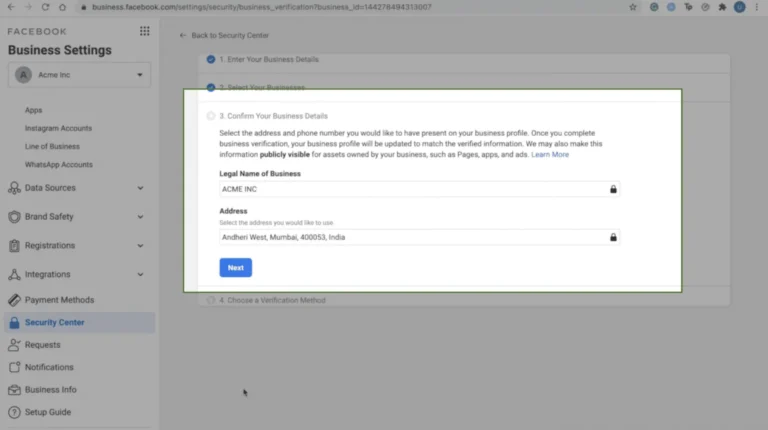
Step 4: In this section, you will need to simply confirm the business details that you wish to submit to Facebook. These details need to match the business details in your supporting documents that you will submit next. This information will also be present on your Facebook Business Profile once your verification is complete.
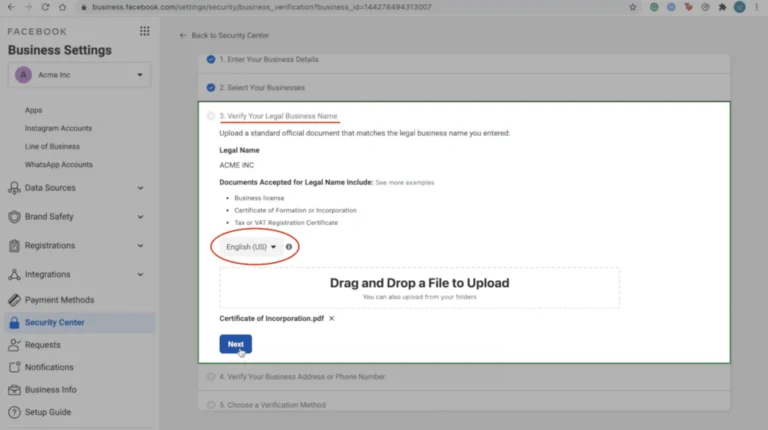
Step 5: In this step, you will need to submit a supporting document to verify your Legal Business Name. You can upload any of the acceptable documents like the Certificate of Incorporation, Business License, Business Bank Account Statement etc.
• Ensure that you choose the correct language of the document – you need to specify the language of the documents you are submitting correctly so that the reviewer is easily able to verify it. Once you have uploaded the document on Facebook for verification, click next.
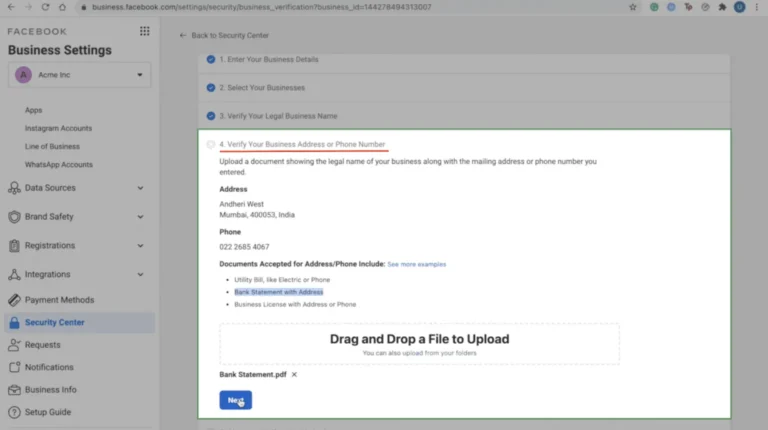
Step 6: You need to repeat the same process for verifying your Legal Business Address or Phone Number on Facebook. Once you have uploaded an acceptable document, click next.
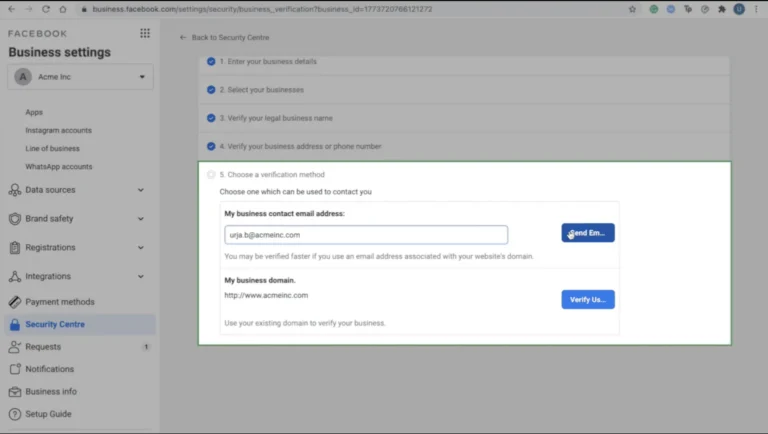
Step 7: You will need to choose a Facebook verification method. You can choose to receive a code via call or email or you can choose to verify using your business’ website domain.
• If you are choosing to verify via email or call, make sure that you are entering an email address or phone number that you have access to. It is recommended that your verification may get completed faster if you use an email address that contains your website domain.
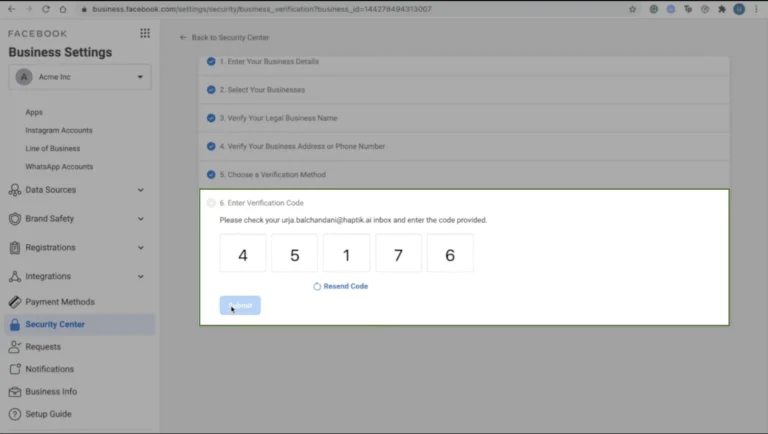
• If you picked email verification, enter the code that you must have received and click submit.
• You have now completed the application for the verification of your business on Facebook!
3) Application Review Process on Facebook Business Manager
• A review of your application by Facebook can take anywhere between 3 business days to 4 weeks.
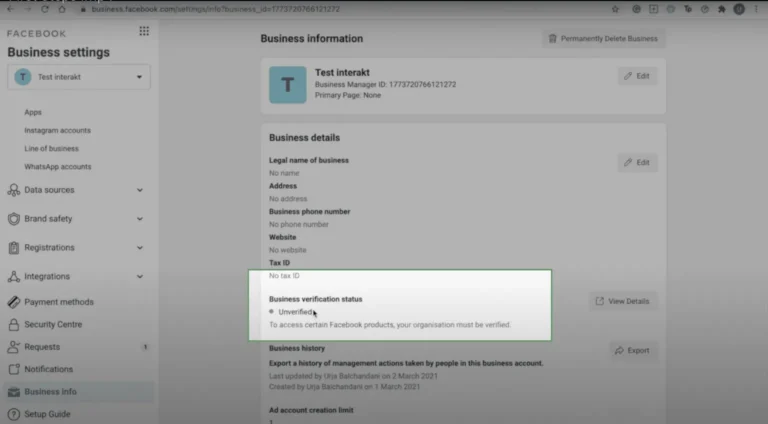
• If your application has been approved, you will receive a confirmation email. You can also check the status of your application in the Security Center.
• You may not receive a confirmation immediately. In case Facebook requires additional documentation, you will receive a notification about it. You will then need to respond to the same support ticket from Facebook and submit necessary WhatsApp Business API documentation.
• Once your verification comes through, you are eligible for unlimited messaging on Interakt.
4) Quick Tips to get your business verified on Facebook
• Verifying your domain will allow you to claim ownership of your domain in Business Manager. This can be an added advantage since Facebook limits the ability to edit, link thumbnail images, headlines and descriptions as a way to control the spread of clickbait and misinformation.
• You should keep a close check on the documents you are submitting and make sure that the information on all of them are consistent and do not vary from the business details with the MCA.
• Submit only necessary documents. Submitting documents beyond what is required can also lead to delay/rejection of your application.
5) Tips to follow when Facebook business verification fails
1. Understand the Reason: Review the rejection notification to understand why verification failed.
2. Keep Business Information Updated: Ensure all business information updated by you is accurate and up-to-date.
3. Upload Mandatory Business Documents: Submit any required documentation promptly and accurately.
4. Appeal the Decision Of Rejection: If you believe there was an error, appeal Facebook’s decision after adhering to the provided instructions.
5. Contact Facebook Support: Reach out to Facebook’s support team for further assistance if needed.


