

Once you have received a cart from the customer, you must close that sale. If you have a Shopify store, you can automatically convert the WhatsApp Cart into a Shopify Cart with the same products and configure it to be sent as an autoreply, so that the customer can then enter his details and pay for the order on your Shopify store!
Non-Shopify merchants can collect payments securely on WhatsApp with WhatsApp Pay and get a summary of all inquiries/orders you might be getting on WhatsApp in the order panel.
So get started by following the steps below!
Step 1: Submit Business Compliance Info
Step 2: Set up Facebook Catalog
Step 3: Set up Product Collections (Sets) in your Facebook Catalog
Step 4: Give Catalog Access to Haptik & connect your FB Catalog to your WABA
Step 5: Enter Catalog ID in Interakt
Step 6: Set up Messages for Product Collection List & Product Catalog
Step 7: Send out Catalogs from Interakt Inbox
Step 8: Send out Catalogs in Campaigns
Step 9: Send out Catalogs in Autoreplies
Step 10: Convert WhatsApp Carts into Shopify Carts automatically! (only for Shopify store owners)
Step 1: Submit Business Compliance Info
To be able to send out WhatsApp Catalog Messages to customers, you need to provide some business compliance information, which will appear in your WhatsApp Profile and will be visible to your customers. This is important for providing credibility for customers interacting with your business.
To submit your compliance info click on the ‘Provide Info’ button in Step A in the Commerce Settings page. In the page that opens up, provide the Legal Name of your Business, your Business Type and whether it is registered or not.
In Customer Care Information, provide the customer care email and the landline or mobile number for customer care.
Similarly, in Grievance Officer Information, provide the name of the Grievance Officer along with the officer’s email and contact number.
Filling all these fields is mandatory. Once you have filled them all, click on Save & Set Live.
Step 2: Set up Facebook Catalog
To send WhatsApp catalogs to customers, you need to create a Facebook catalog on your FB Commerce Manager.
You can create a FB catalog via Google Sheets or your E-store directly:
Via Google Sheets:
Check out the above video to understand how you can maintain your inventory in a Google Sheet and link that to your Facebook catalog.
Via Shopify:
If you have a Shopify store you can sync your Shopify Catalog to Facebook.
Via other E-Store Platforms:
Facebook Catalog can be synced from other popular platforms like Woocommerce, Magento, Bigcommerce, etc. In case you need any help in syncing your catalogs from these platforms, please write to us at [email protected]
Step 3: Set up Product Collections (Sets) in your Facebook Catalog
Once you have created your FB catalog, it is important to create collections of your products which would make it easier for your customers to find the products they want.
In your Facebook Commerce Manager, go to Sets (we call them Collections) & click on Create Set on the top right. Here you can create sets by defining some filters or by manually selecting items. If you choose to add filters, you can apply filters on any product attributes. Make sure you give the ‘Set Name’ as something which your customers can see & understand, since these names will be sent to them in the Product Collections List Message.
The great thing about creating Collections with filters is that whenever a new product gets added in your Catalog and its attribute fulfils the filter conditions, the product will automatically be added to the Collection.
Step 4: Give Catalog Access to Haptik & connect your FB Catalog to your WABA
Once you have created your FB catalog, you need to add us as a partner in the Catalog so that we can then enable you to send the catalog products to your customers on WhatsApp. To give us access, go to ‘Business Settings’ in your FB Business Manager. Click on ‘Catalogs’ under ‘Data Sources’ in the left panel. Choose the catalog and click on ‘Assign Partners’. Choose to assign a partner by ‘Business ID’ here. In the partner business ID, enter 928974617157828. Provide the permission to Manage Catalog & then click on Next.
Now, to connect your catalog to your WhatsApp business API account, go to WhatsApp Accounts in your Business Settings. Choose your WhatsApp account. Click on Settings and then go to WhatsApp Manager. On the left panel select Catalog. And choose the catalog that you want to connect to your WhatsApp Business API Account.
You’re good to go now! Just enter your FB Catalog ID in the next step.
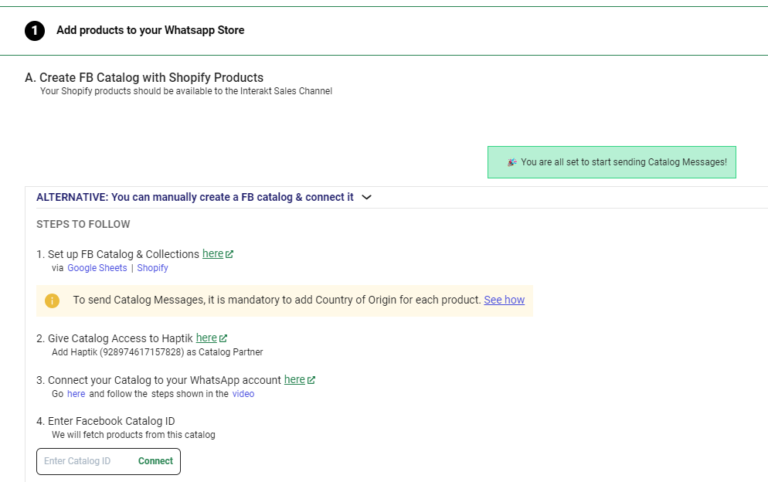
Step 5: Enter Catalog ID on Interakt
Before entering your Catalog ID, please be sure that you want to continue with this specific catalog only. Once you have connected a catalog to Interakt, you might not be able to change that. To get your Catalog ID simply head over to FB Commerce Manager. Here you will find the catalog ID mentioned below the catalog name. Enter the same ID here & click on Connect!
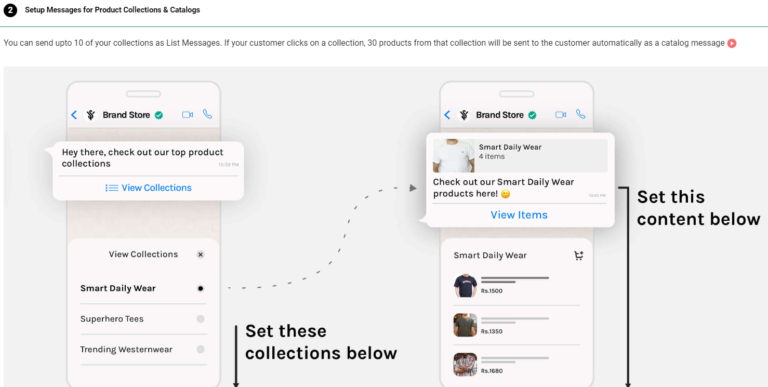
Step 6: Set up Messages for Product Collection List & Product Catalog
Once you have successfully connected your Catalog to interakt, the next step is to set up 2 kinds of messages for your account:
(1) The list message containing product collections
(2) The catalog message containing products within a specific collection. The catalog message is sent whenever your customer selects a collection from the list message. It is then sent automatically!
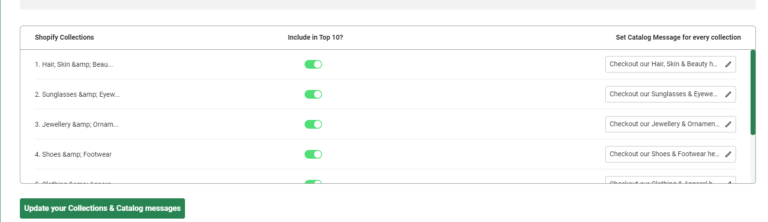
If your catalog is connected properly, collections within your catalog appear automatically on the Commerce Settings page. Since you can send up to 10 collections in the list message, select the top 10 collections here. You can also edit the ‘message body’ of the catalog message which will go for every collection. Once you have done this, simply click on Confirm.
After you click on Confirm, it might take a few seconds for us to set up these 2 kinds of messages for your account. Once the messages have been set up, you can immediately try them out!
Remember that whenever you add/delete/update any collection in FB Commerce Manager, you need to refresh this page to get that new collection in your Commerce Settings page. You can then select that new collection and update your list msg by clicking on Update.
Step 7: Send out Catalogs from Interakt Inbox
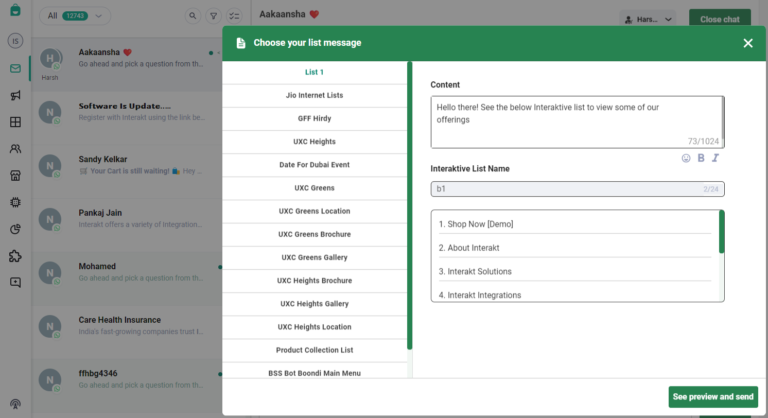
Send Product Collection Lists
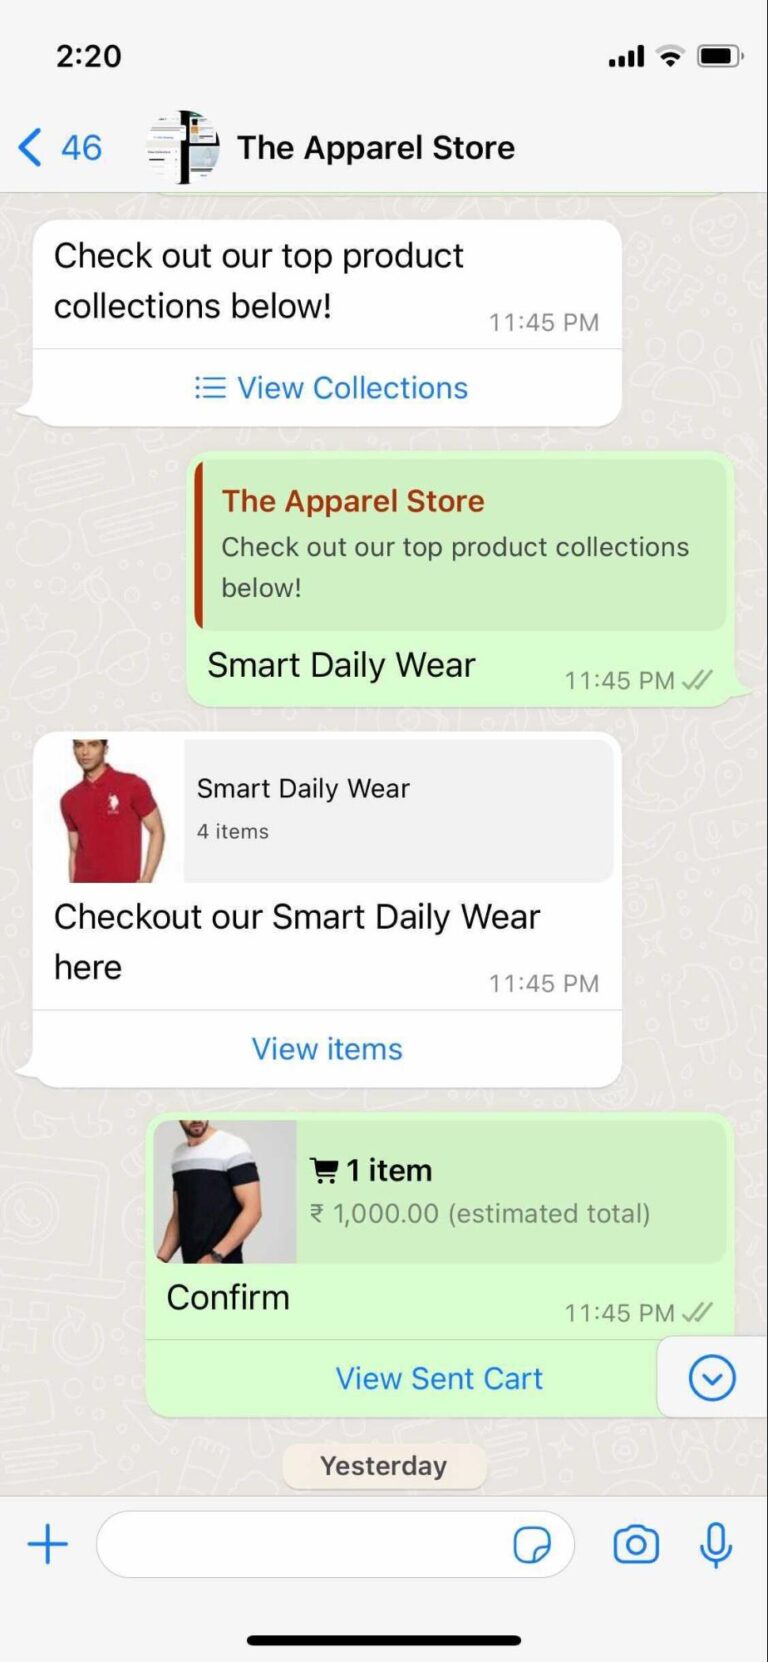
Simply go to your inbox and pick a chat where the customer has messaged you within the past 24 hours. We would suggest trying this with your number first. Click on the list message icon. You should see your top 10 product collections appear there. You can change the message body of this list message as well. And then send it!
On your personal WhatsApp app, you should see this msg appear like this. Simply select a collection from the list. And as soon as you do that, you’ll get the catalog for that collection automatically! You can select some products and send a cart as well!
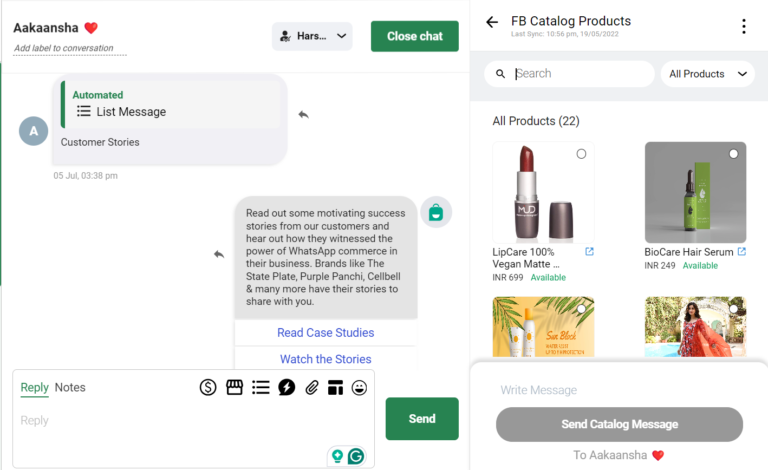
Select Products from your Catalog & Send Custom Catalog Messages
In the inbox, click on the Shop icon to select specific products from your catalog and send those products as a catalog message directly. This is useful especially when you are having a conversation with your customer and the customer asks to see some specific types of products. With the catalog now accessible to you in your Interakt Inbox itself, you can easily search for products in the catalog or filter them by different collections.
Step 8: Send out Catalogs in Campaigns
Once you have set up the Product Collections List Message & the Catalog Messages for your account, you can include this flow in your Campaigns!
Send Catalogs in Ongoing Campaigns:
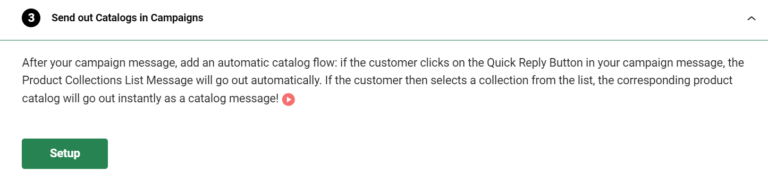
Imagine you have set up an Ongoing campaign to send automatic WhatsApp messages whenever an order is delivered to your customer. In the same communication, you could try to get your customer to browse through more of your products. To do this, you need to include a Quick Reply button in your message. If the customer clicks on it, the Collections List message that you have set up, will go automatically. If the customer then selects a collection, the corresponding catalog will go automatically.
So, along with updating the customer about his existing order, you would have created the possibility of the customer placing another order with you!
Send Catalogs in Onetime Campaigns:
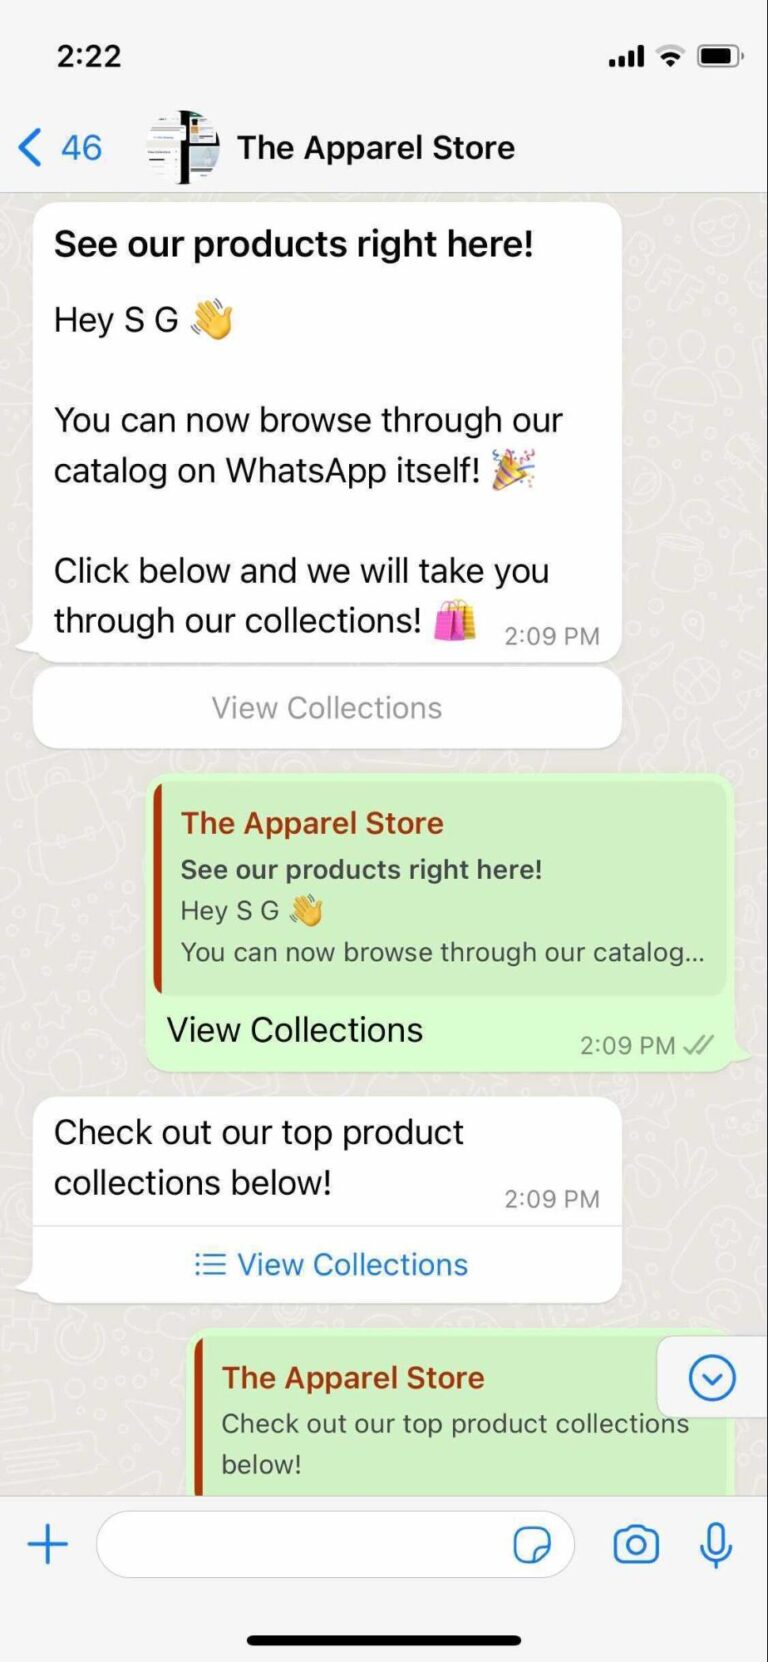
You could add the above flow to Onetime campaigns as well! Imagine sending out a message to 1000s of your customers informing them that they can now browse through your catalog on WhatsApp itself! As soon as the customer clicks on the button, the collections are sent to him, and the customer can then, one by one, see the products under the collections.
Use our Sample One-time Campaign to Promote your WhatsApp Catalog to customers:
To make this flow live in a campaign, simply click on ‘Setup’ in Commerce Settings
We have created here a Sample Onetime Campaign for you, which you could take live in 2-3 clicks! Click on Use Sample.
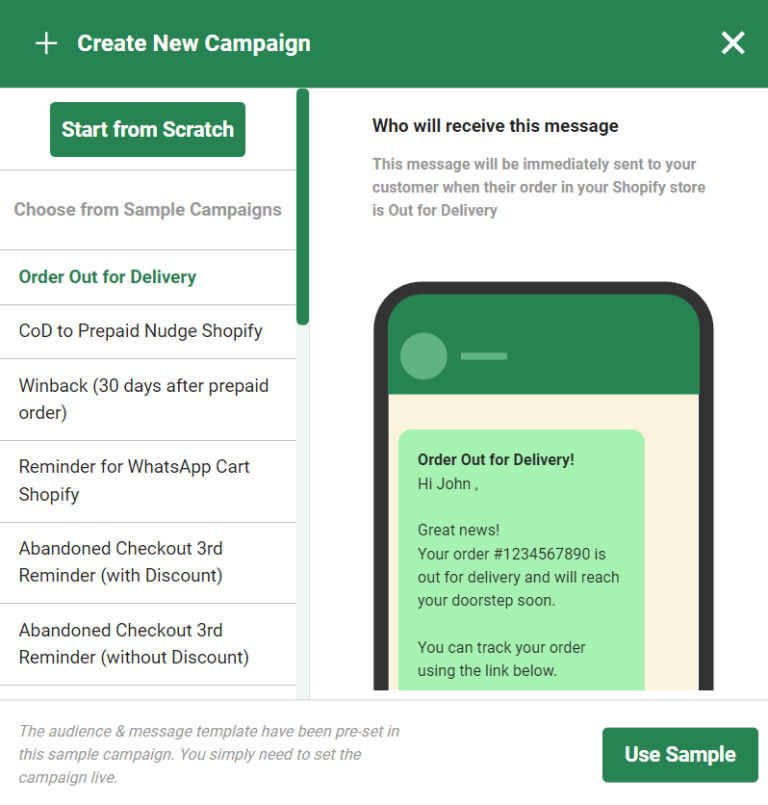
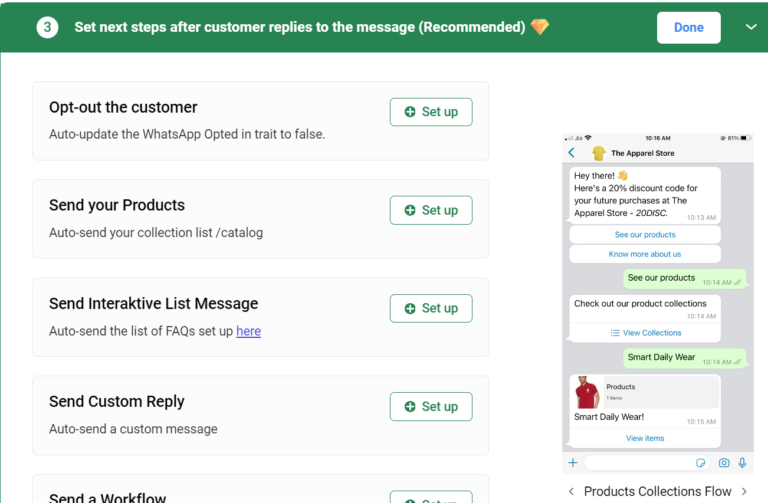
In the Campaign Creation page that opens up, filter out which customers you want to send it to. The template would be already preselected. In the 3rd step, you must enable the flow of the collection & catalog messages after this template has gone out. The flow is already enabled here. If you want, you can edit the message that is sent along with your product collections.
And then, simply make it live!
You can attach this flow to any campaign that you create from now. Whenever you create a campaign, you can enable the collections-catalog flow in the 3rd step.
Remember that this will be enabled only if you have already connected your catalog & selected your top 10 collections. Also, this flow will work only if your template has a Quick Reply button.
Please Note: You can also send your catalog while creating a template on Interakt.
We hope you like this feature and your campaigns create even more impact going forward.
Step 9: Send out Catalogs in Autoreplies
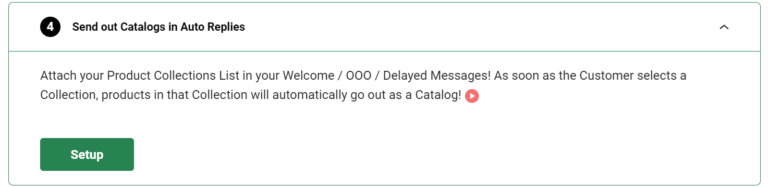
Once you have set up the Product Collections List Message & the Catalog Messages for your account, you can include this flow in your Welcome / OOO / Delayed Messages as well!
The idea is that – While you cannot attend to your customers, they should still be able to browse through your products, right?
To make that possible, simply add your Product Collections List to your auto-replies by clicking this checkbox here!
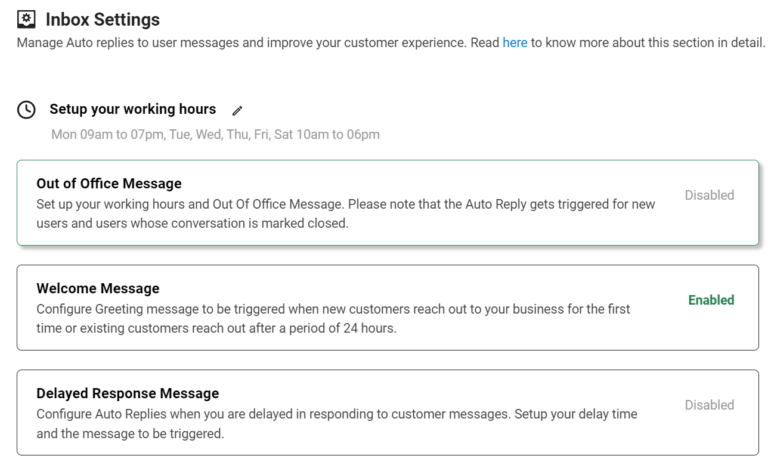
The next time these auto-replies go to your customer, they will see this List alongside. And if they select a collection from the list, they will be sent the corresponding Product catalog as well!
So your customer might have already had a look at your products by the time your agent attends to them, thereby saving the agent’s effort!
Please Note: you can also send catalogs via custom auto replies on Interakt
Step 10: Convert WhatsApp Carts into Shopify Carts automatically! (only for Shopify store owners)
Once you have started sending catalog messages to your customers on WhatsApp, you’ll start receiving Carts from them! Rather than attending to each Cart manually, you can now automatically direct the customer to a pre-filled cart on your Shopify website! For your customer this is how the experience would be:
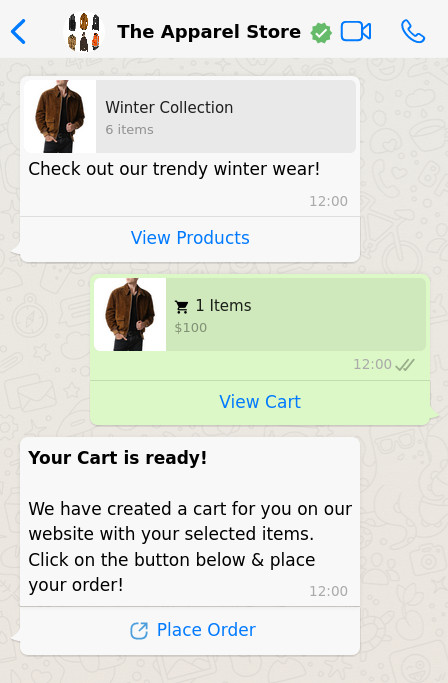
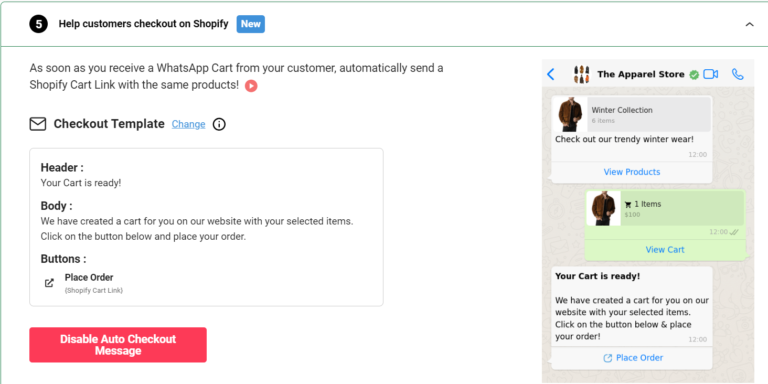
After receiving a Catalog Message from you, he selects the products he likes and sends you a cart. As soon as the cart is sent, he receives an ‘Auto checkout’ message with a button. Clicking on the button, he is taken to your Shopify website where a cart is already created with the same products that he sent in his WhatsApp cart! His name and email ID would also be prefilled! To enable this auto-checkout message, go to the Commerce Settings page. Here, we have a pre-set message for you., which you can enable. You can also change the auto-checkout template. Remember, that the template should contain a CTA button with this particular dynamic variable: https://api.interakt.ai/cta?redirect={{1}}
We hope this helps you in converting a lot of WhatsApp Carts into Final Orders from customers.