
")
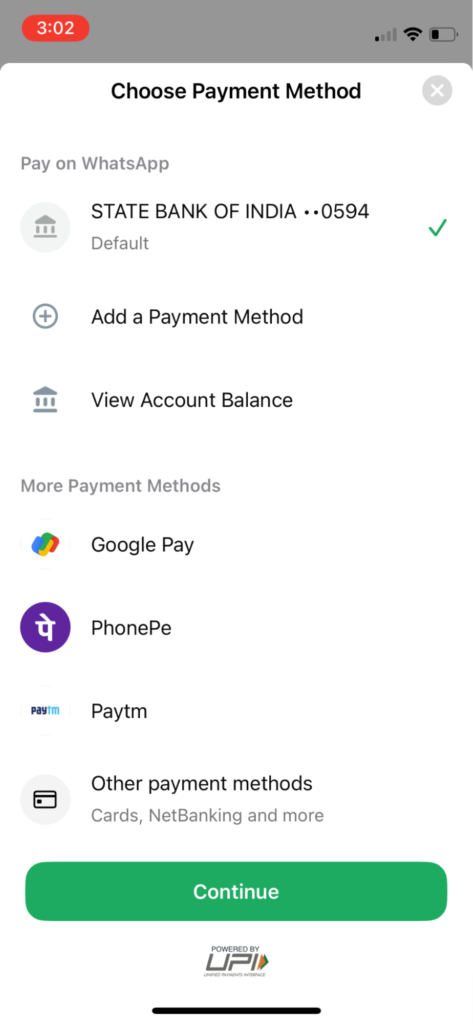
If you’re looking to collect payments for subscriptions / bills / insurance premiums etc from your customers, you can now do so natively on WhatsApp via WhatsApp Pay notifications! Your customer won’t be redirected to any 3rd party link for making the payment. Instead, they can make the payment natively within WhatsApp via any of the below options:
– Any UPI app installed on their phones
– Debit / Credit cards
– Netbanking
– UPI connected to their WhatsApp
Note – End customers don’t need to have UPI connected to their WhatsApp to pay via WhatsApp Pay messages. If they don’t have UPI connected to their WhatsApp, they can pay via other methods, as mentioned above.
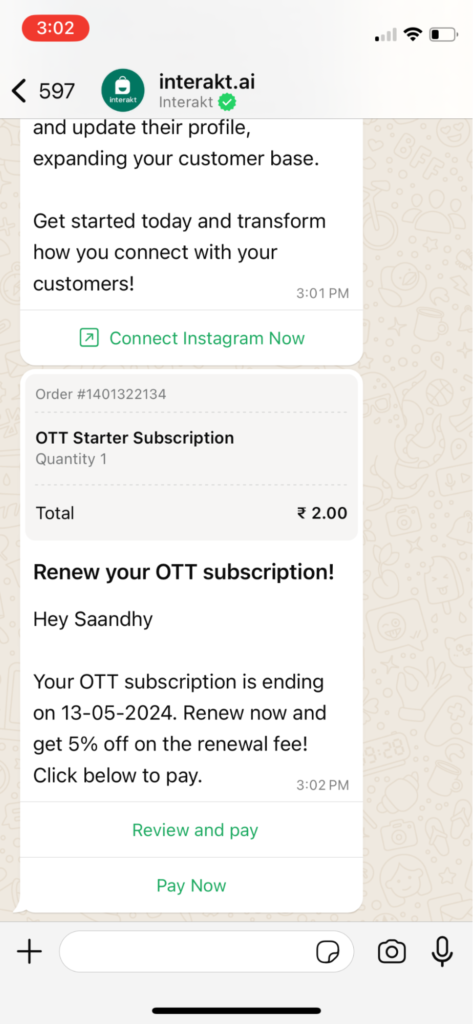
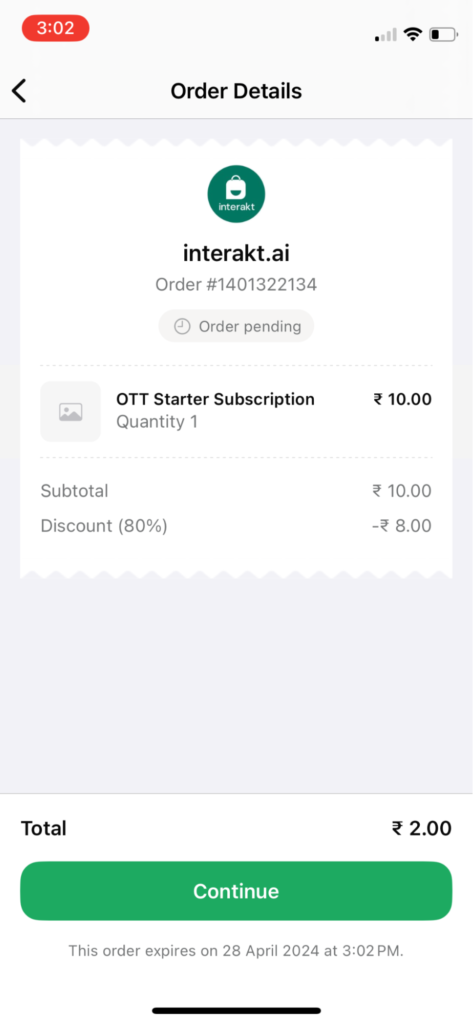
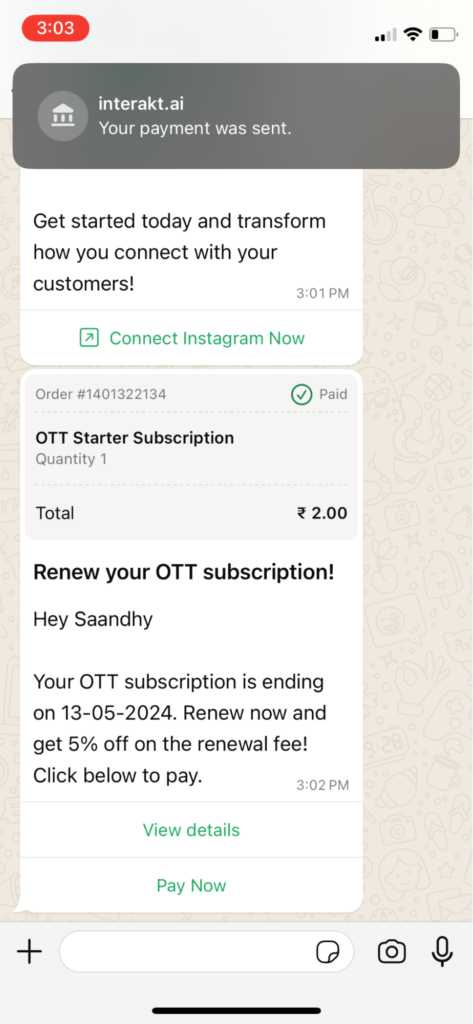
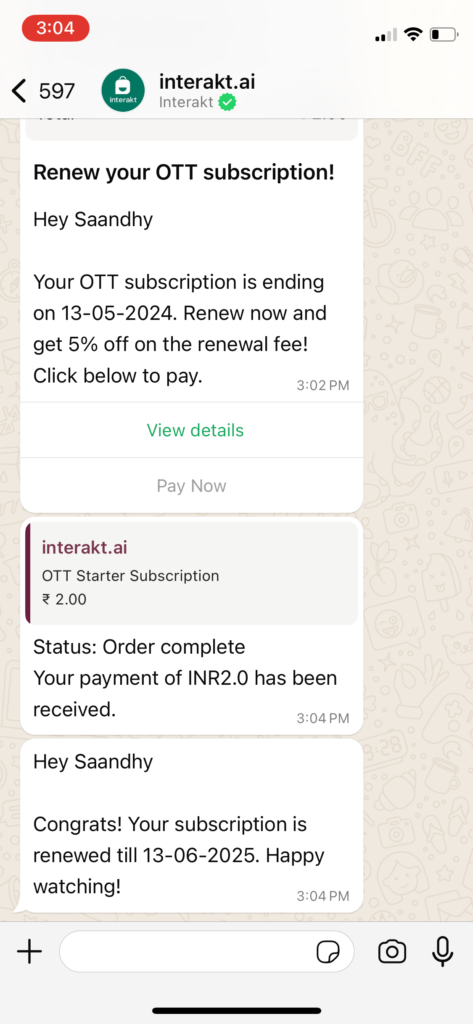
Given below is an example of the payment experience that can be created via WhatsApp Pay messages.
How to set up WhatsApp Pay notifications via Interakt?
For setting up WhatsApp Pay notifications from Interakt, you will have to do the below steps:
(If you’re looking for the API documentation for passing payment related info to Interakt, check step 7 below).
1. Ensure eligibility of your business for WhatsApp Pay
2. Connect a payment gateway in your WhatsApp Manager (within Facebook Business Manager account)
3. Activate the WhatsApp Pay app on Interakt
4. Create a WhatsApp Pay message template in your WhatsApp Manager (within Facebook Business Manager account)
5. Sync the WhatsApp Pay message template into your Interakt account
6. Set live an Ongoing Campaign (with a ‘trigger event’ configured) in your Interakt account
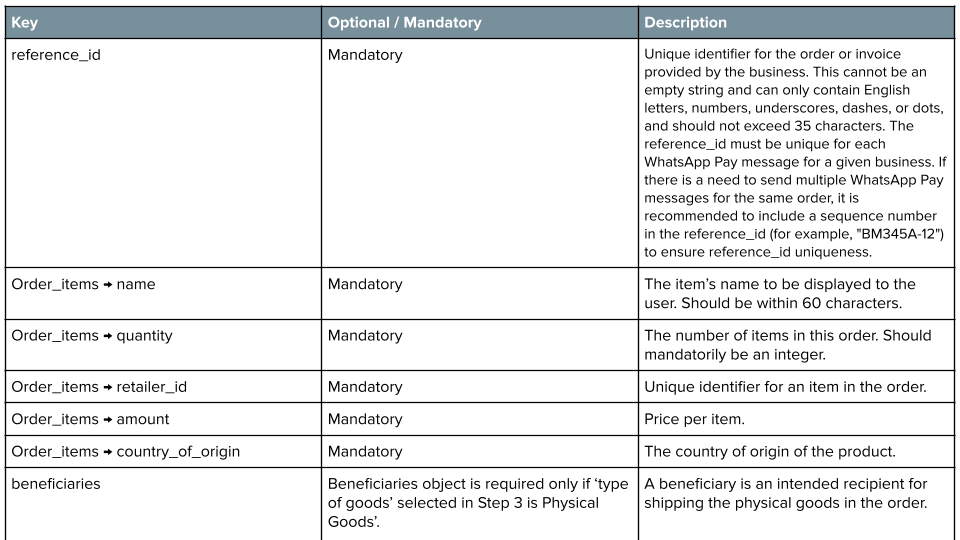
7. Pass the ‘trigger event’ for customers, using Interakt’s Event Track APIs – In the ‘trigger event’ payload, you’ll need to pass payment related information (order_details object) for each customer, which is necessary for sending the WhatsApp Pay message.
8. How to configure Payment Confirmation message
9. How to get webhooks for Payment Confirmations
1. Ensure Eligibility:
• WhatsApp Native payment feature is available for businesses with a +91 WhatsApp API number.
• WhatsApp messages can only be sent to customers with +91 mobile numbers.
• You need to have an account with either Razorpay or PayU to be able to use WhatsApp Pay via Interakt.
2. Connect Payment Gateway:
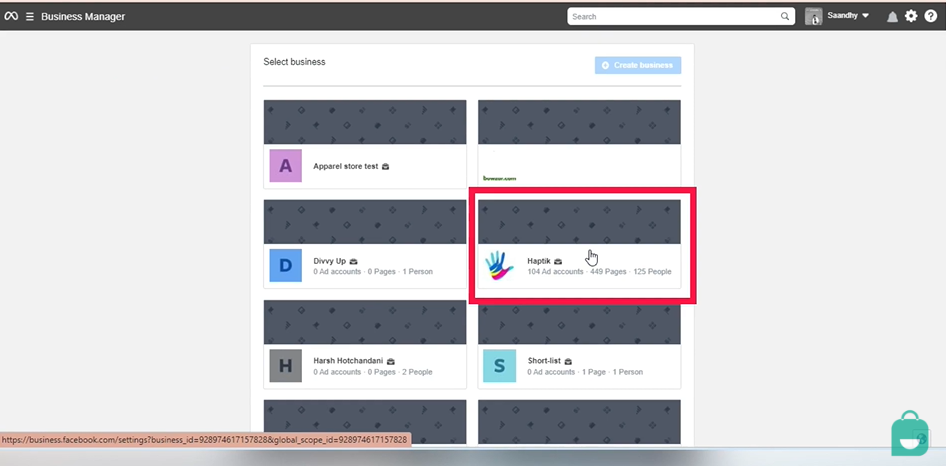
– Log into your Facebook business manager account at business.facebook.com/settings.
– Select the Facebook business containing your WhatsApp business account.
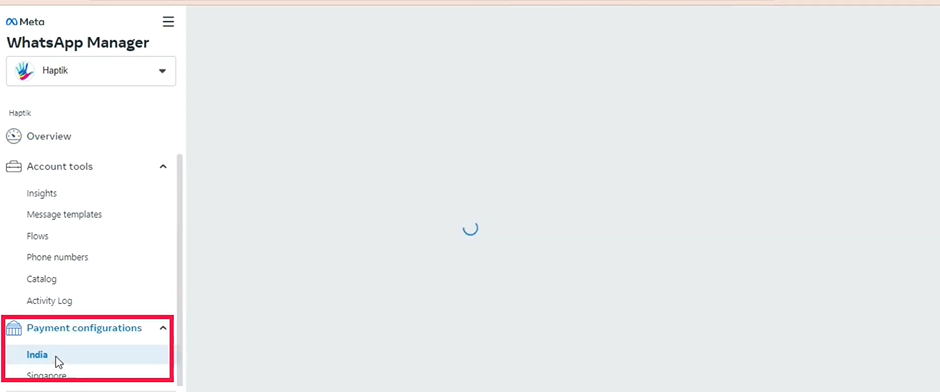
– Navigate to WhatsApp accounts > Settings > WhatsApp Manager.
– Hover over the left panel and click on India.
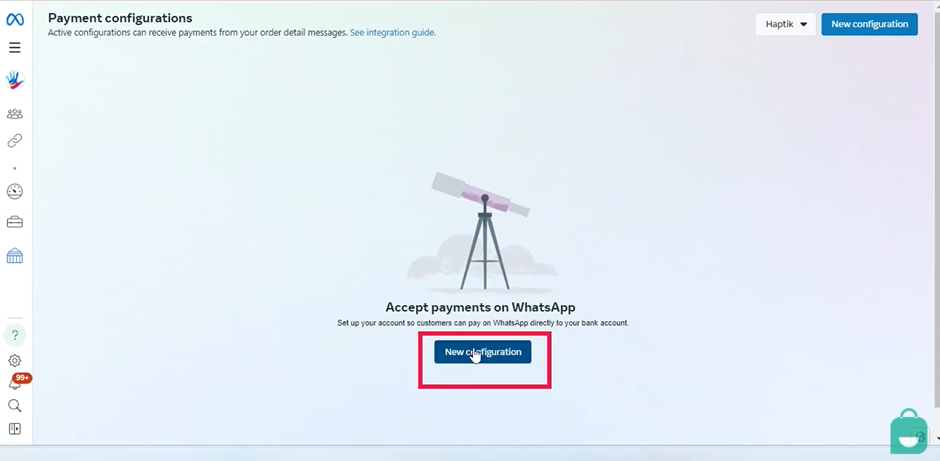
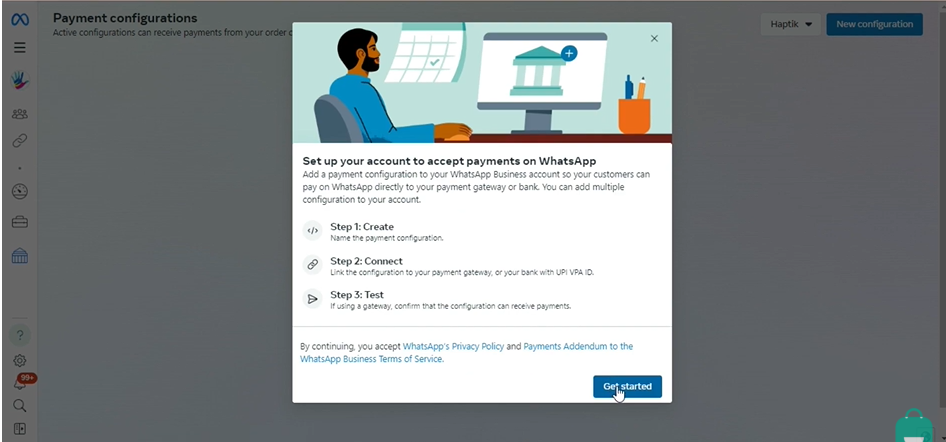
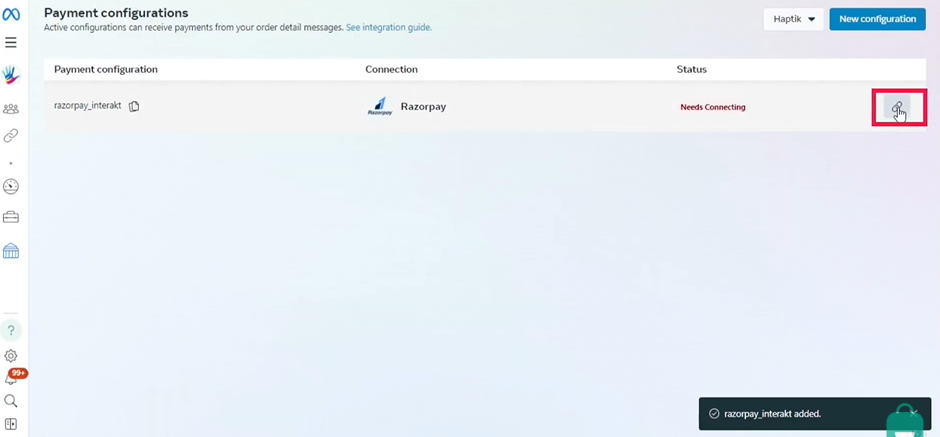
– Under the payment configurations, click on ‘New Configuration’.
– Then click on ‘Get Started’
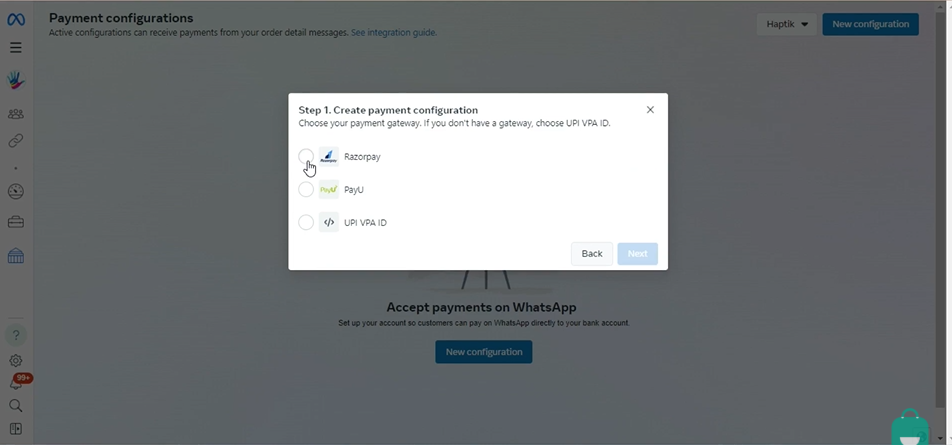
– Choose between Razorpay and PayU as the Payment Gateway.
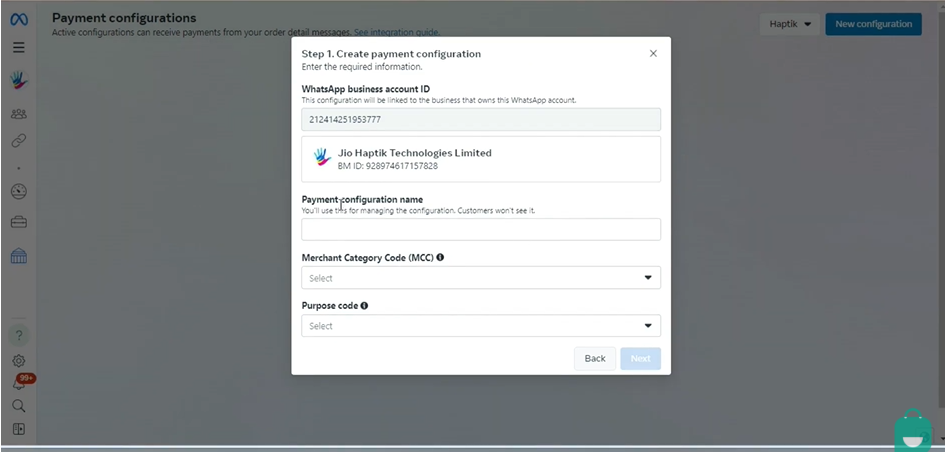
– Enter a payment configuration name, Merchant category code, and purpose code.
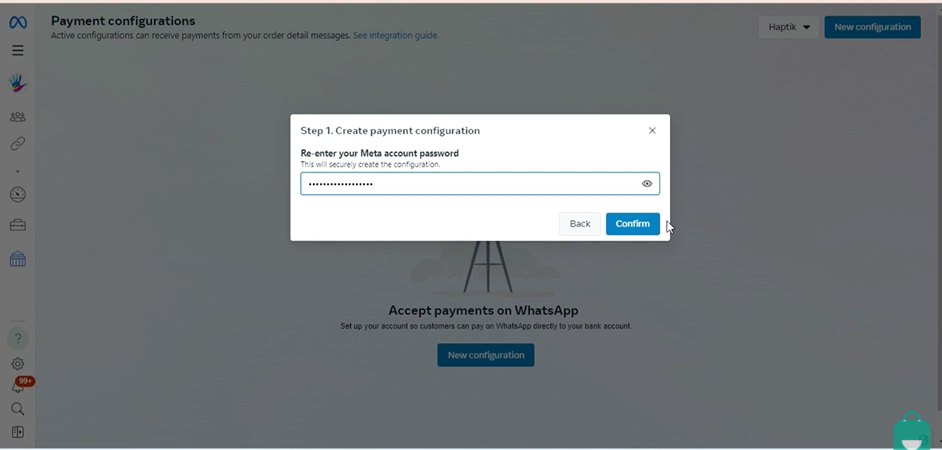
– You would be asked to enter your Facebook password again at this stage
Now click here (the highlighted part)
– Now select either of the two options provided here to connect the payment Gateway. You can either choose to connect the payment Gateway yourself immediately or you can email another member of your team to do the integration.
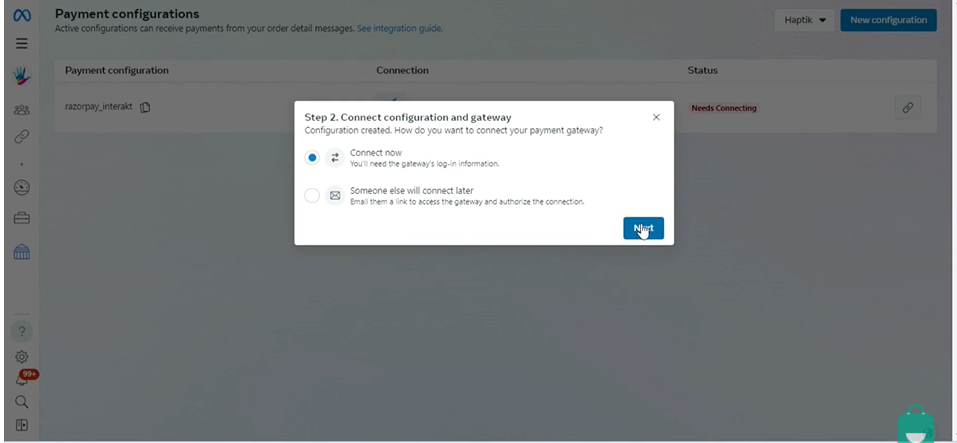
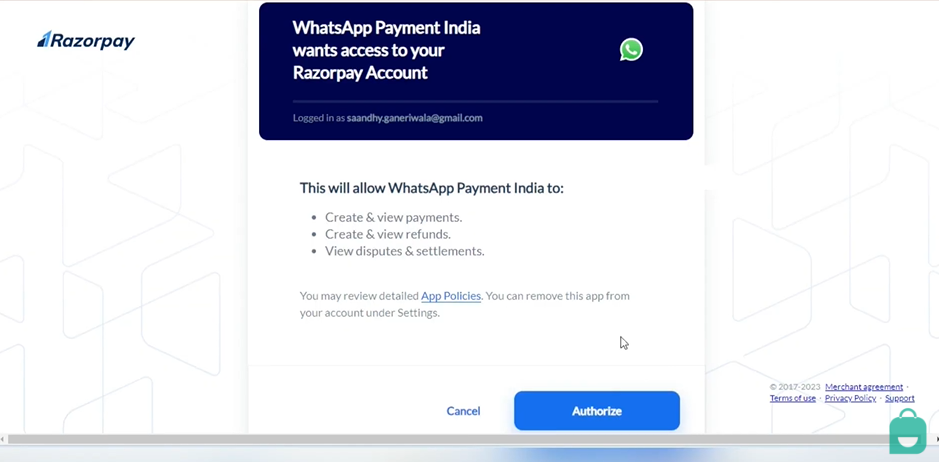
– Once you click on ‘Next’ you will be redirected to the payment gateway account where you will be required to give certain permissions to FaceBook.
– Next, you’ll be brought back to Facebook, click on ‘Settings’
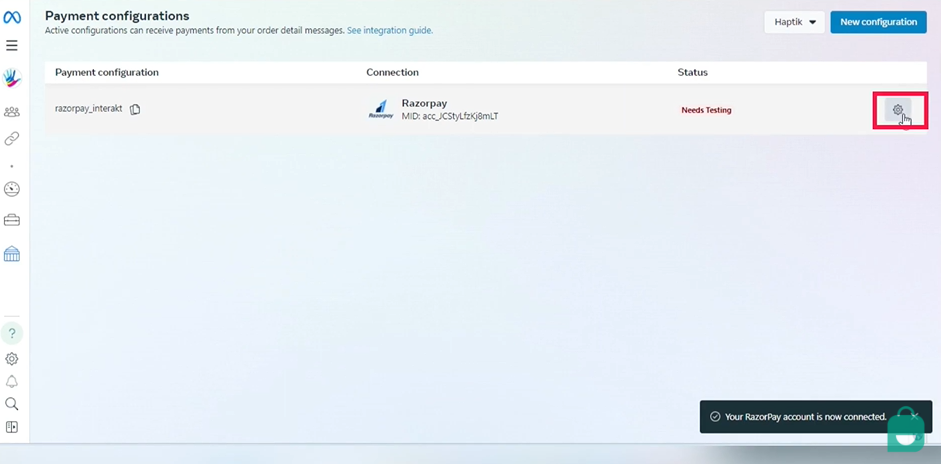
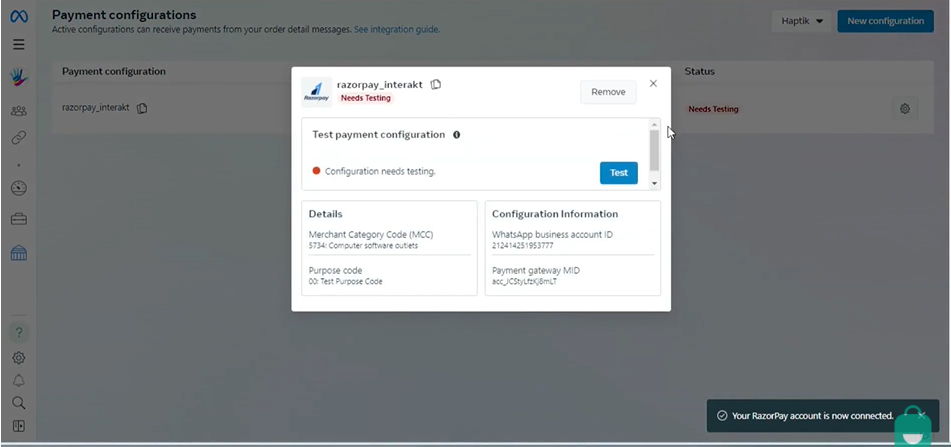
– Now click on ‘Test’ on the pop-up box.
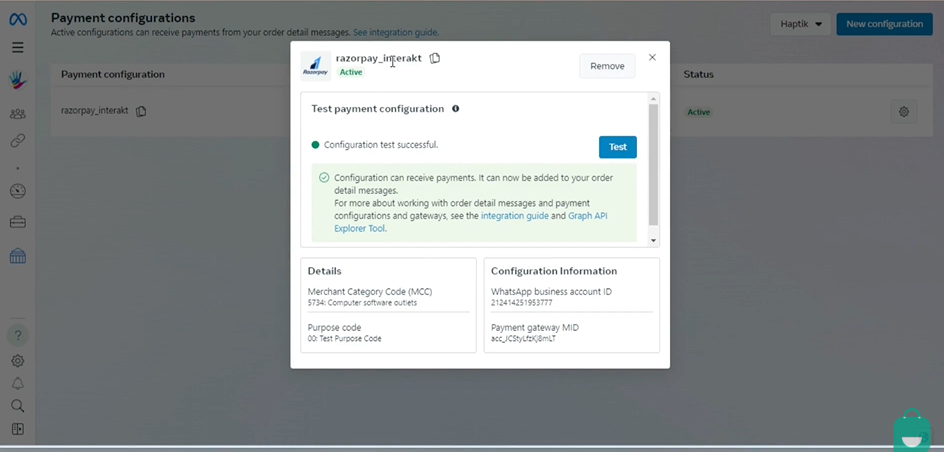
– If you see the – ‘Configuration Test Succesful’ message, you can now start receiving payments via WhatsApp Pay.
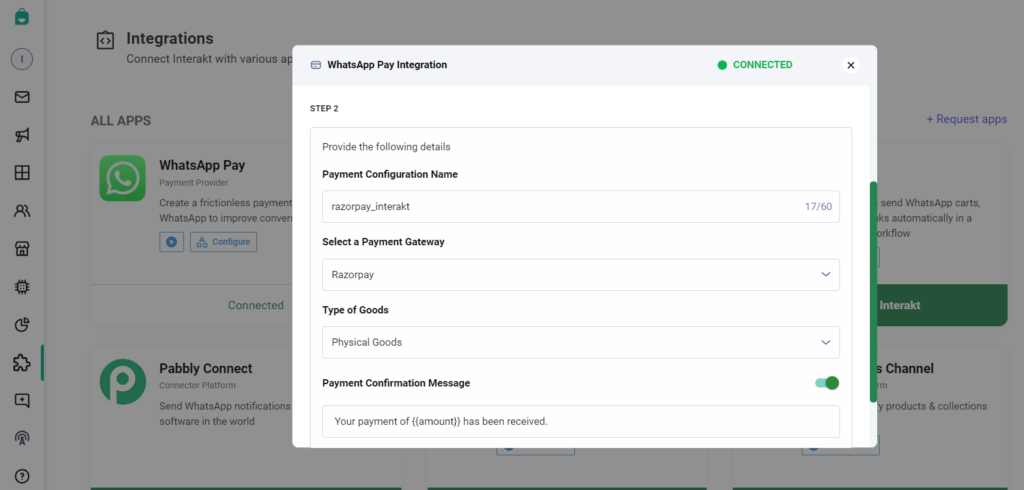
3. Activate WhatsApp Pay App on Interakt
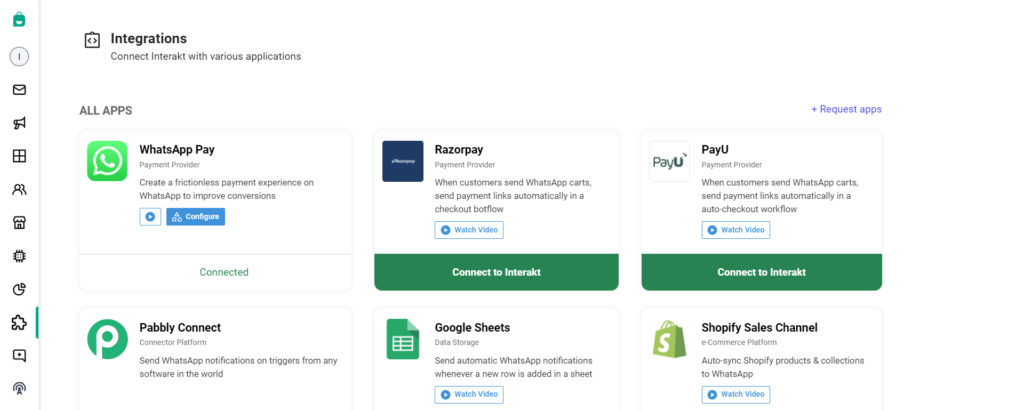
– Go to the Integrations page on Interakt.
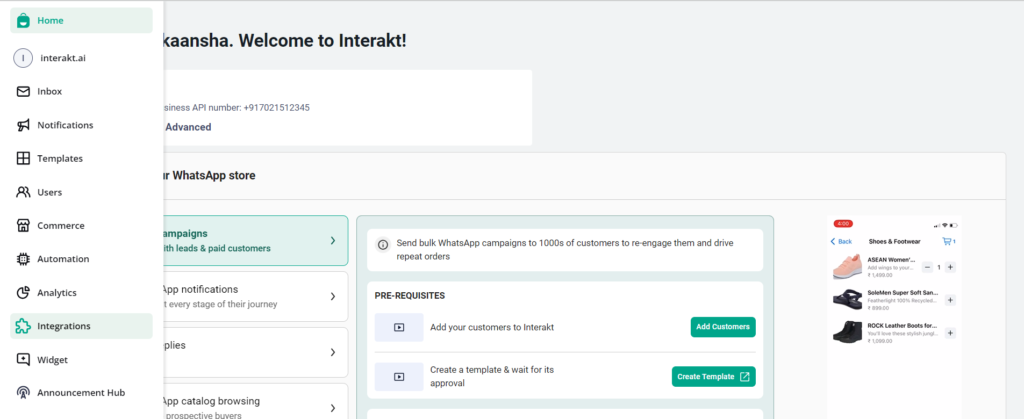
– In the WhatsApp Pay app card, click on ‘Connect’.
– Enter the same payment configuration name used in Facebook business manager
– Select the payment Gateway chosen in Facebook business manager.
– Specify the type of goods your business deals in.
– Customize the confirmation message template for payment completion. This message will be automatically sent to your customer when they make a payment via the WhatsApp Pay message. You can also set up personalized confirmation messages for each customer – we have explained how to do this, later in this article.
– Submit the configuration and wait for it to be enabled
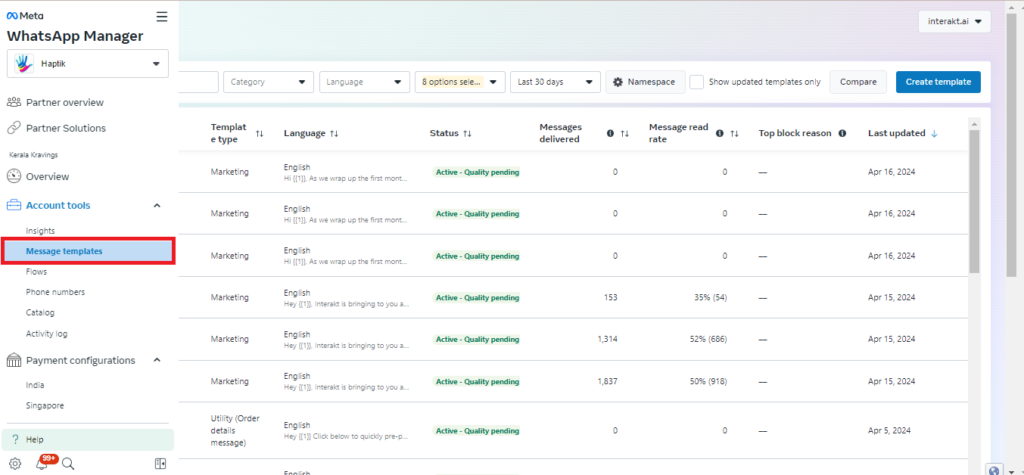
4. Create a WhatsApp Pay message template in your WhatsApp Manager:
– Log into your Facebook business manager account at business.facebook.com/settings.
– Select the Facebook business containing your WhatsApp business account.
– Navigate to WhatsApp accounts > Settings > WhatsApp Manager.
– Hover over the left panel and click on ‘Message Templates’
– Click on ‘Create Template’ on the top right
– Select Utility – Order details message as the category.
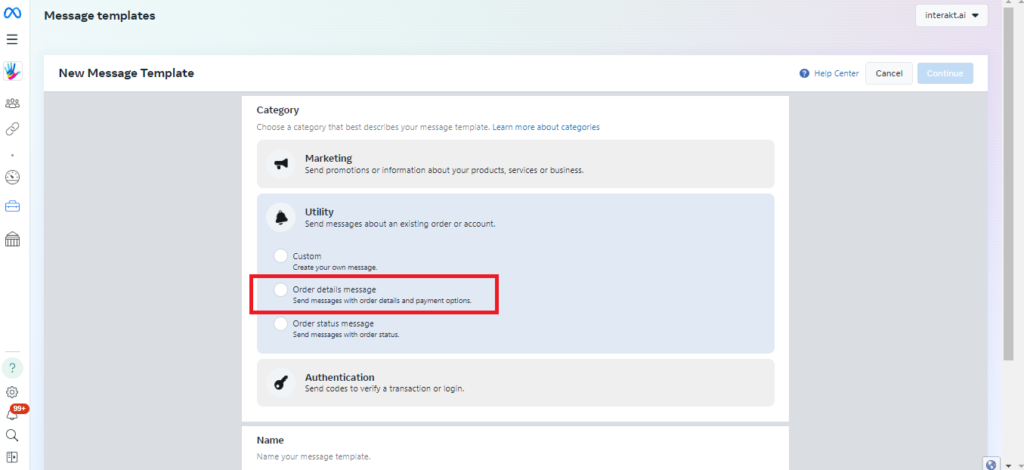
– Provide a name for the template.
– Choose the language for the template.

– Click on Continue on the top right.
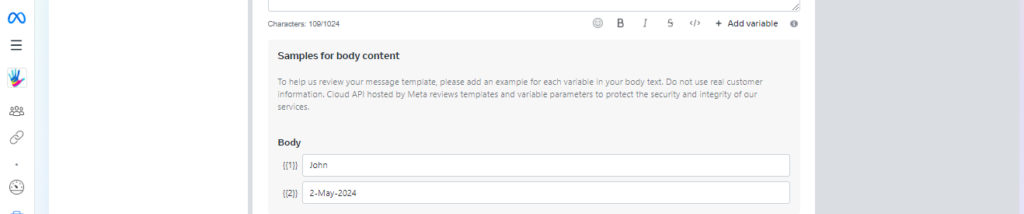
– Provide a header, body and footer (optional) for the template. Remember to provide sample values of all the variables that are present in the template, as shown below.
– Then click on Submit.
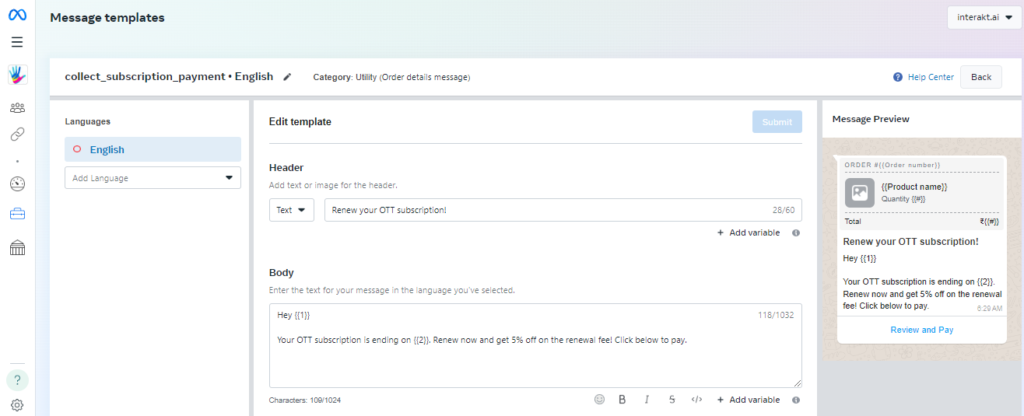
– Wait for the template to get approved.
5. Sync the WhatsApp Pay template into your Interakt account:
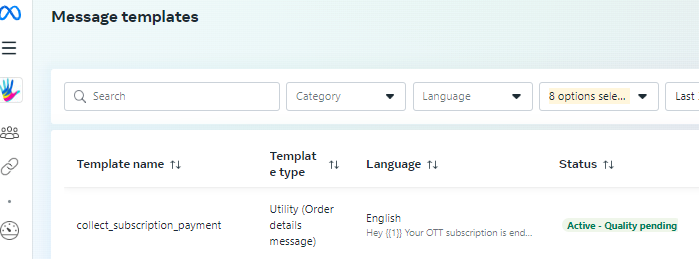
Once the order_details template has been approved in your WhatsApp Manager, go to the Templates page in your Interakt account and click on Sync.
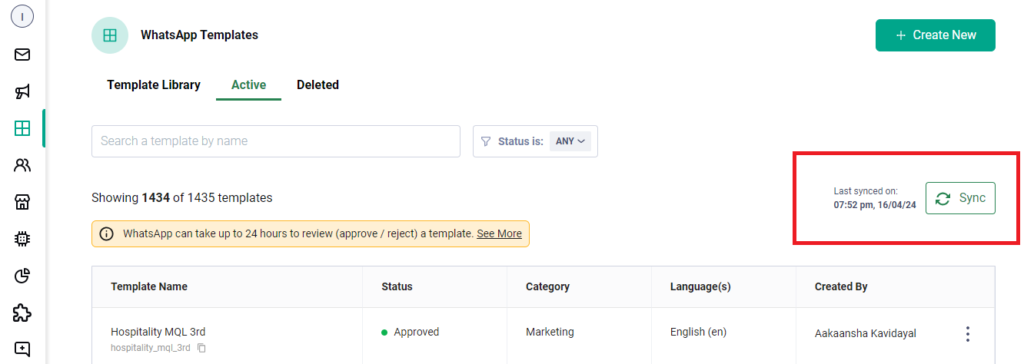
After the Sync is completed, you should see the order_details template appear in the list of templates in your Interakt account.

6. Set live an Ongoing Campaign (with a ‘trigger event’ configured) in your Interakt account
Next, you’ll have to set live an Ongoing Campaign on Interakt with a ‘trigger event’. For example, if you are looking to collect subscription renewal payments, you might want to trigger an event named ‘Subscription Renewal Due’ via API, for every customer, a few days before their subscription expiry. This same trigger event should be selected within the Ongoing Campaign.
To set live an Ongoing Campaign, follow the below steps:
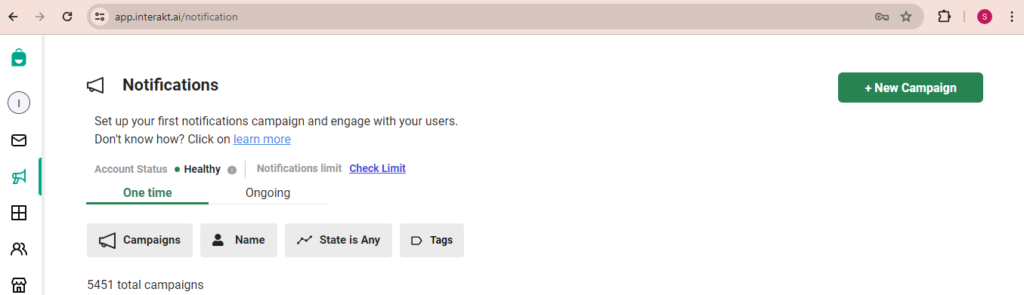
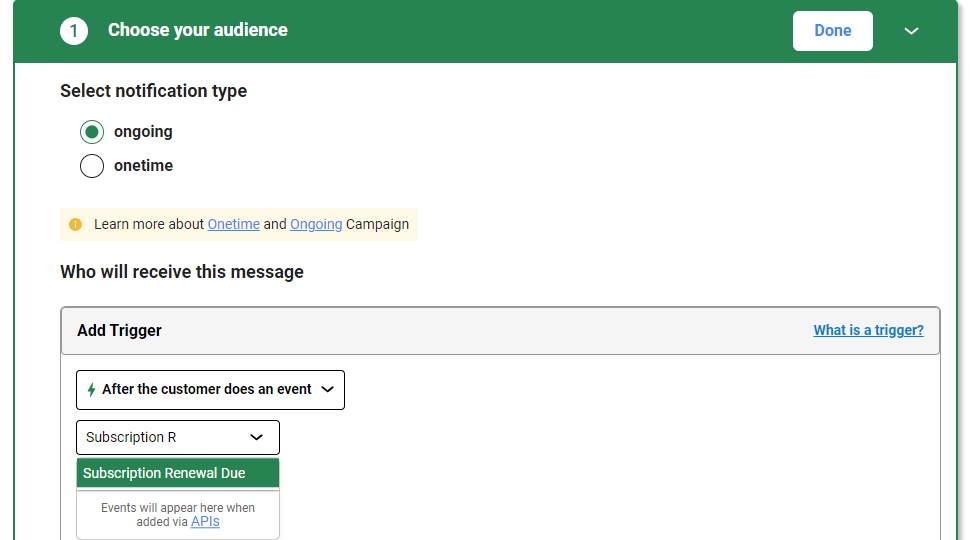
1. Click on ‘New Campaign’ in the Notifications Page.
b. Choose campaign type as Ongoing.
c. In the ‘Add Trigger’ section, select trigger as ‘After the customer does an event’ and choose the event name from the dropdown.
Note – For the event to be present in the dropdown, you should have passed the event (via Track API) for at least one customer. To know how to add events via Track API, check the next section of this article.
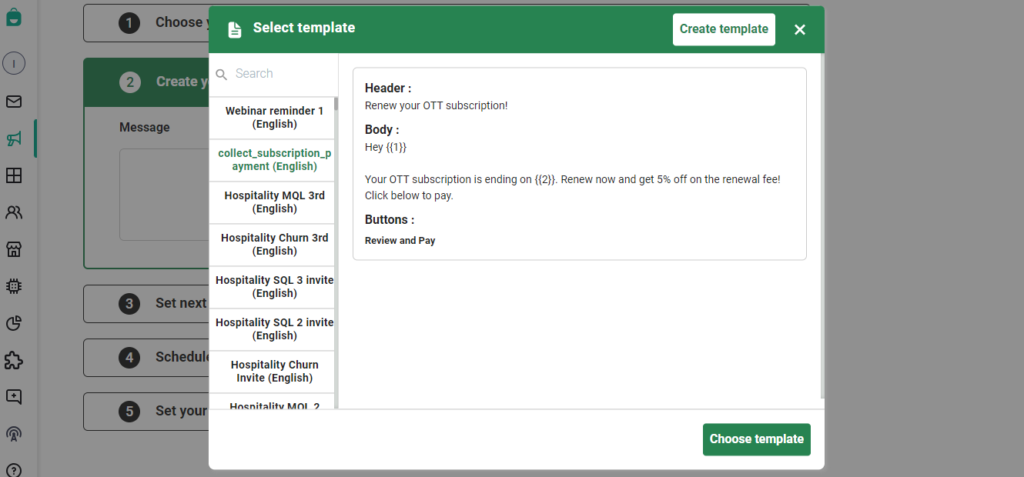
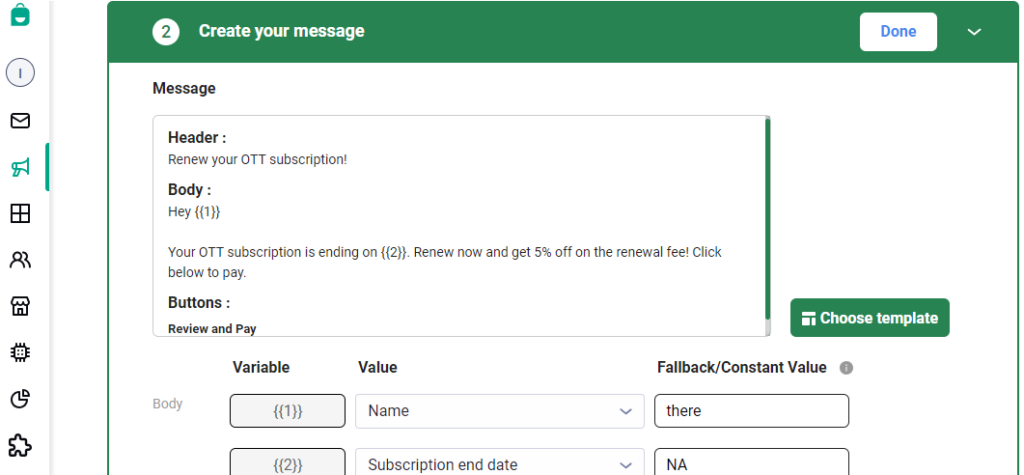
– Next, select the order_details template that you had synced into Interakt in the previous step.
– Map variables in the template to relevant fields.
– Next, configure the scheduling for your campaign.
– Finally, set it live.
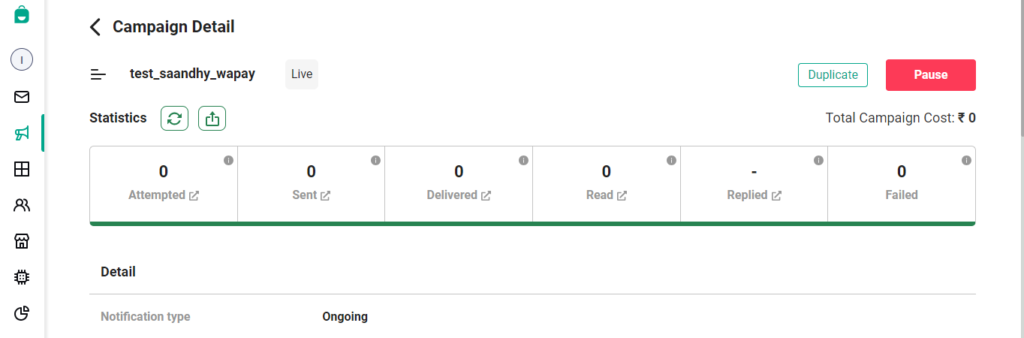
After you’ve set the campaign live, whenever you pass the trigger event via API, a message would be sent within the campaign. The stats of the campaign would appear as shown below.
7. Pass trigger event (with payment related info) via Event Track API
For adding a new event for a particular customer, find below a sample curl:
curl --location 'https://api.interakt.ai/v1/public/track/events/' \
--header 'Content-Type: application/json' \
--header 'Authorization: Basic {{API_Key}}' \
--header 'Cookie: Path=/' \
--data '{
"phoneNumber": "7003705584",
"countryCode": "+91",
"event": "Subscription Renewal Due",
"traits": {
"subscription_end_date": "13-05-2024",
"current_subscription_type": "starter_plan",
"subscription_start_date": "13-05-2023",
"customer_language": "hindi",
"order_details": {
"reference_id": "14013",
"order_items": [
{
"name": "OTT Starter Subscription ",
"quantity": 1,
"retailer_id": "15",
"amount": 100,
"country_of_origin": "India"
}
],
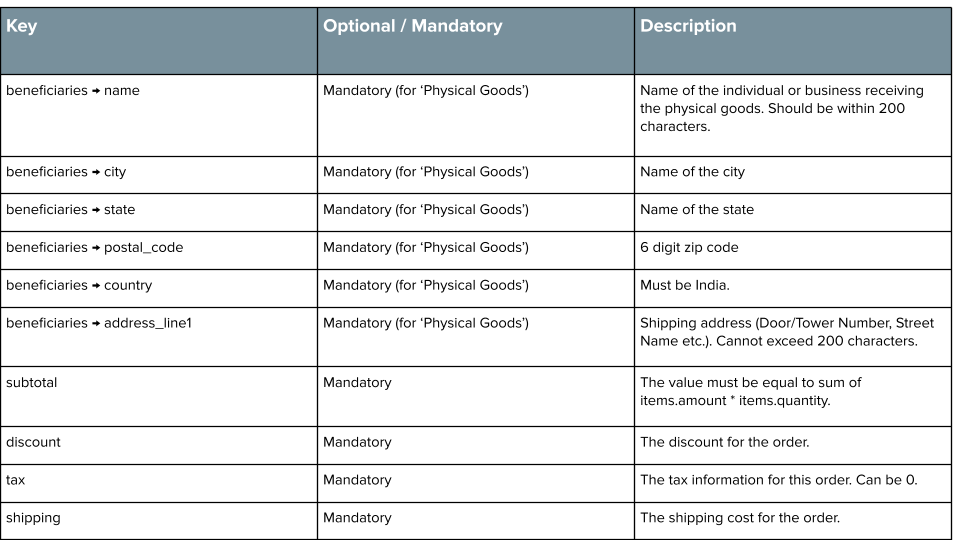
"beneficiaries": [
{
"name": "Akhil Kumar",
"city": "Mumbai",
"state": "Maharastra",
"postal_code": 400086,
"country": "India",
"address_line1": "7th Avenue, 8th street, 2nd Floor",
"address_line2": "Goregaon West"
}
],
"subtotal": 100,
"discount": 30,
"tax": 10,
"shipping": 10,
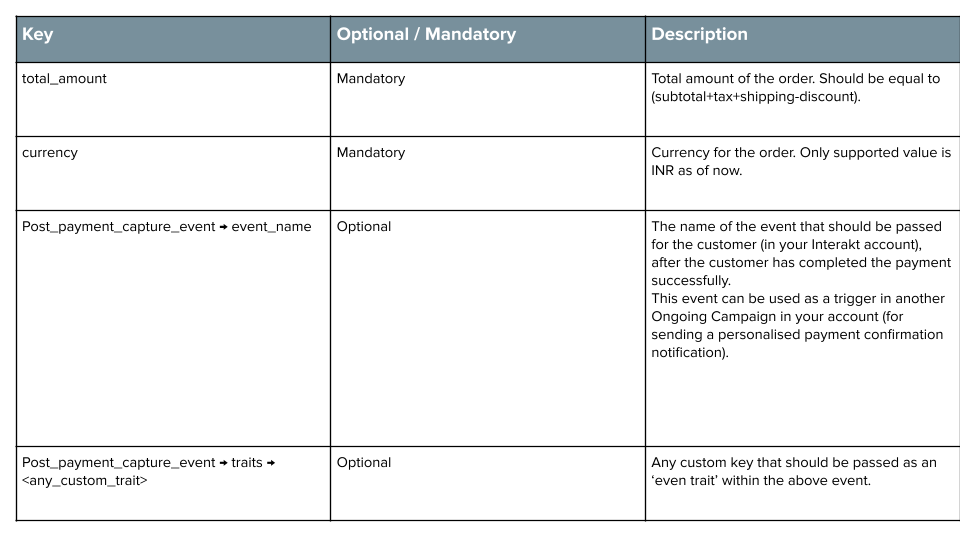
"total_amount": 90,
"currency": "INR",
"post_payment_capture_event": {
"event_name": "Subscription Renewal Done",
"traits": {
"old_plan_type": "starter_plan",
"old_plan_expiry": “13-06-2024”,
"new_plan_type": "growth_plan",
"new_plan_expiry": “13-06-2025”
}
}
}
}
}'
Notes:
– Before passing an event for a customer, the customer should have been added to your Interakt account. You can add customers via CSV Upload or via the User Track API.
– The identifier for the customer in the Event track API call is any of the below:
• userId (this can be used if a user_id was specified while adding the customer via the User Track API call)
• phoneNumber & countryCode (the above curl uses this identifier)
• fullPhoneNumber (this is the combined country code & phone number of the customer. If your customer’s country code is 91 & phone number is 9999999999, then, the fullPhoneNumber would be 919999999999)
– The {{API_Key}} shown in the curl (which is to be passed in the headers) will be available in your Interakt account’s Developer Settings.
– In the ‘traits’ object, you can pass custom ‘event traits’ in the form of key-value pairs. In the above curl, these ‘event traits’ are the ones shown below. These ‘event traits’ can then be mapped to variables (placeholders) in your message template, or could even be used to filter (segment) the ‘audience’ for your campaign.
     "subscription_end_date": "13-05-2024",

    "current_subscription_type": "starter_plan",

    "subscription_start_date": "13-05-2023",

    "customer_language": "hindi",
– To be able to send a WhatsApp Pay message upon triggering an event via APIs, it is mandatory to pass the “order_details” object within the “traits” object. Also, as detailed above in this article, you should have done all the 6 steps to ensure that the WhatsApp Pay message can get sent successfully.
“subscription_end_date”: “13-05-2024”,
“current_subscription_type”: “starter_plan”,
“subscription_start_date”: “13-05-2023”,
“customer_language”: “hindi”
8. How to configure Payment Confirmation Message
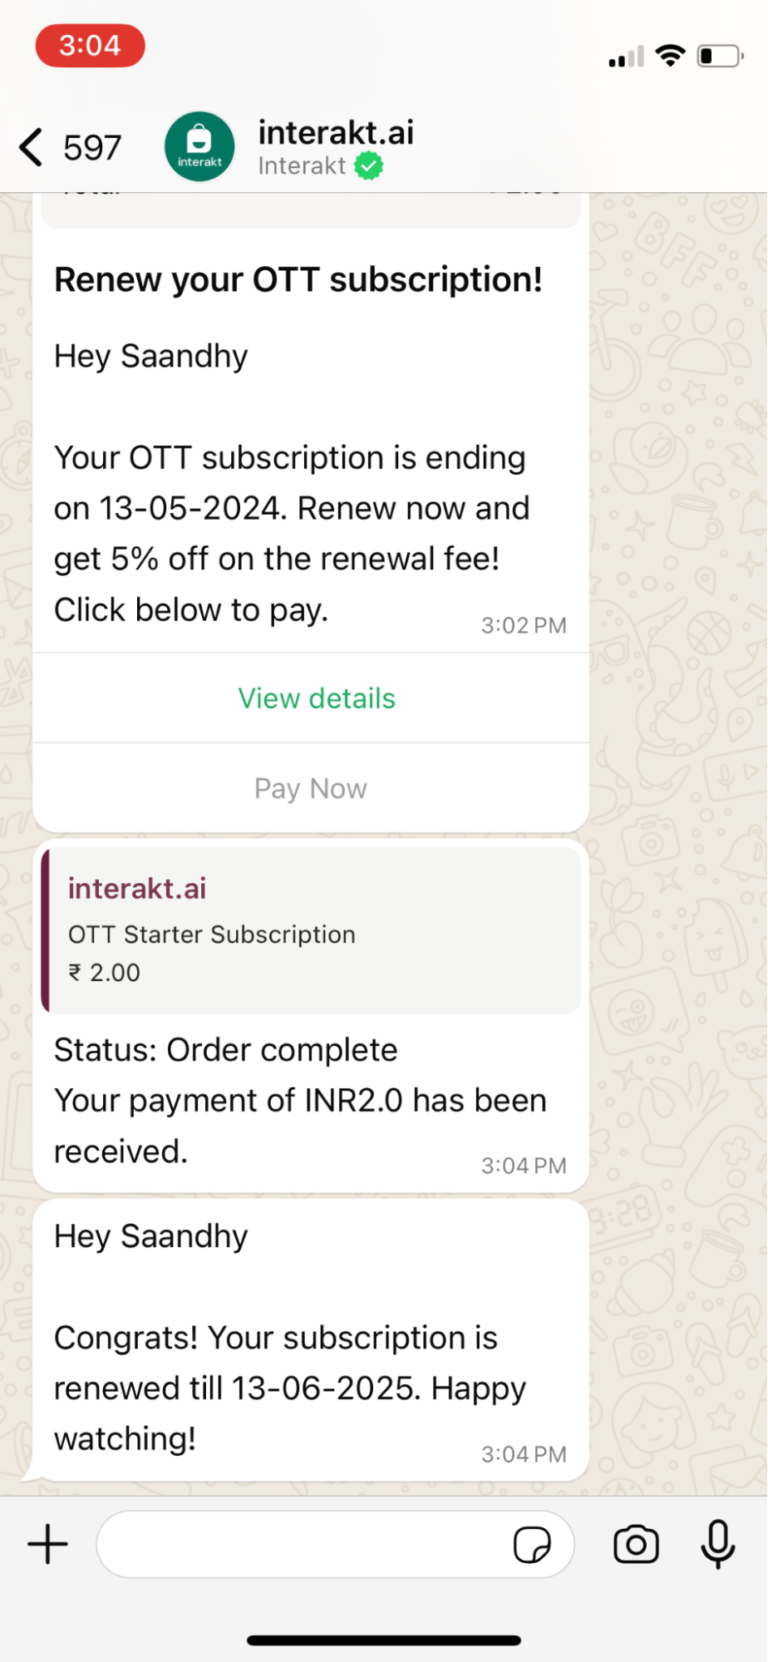
You can configure 2 kinds of payment confirmations:
1. Generic
– This is the 1st confirmation message in the adjacent screenshot.
– This confirmation message can be used for only confirming the receipt of the payment. Personalised information like details of renewed subscription cannot be included in this confirmation message.
– This confirmation message is configured at the time when you activate the WhatsApp Pay app in Interakt. Check Step 3 of this article to see more details.
– You can deactivate this generic confirmation message from the WhatsApp Pay app in the Integrations Section.
2. Personalized
– This is the 2nd confirmation message in the adjacent screenshot.
– This confirmation message can be used for sending personalised information like details of renewed subscription.
– To send a personalized payment confirmation message, you’ll need to ensure the following:
a. Specify ‘post payment-capture event’ details in the event track API call that you’ll make for passing payment details (check Step 7 of this article) – This will ensure that, whenever the customer makes a payment, this ‘post payment-capture event’ will be passed for that customer automatically.
b. Set live an ongoing campaign in Interakt with the above ‘post payment-capture event’ as the trigger event
9. How to get webhooks for Payment Confirmations
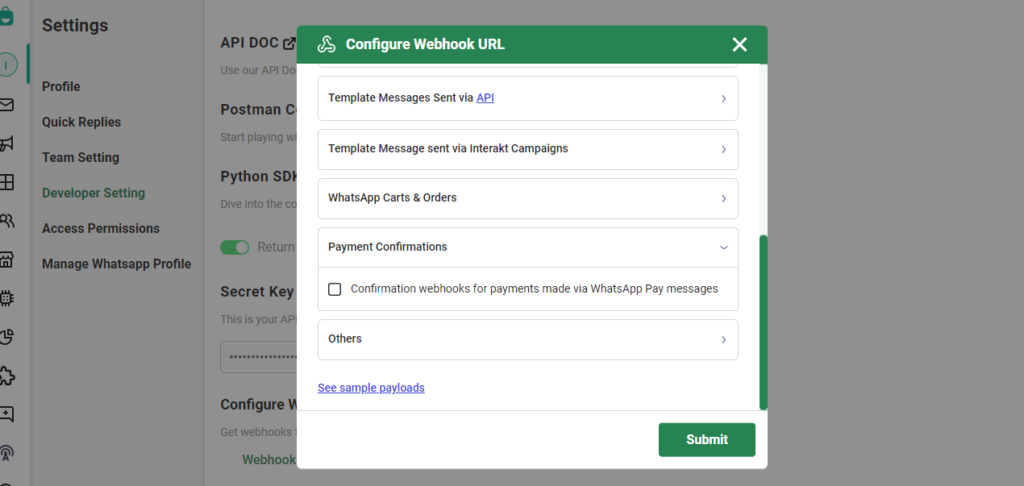
You can consume webhooks for details of payments completed by your customers. To configure these webhooks:
• Go to the Developer Settings of your Interakt account
• Click on Configure webhooks
• Open ‘Payment Confirmations’
• Select ‘Confirmation webhooks for payments made via WhatsApp Pay messages’