As part of the automation capabilities of Interakt’s WhatsApp Business platform, you can find 2 modules in the Automation settings option.
1. Inbox Settings
2. Custom Auto Reply
To send OOO, welcome, delayed messages on WhatsApp, we will be going through the first module i.e. Inbox settings. In this module, we ‘ll help you understand how you can set up Auto replies for your Interakt account.

Before setting up your Auto replies, it is important to configure your business hours. As these Auto Replies work on and around the business hours set by you.
Step 1: Click on the pencil icon to enter the working hours. A popup appears which reads, “Setup your working hours”.

Step 2: Click on the day drop down to select the day of the week. Do the same to enter the start time and end time. Repeat this for each day of the week. To do so, click on “+ Add hours” that can be seen below the last entry made. These multiple entries allow you to make as many customizations to your Out Of Office message as you want per your business requirement.
If you wish to delete an entry, you can do so by clicking on the “Bin” icon next to each day time entry.
Step 3: Once you have entered your work timings, click on the “Save” button. The working hours preview will be visible to you.

Currently there are three types of Auto replies that can be set on Interakt.
A. Out Of Office Message
This allows you to configure Out Of Office messages as Auto Replies when customers reach out during the non-business hours.
Please note that the Out Of Office message will be triggered for the below conditions This allows you to configure Out Of Office messages as Auto Replies when customers reach out to you during the non-business hours. Please note that the Out Of Office message will be triggered based on the Out Of Office hours. Out Of Office hours are the hours outside of the business hours set by you.
The conditions for Out Of Office hours to be triggered are as follows:
1. In case of new users who reach out to your business during non-office hours.
2. In case of existing users and ongoing conversations, the Out Of Office message will be triggered only for conversations marked as “Closed”. Hence, please ensure that your user conversations that are addressed are closed and the “Open” queue is kept to minimum.
User conversations in the “Open” queue will not receive the Out Of Office message even if they reach out during the non-business hours.
There are essentially two major components to setting up the Out Of Office Message, i.e. the hours and the message. The first component will be applied from the business hours set already. Let us look at how the message can be set.
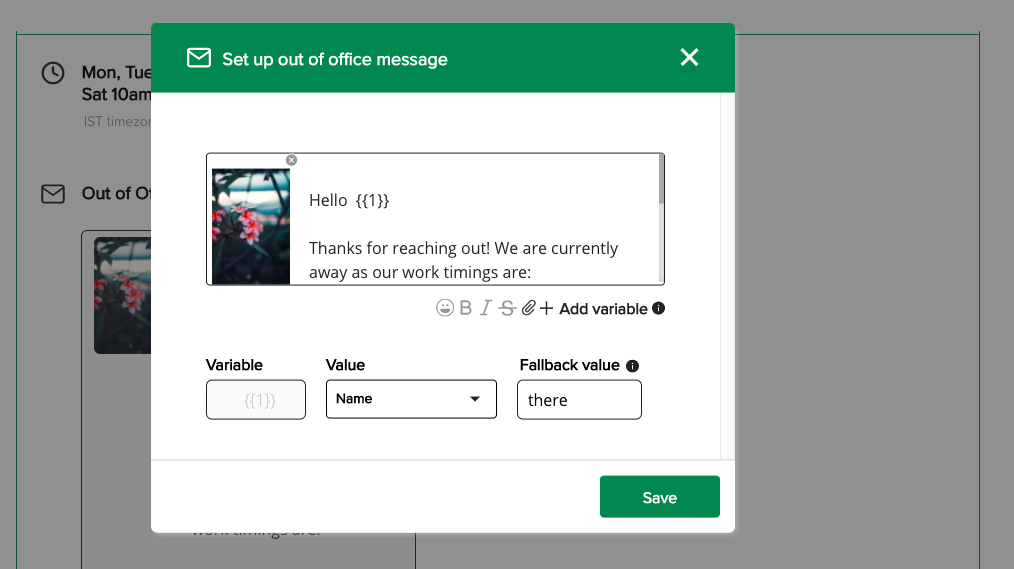
Step 1: Click on the “pencil” icon next to the Out Of Office message header which opens a popup screen.

Step 2: Writing the Out of Office Message is similar to how quick replies are created on Interakt. You can add here the message that you want to be triggered to the users. The message can be personalized by using variables, attachments and media files as well.
Step 3: Once the message is entered as per your liking. Click on the “Save” button. The message is also visible in the preview section outside.

Step 3: You can review all the details again. Post which, click on “Enable”. A success message appears on the right of the screen that reads, “Out of Office Message is enabled”. Once the Out Of Office message is enabled, the same Enable button is changed to “Disable” and can be used for the same.
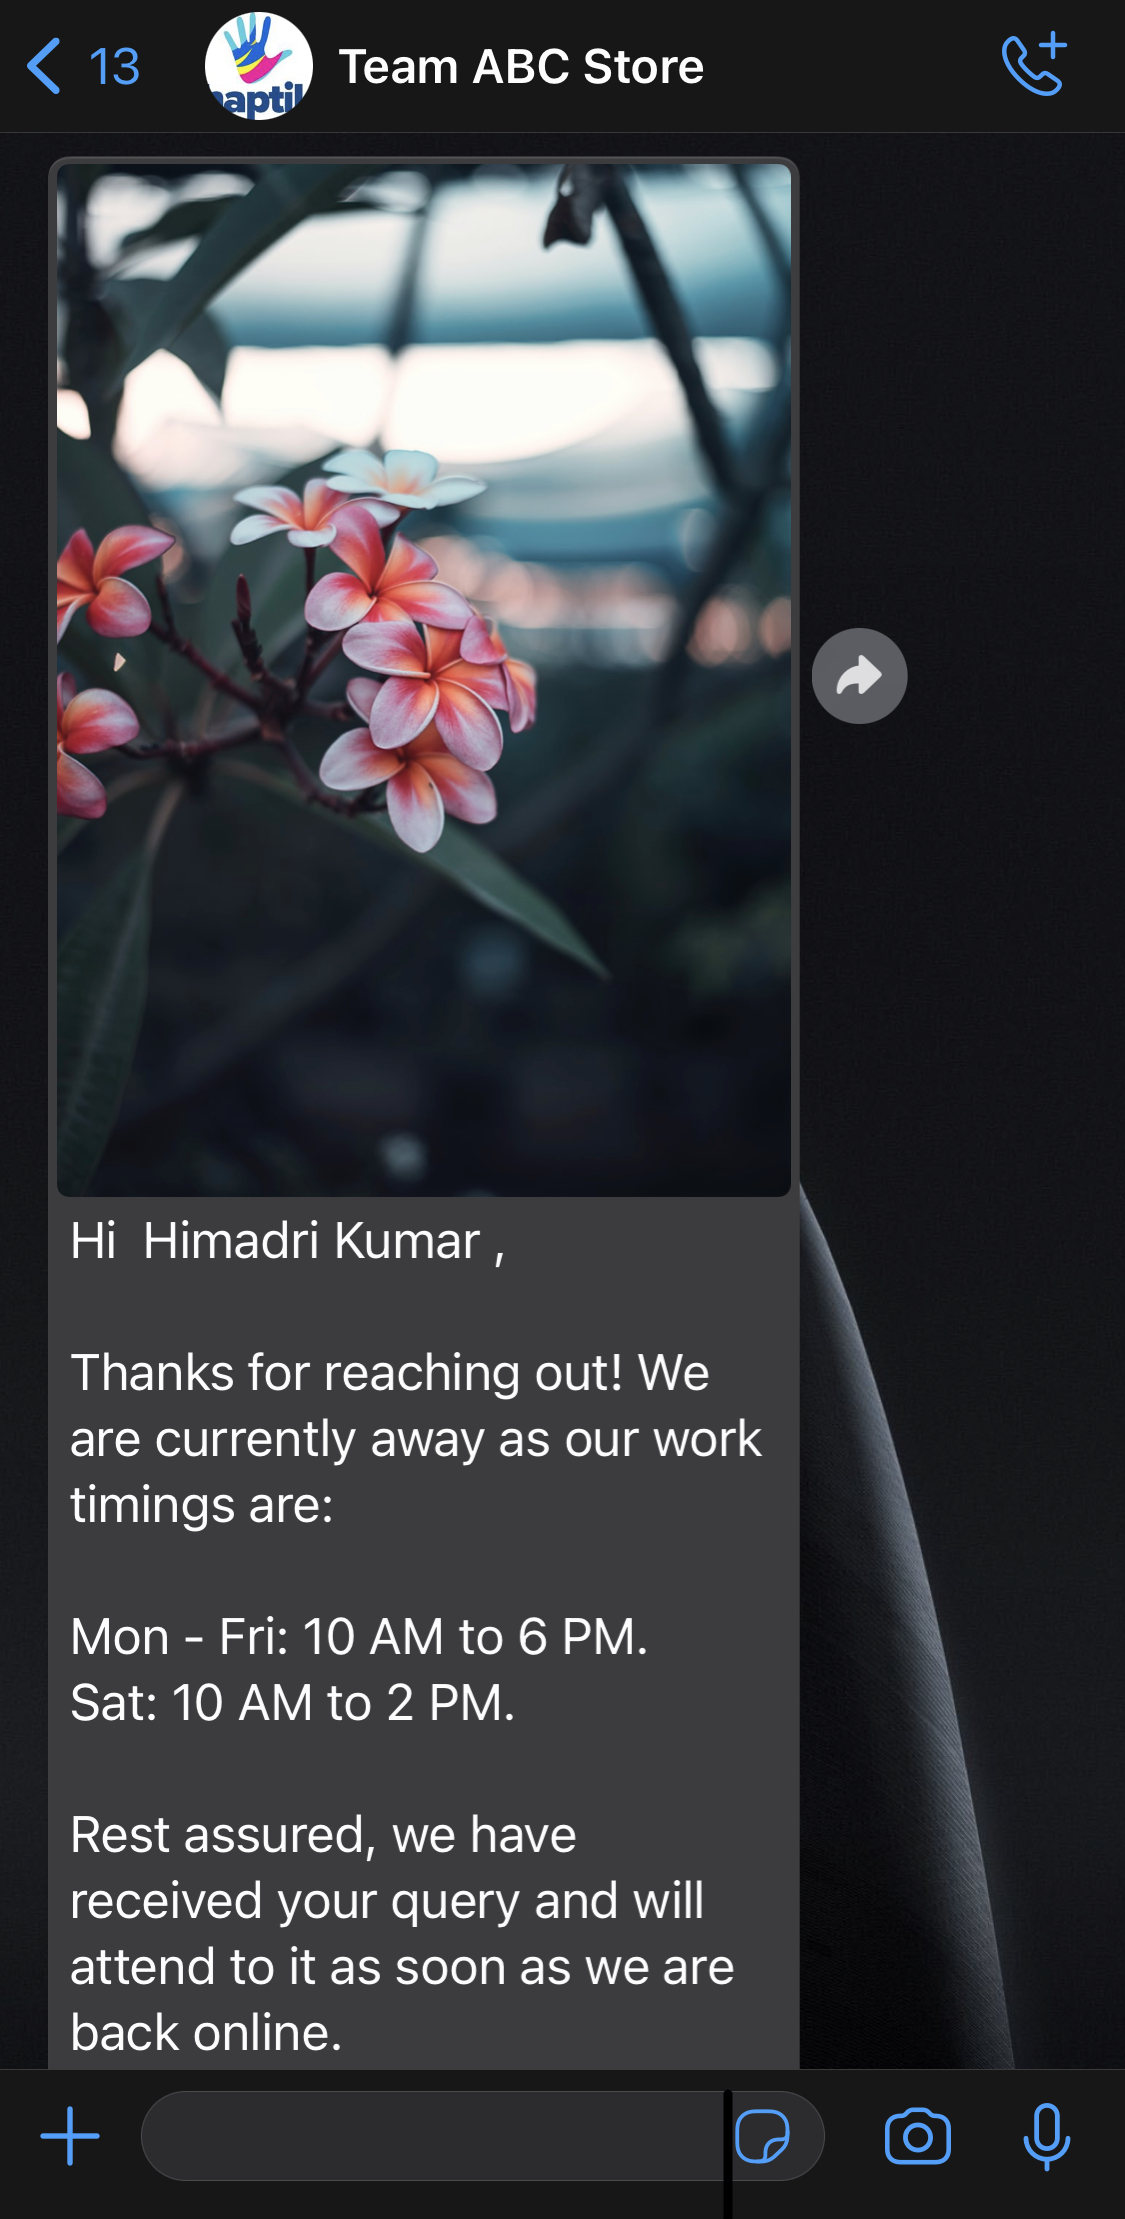
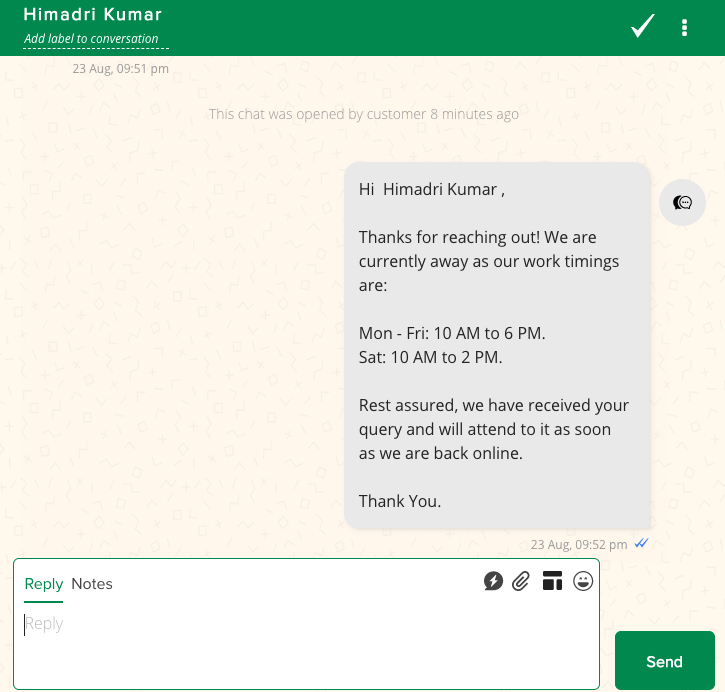
End customers now reaching out during the non-working hours will receive an Out of Office Message which will look like the below.
Out of Office helps improve customer engagement and experience for an organization among many other things. Read here to learn more how organizations can fuel their business through the same.
B. Welcome Message
This allows you to configure welcome messages in case new customers or existing customers reach out to your business. The message is triggered against the first message dropped by the customer.
Note, that in case of existing users. The welcome message will be triggered only if the customer reaches out to the business post an interval of 24 hours. This is irrespective of whether the previous chat was kept Open or Closed. This is the only condition for Welcome Message to be triggered.
Step 1: To set up the Welcome Message, click on the “pencil” icon alongside Welcome Message which opens a popup screen. Enter the message that you would like to trigger.
Step 2: Writing the Welcome Message is similar to how quick replies are created on Interakt. You can add here the message that you want to be triggered to the users. The message can be personalized by using variables and attachments as well.
Step 3: Once the message is entered as per your liking. Click on the “Save” button. The message is also visible in the preview section outside.
Step 4: You can review all the details again. Post which, click on “Enable”. A success message appears on the right of the screen that reads, “Welcome Message is enabled”.
Note, in case you have enabled both Out Of Office and Welcome Message. And if a customer reaches out to you during the non business hours then both Out Of Office (for closed chats) and Welcome Message Auto reply will be triggered.
C. Delayed Response Message
When end customers reach out to your business, there can be scenarios where you are unable to respond to their chat via. Interakt on time. This delay in responding to customer messages / queries can be due to various reasons such as:
• High surge of enquires / High traffic / Increased workloads which lead to delays in responses
• Bandwidth issues due to team unavailability
• Downtime due to another outage which requires attention etc.
The advantages of triggering a delayed message in response to a customer message left unanswered are as follows:
• Keep customers informed about delays
• Improve customer experience w.r.t Sales Support

1. Delayed Response Time
If a customer reaches out to your business and their message is unanswered. It is here that you can decide at what point the Delayed message auto reply should be triggered if the message is left unanswered. The time slot could be in minutes or hours as per your business workflow.
Note: The delayed message time set cannot be more than 24 hours. This is the upper limit of delayed response messages to be triggered. This keeping in mind the WA rule of being unable to respond to a user message if not done in 24 hours.
Click on the drop down arrow under “Delayed Response Time” to set the same.

2. Delayed Response Message
The Delayed Response Auto Reply gets triggered for unanswered customer messages left in the Open state (Assigned chats) and the Un-assigned chats. It is applied during the working hours as messages from customers during non business hours receive Out Of Office Auto Replies.

Step 1: To set up the Delayed Response Message, click on the “pencil” icon alongside the Delayed Response Message header which opens a popup screen. Enter the message that you would like to trigger.
Step 2: Writing the Delayed Response Message is similar to how quick replies are created on Interakt. You can add here the message that you want to be triggered to the users. The message can be personalized by using variables, attachments and media files as well.
Step 3: Once the message is entered as per your liking. Click on the “Save” button. The message is also visible in the preview section outside.


