Introduction
Welcome to our guide on how to supercharge your customer support experience with auto-routing based on user traits. This powerful feature streamlines chat assignments, ensuring they reach the right agent promptly. Whether it’s random assignment or based on custom routing rules, auto-assignment improves efficiency and enhances customer satisfaction.
Who Can Use Auto-Routing?
Auto-routing is currently available for our advanced and enterprise customers.
To configure the auto-routing and chat assignment for your business click here.
Benefits
By implementing auto-routing, you can enjoy the following benefits:
-Enhanced Customer Satisfaction: Deliver personalized support experiences that leave your customers delighted.
-Improved Support Interaction Efficiency: Streamline your support operations, reducing manual work and making the process more efficien
What are the steps to setup auto-routing?
There are 2 types of Auto routing.
1) Organization level auto-routing – If enabled, all the chats in unassigned section will get auto assigned to the team-mates. Conditions are:
a) When enabled, all new chats will be automatically assigned to your team members.
b) Existing chats will require manual assignment.
c) Chats will only be assigned to team members.
d) If a chat is already assigned, it will stay with the current agent.
2) Trait based routing – If you need to assign users based on specific traits or tags, this is the solution for you. For instance, it’s ideal for sales teams assigning leads to individual team members.
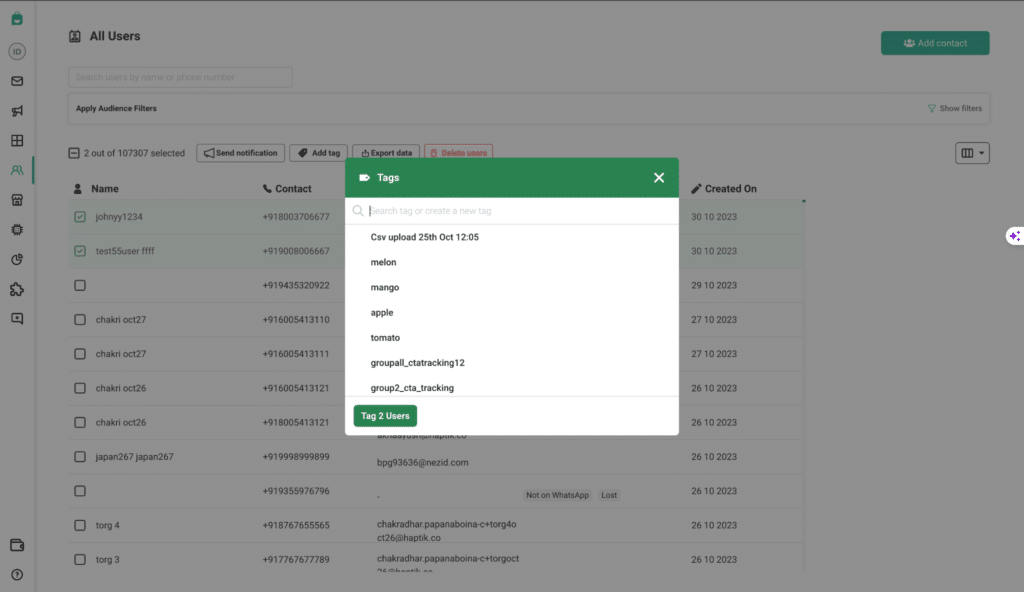
a) To set up trait-based routing, create and assign tags or traits from the “All Users” page or workflows.
Step 1: Step 1: Access Chat Assignment Settings
– Click on “Automation” from the left menu bar in Interakt.
– Choose the “Chat Assignment” tab.
Step 2a – Organization Level Auto-Routing
– At the top, you’ll find the option to “Enable auto assignment of chats.”
– When toggled on, incoming chats will be automatically distributed to team members. The chat will be assigned to the agent with the fewest open chats.
Step 2b – trait based auto routing:
When is this required: This set up is useful whenever you want to assign agents basis the traits or tags. Eg, if you have a sales team and all the team members are assigned their own leads. In this scenario, I can assign my tag to my leads and set up a configuration such that all those leads will be automatically assigned to me.
Use this setup when you want to assign agents based on specific traits or tags.
– For example, if you have a sales team with different leads, you can assign tags to each lead, and set up a configuration to automatically assign leads to the right team member.
– To enable auto routing based on user traits, you need to set up tags or traits from the “All Users” page or workflows.
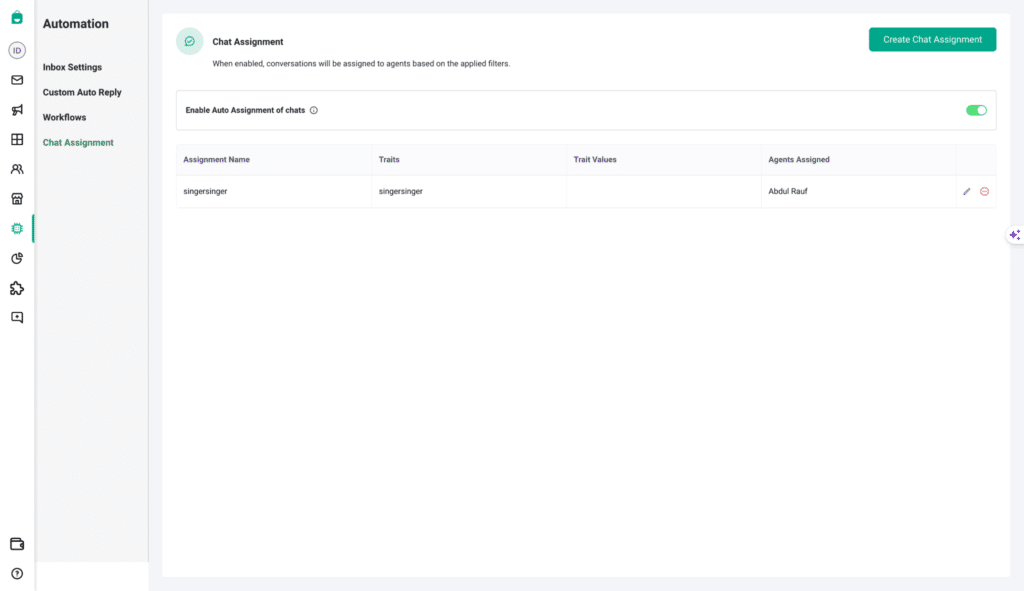
Step 3 – create rules
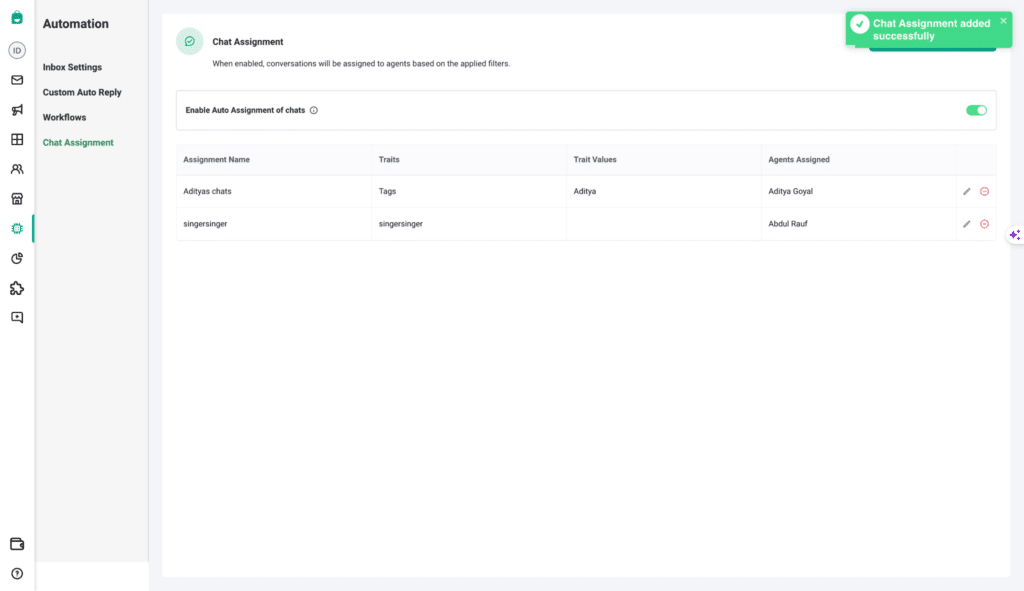
– In the “Chat Assignment” section under automation, click on “Create Chat Assignment.”
– Give your assignment rule a name.
– Define your own conditions. For example, if all leads from “Aditya” have been given a tag of “Aditya,” you can create the following rule:
– If Tags are “Aditya”
– Assigned agent: Aditya Goyal
– Save your rule, and that’s it! All new chats coming from any user with the tag “Aditya” will be automatically assigned to Aditya Goyal.
– You can view, modify, or delete your assignment rules in the future.
If Tags is Aditya
– Assigned agent -> Aditya Goyal
– Click on save and that’s it. All the new chats coming from any user who has the tag “Aditya” will automatically be assigned to Aditya Goyal.
– You can see the assignment rule created in the table and modify the same in future.